

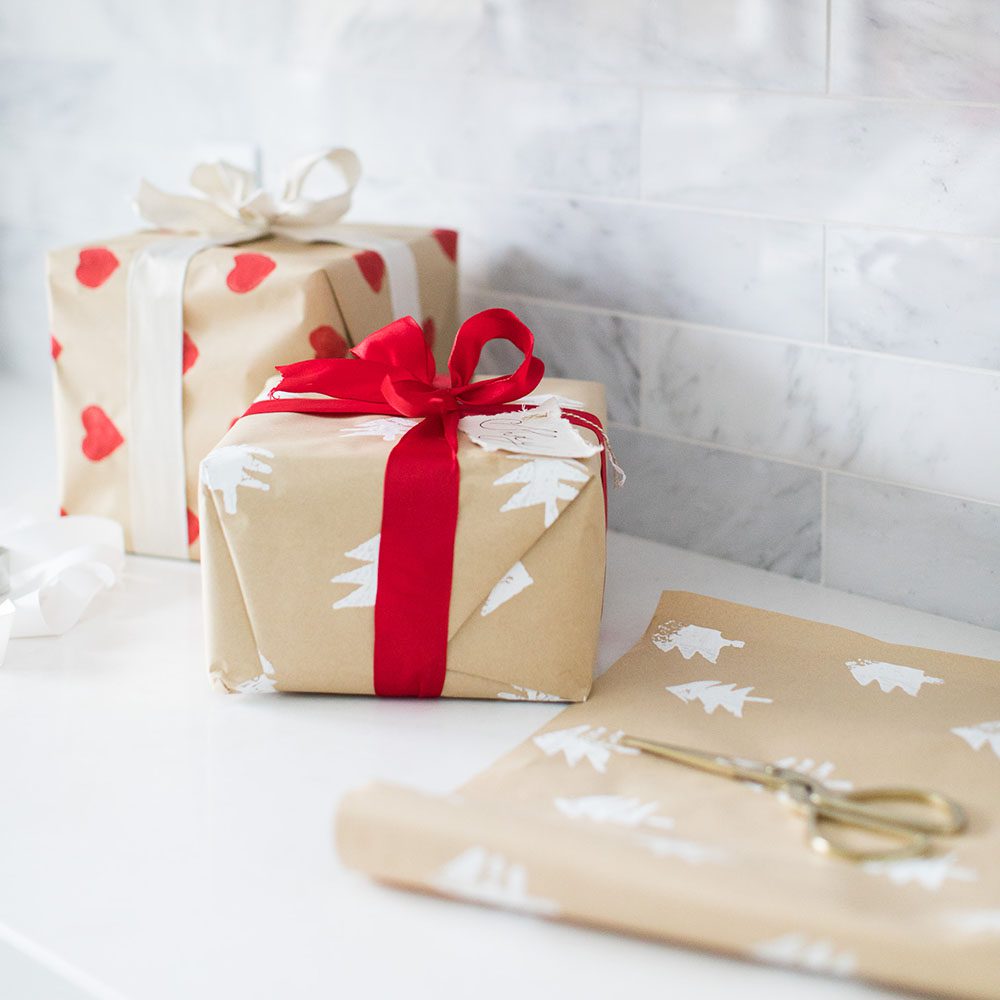
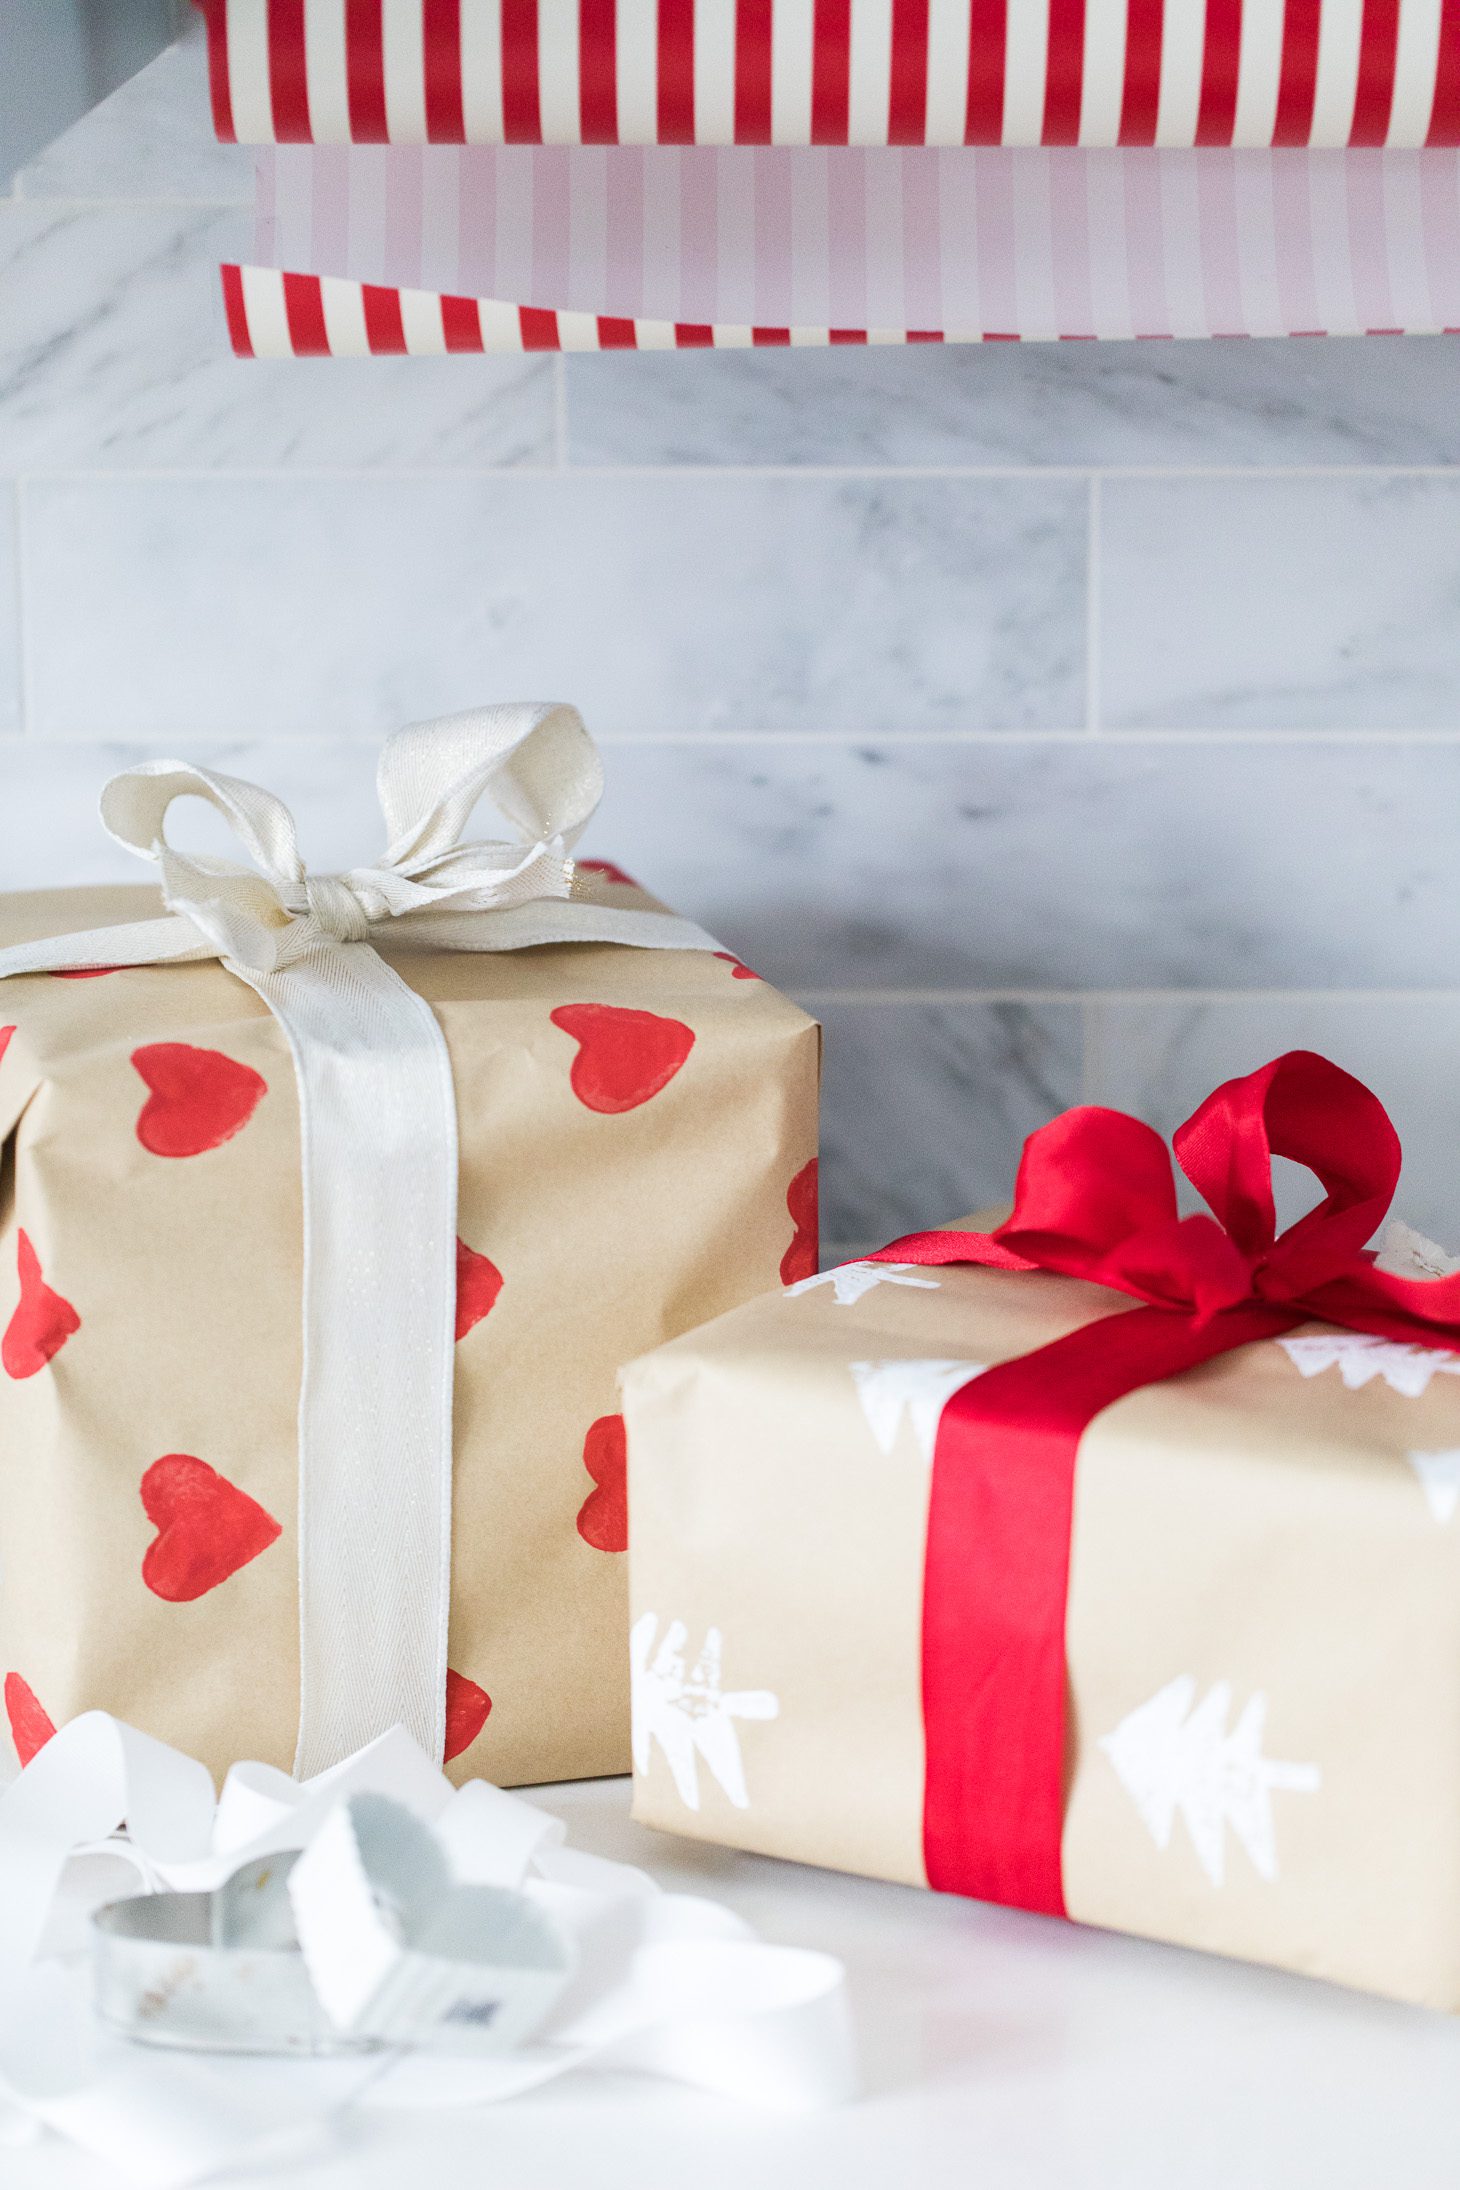
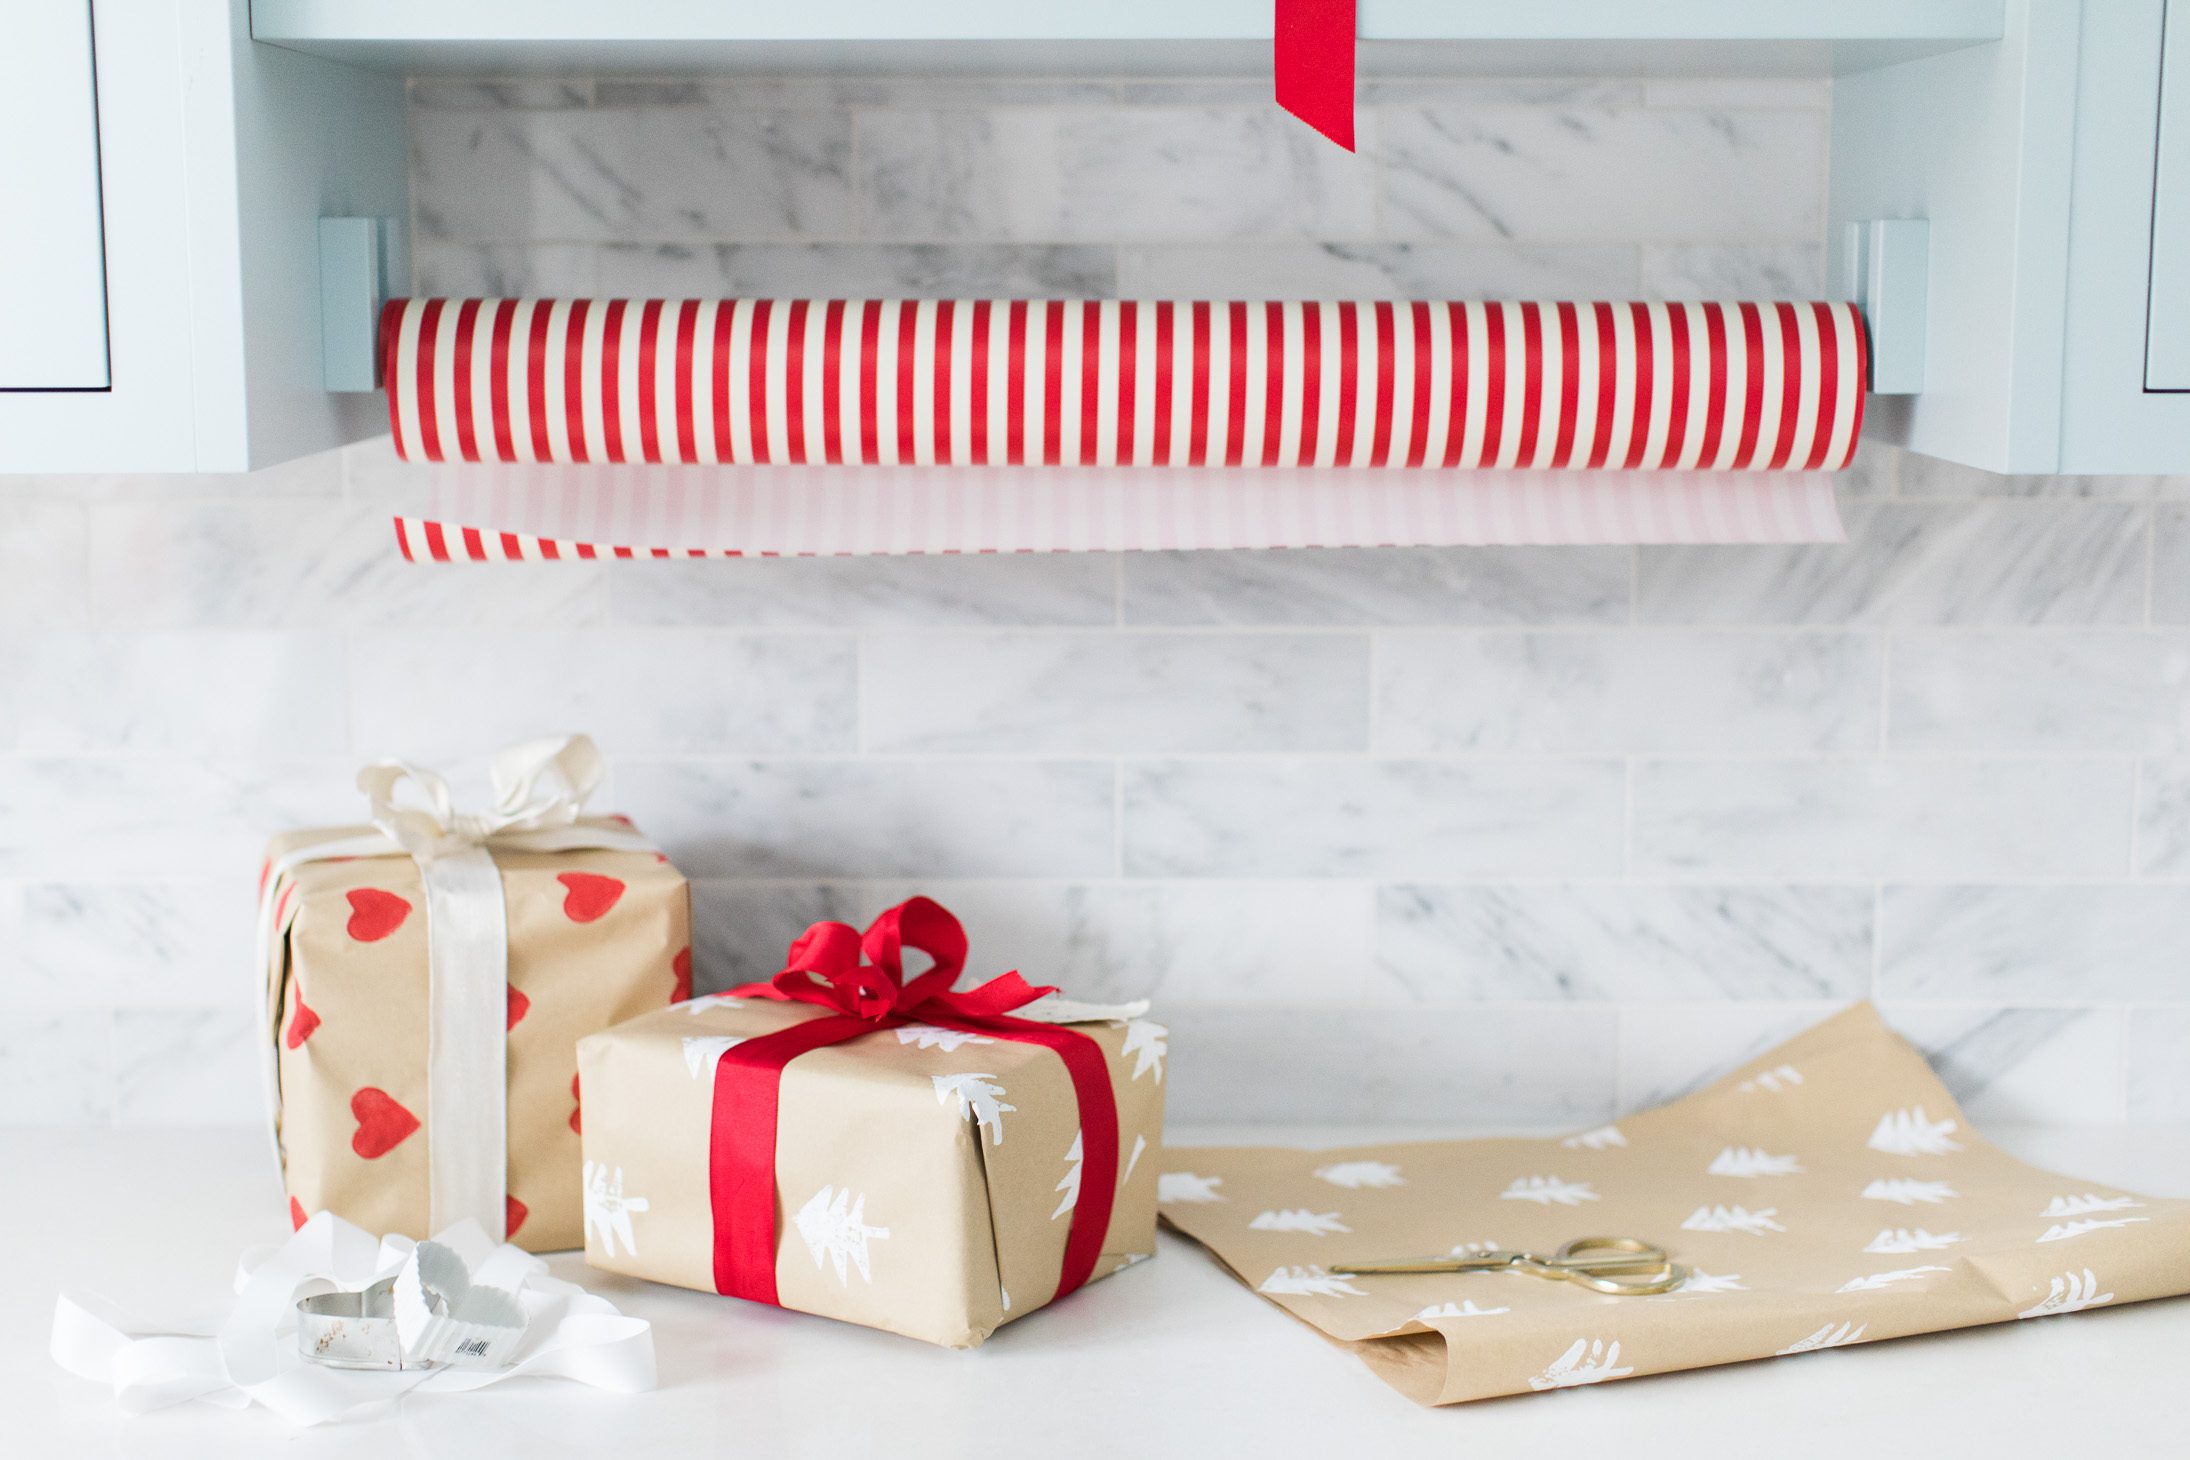
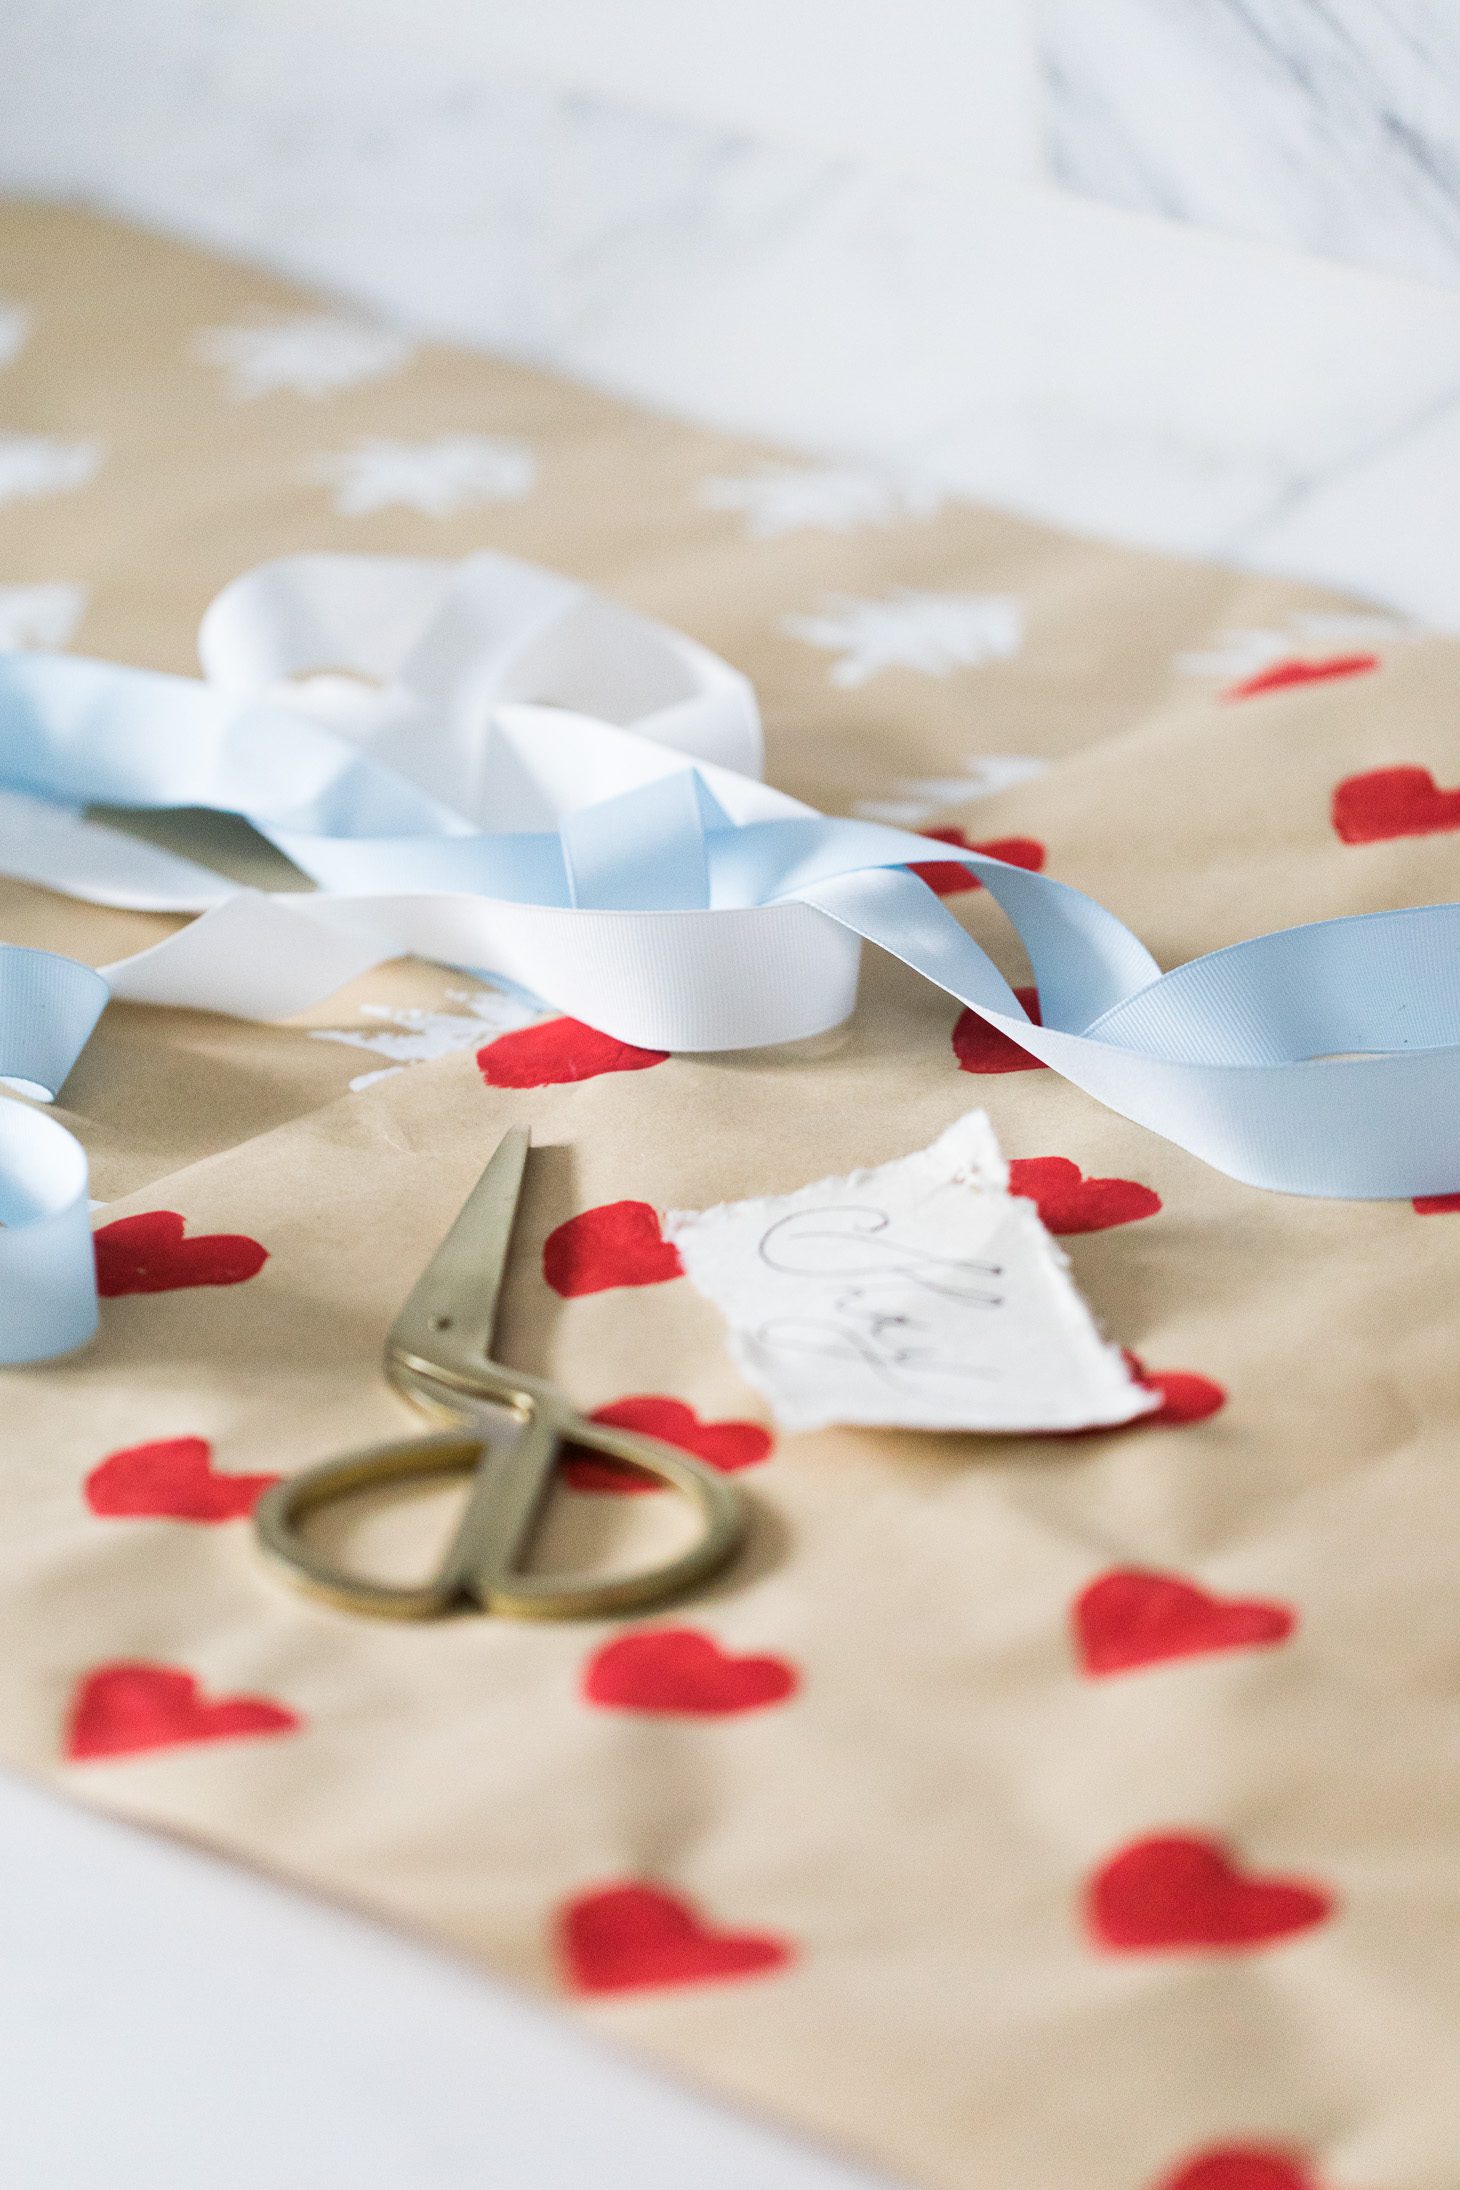
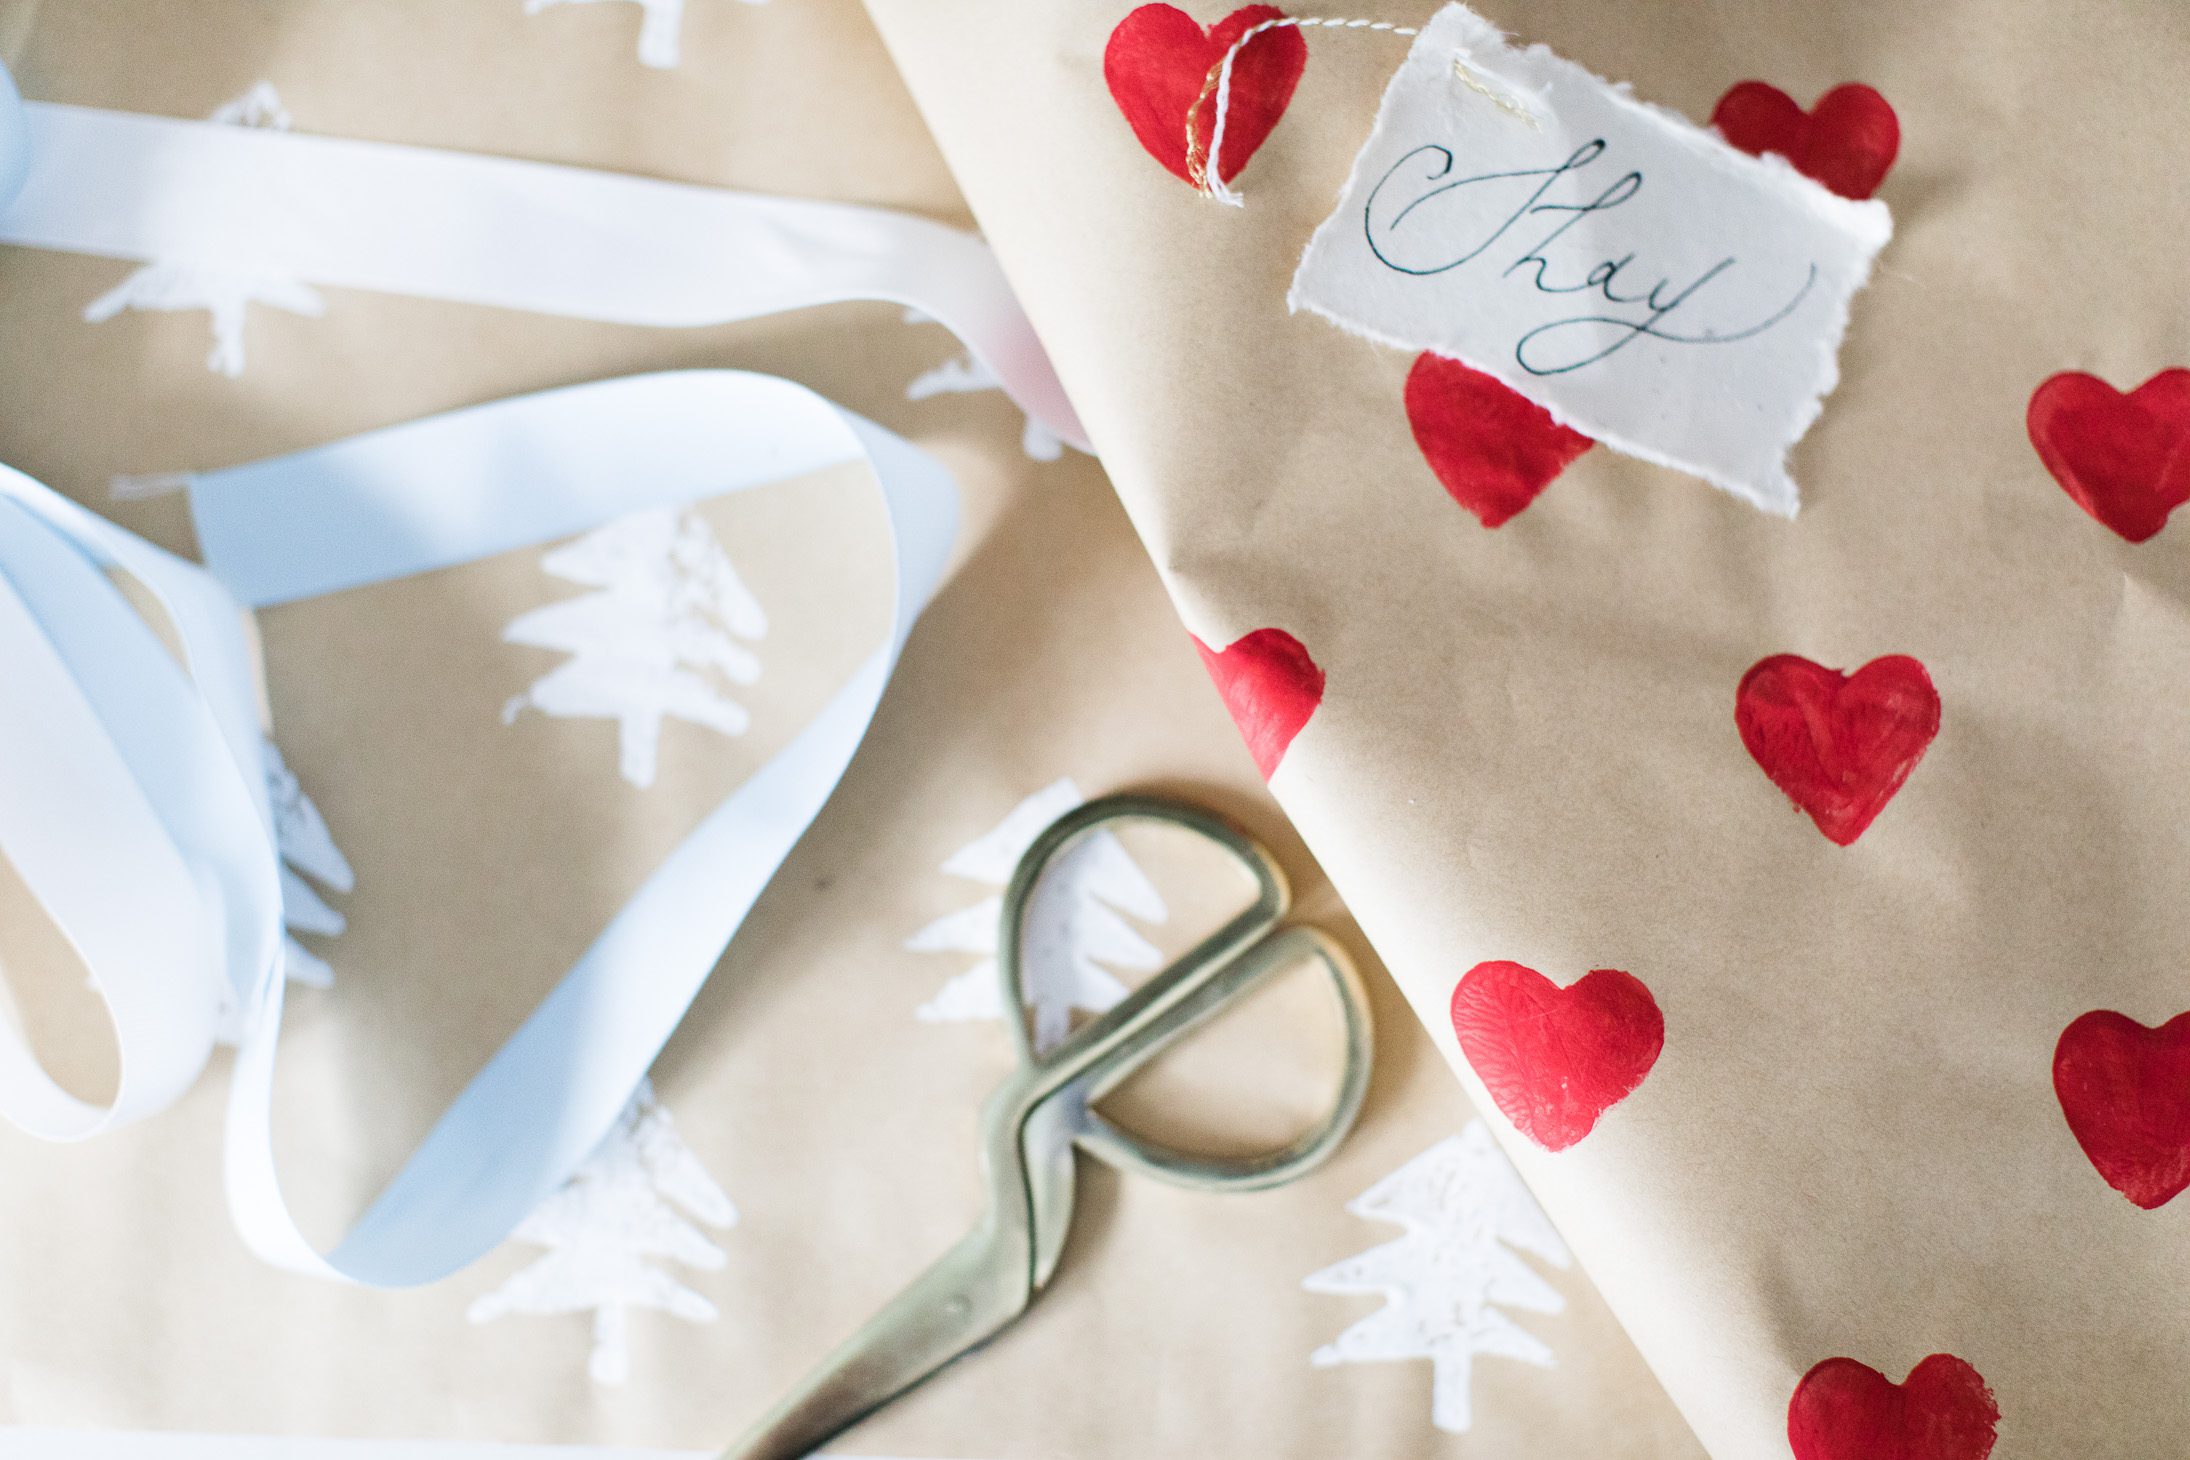
I HAD to share this DIY with you today! Last week Mackenzie decided to try out DIY Stamped Wrapping Paper … and get this, the stamps are made out of potatoes!! LOL!! She showed us photos of what it looked like afterward and it was so cute that we decided to share it with you and let you know just how EASY it is!! Not only does this make for some ADORABLE wrapping paper but this was super fun and easy to make and would be the PERFECT activity for a girls craft night … while drinking wine, of course, or for a fun activity for the kids on a snowy day … or, if you’re the type of person who is really on the ball at this time of year and likes to put their own touch on their gifts … this is for you!!
DIY Stamped Wrapping Paper
What You’ll Need
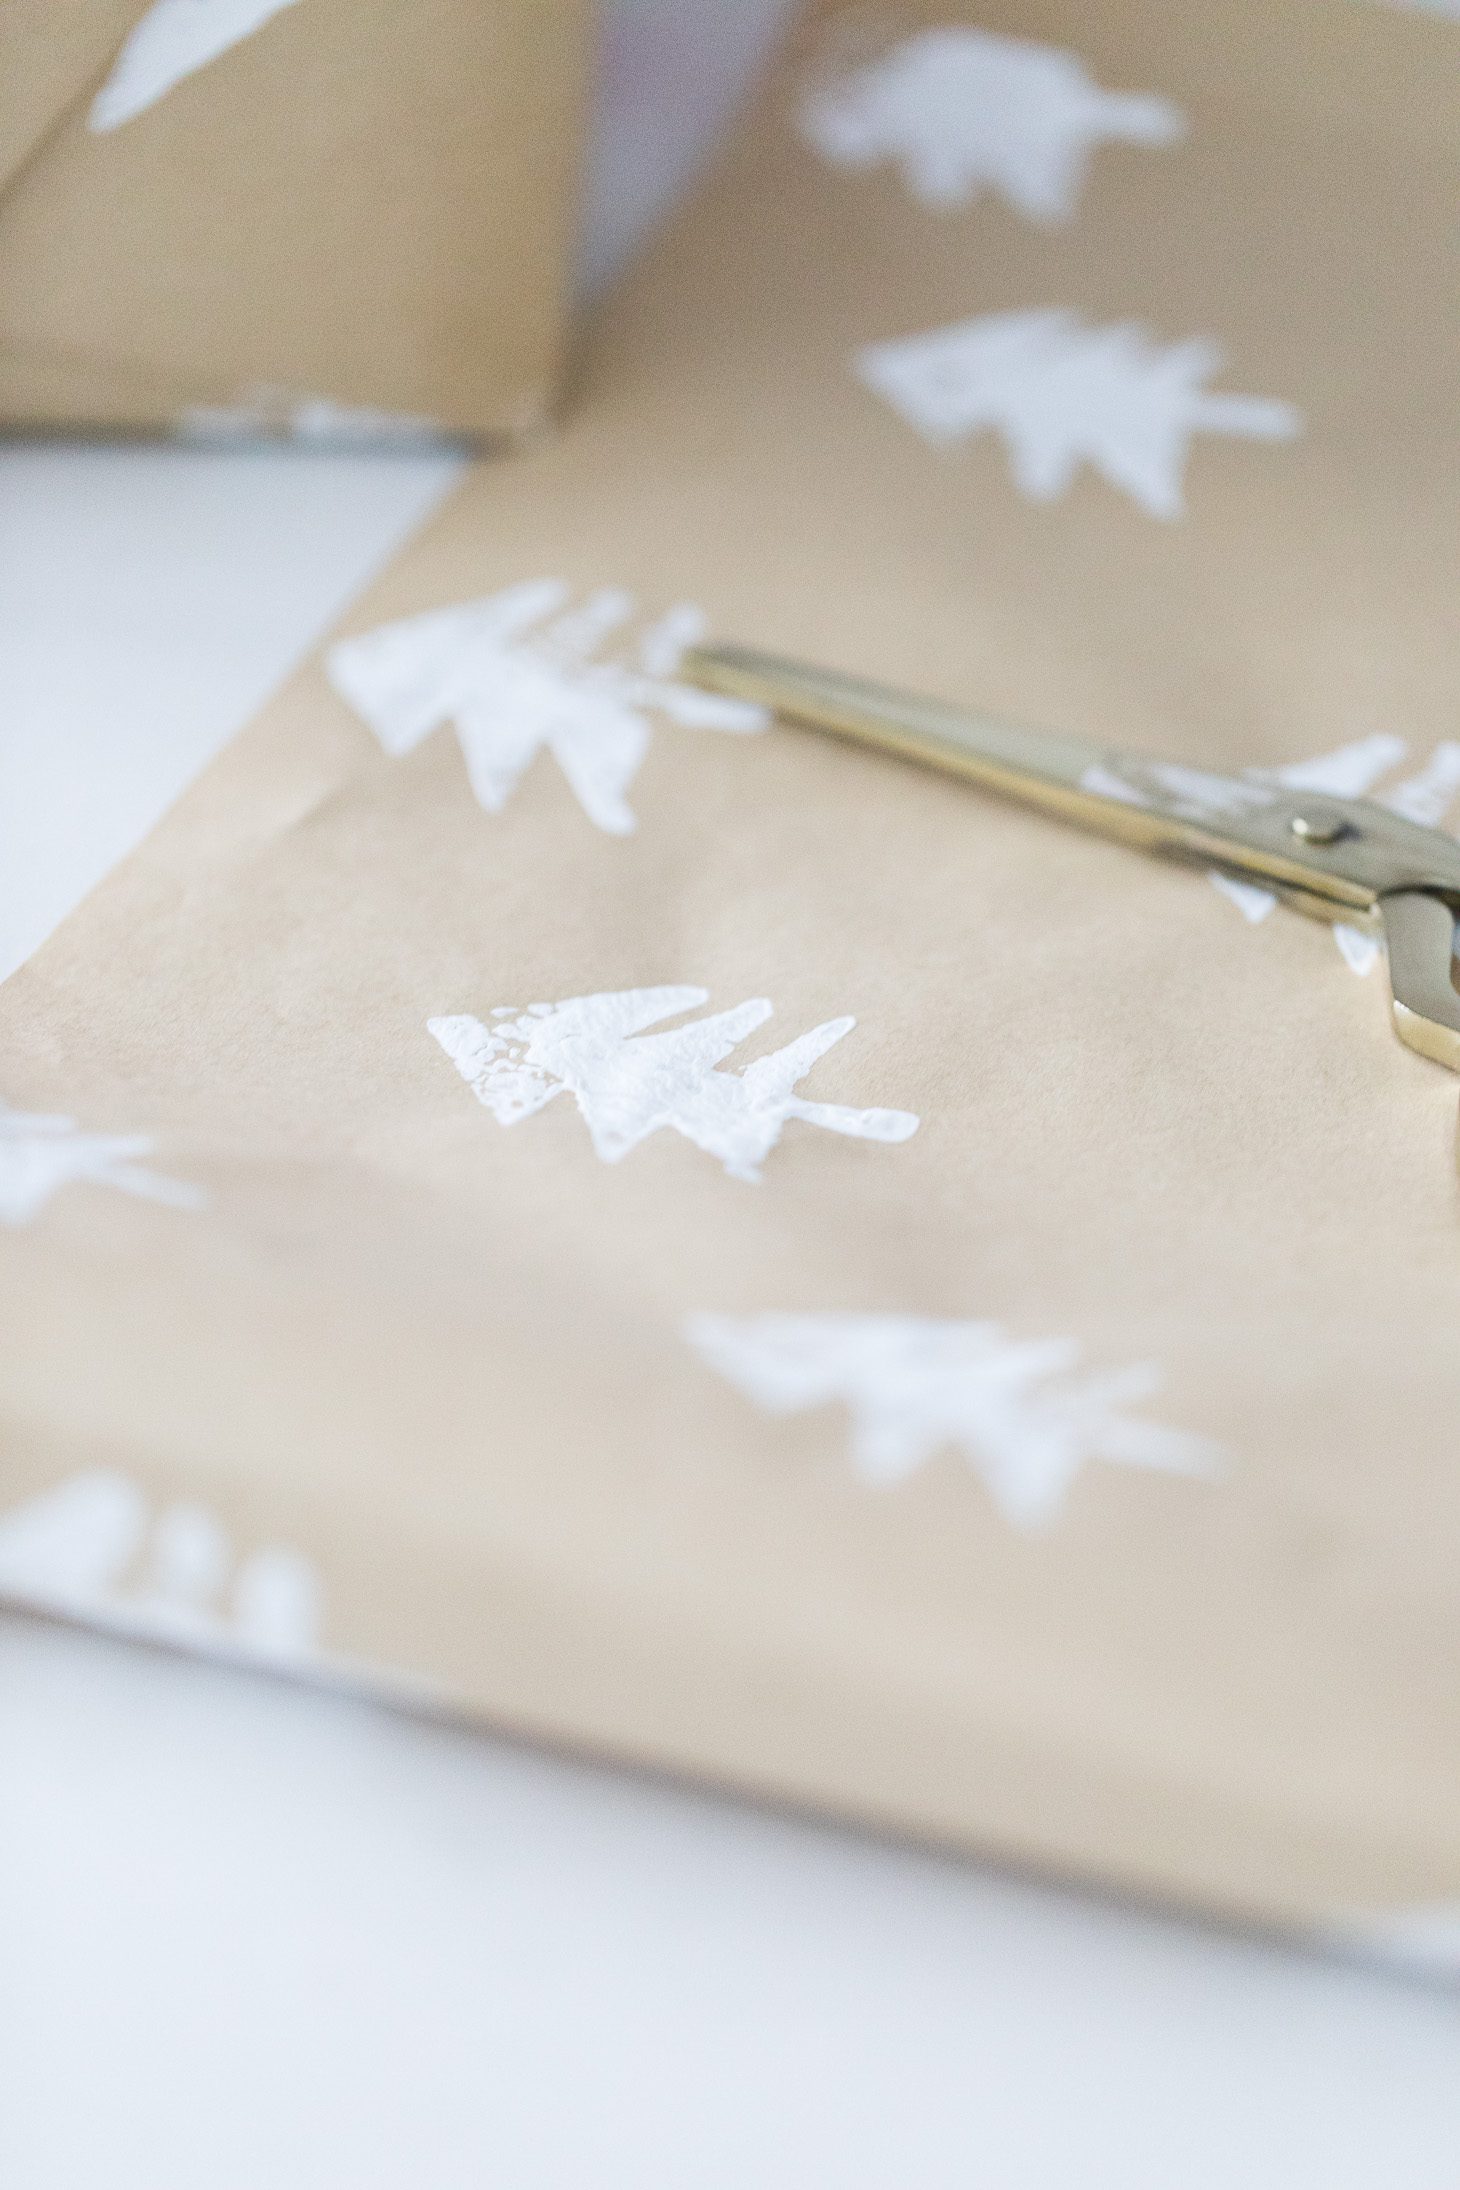
- Plain white or brown (postal) wrapping paper. We made 4 rolls with different stamps!
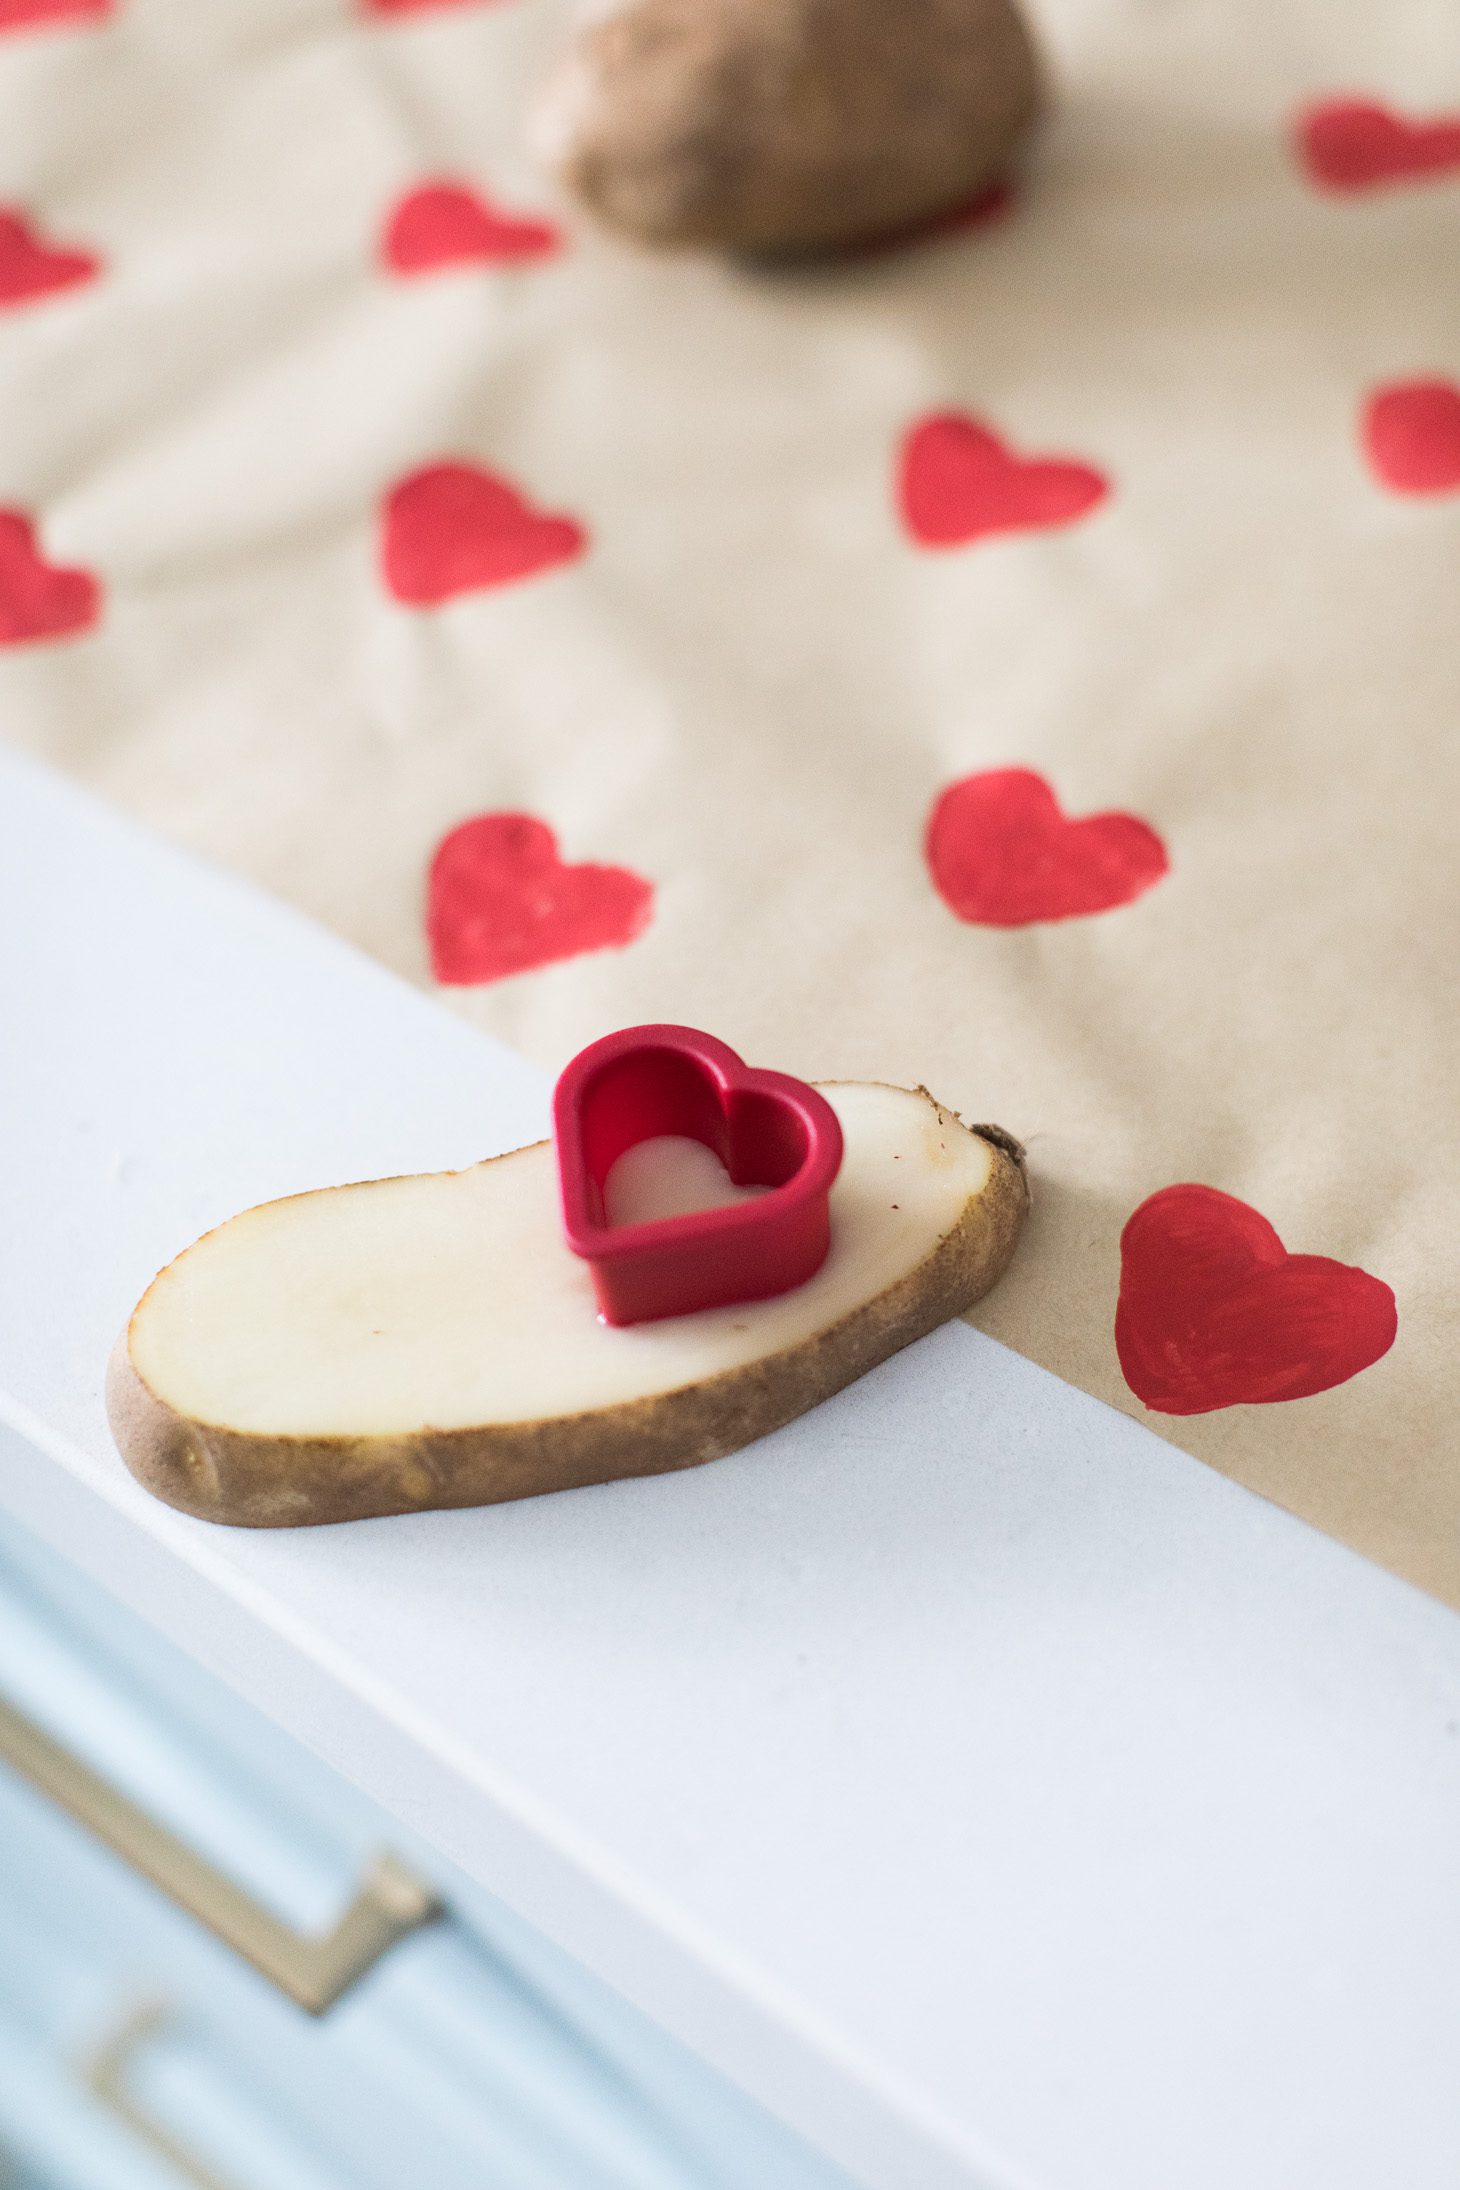
- 2 big potatoes
- 2-3 Cookie cutter shapes of choice (we did small hearts, Christmas trees, and snowflakes!)
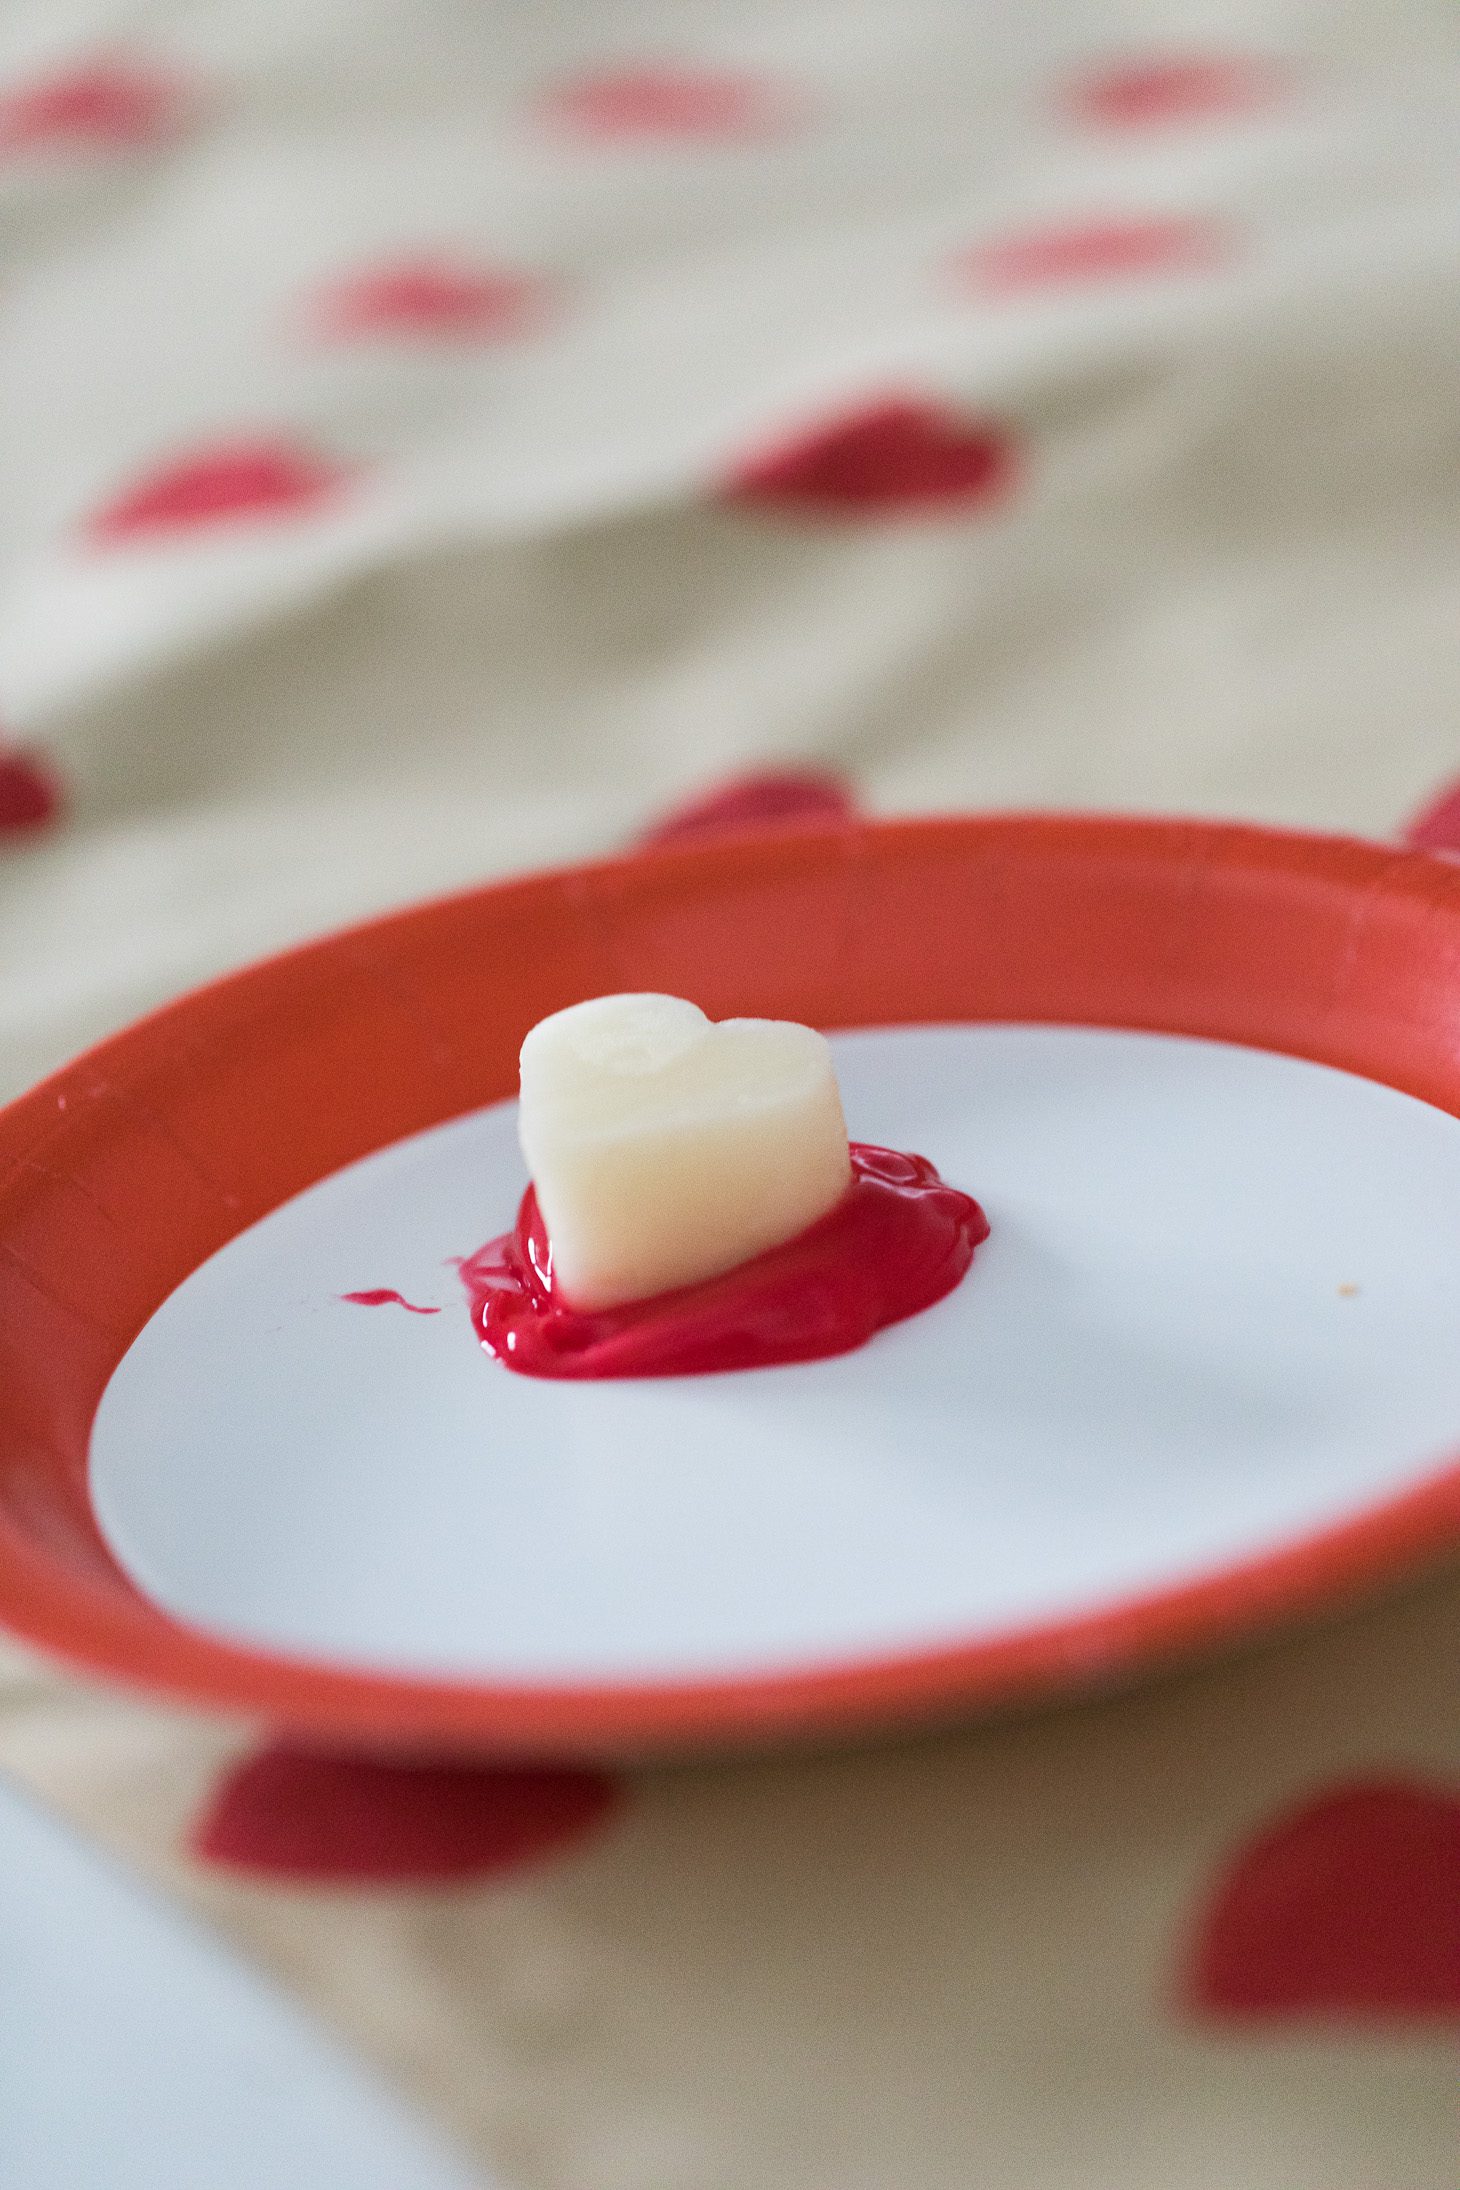
- Acrylic paint of choice (we used red, powder blue and white!)
- 1 small paint brush to fill in edges
- Paper plate
Method
- Start by making your stamps. Use a sharp knife to cut the potato in half lengthwise. Cut a 2-inch thick slice off the cut side of the potato. Placing the slice of potato on a cutting board, place your cookie cutter over the piece of potato, and press down until the cookie cutter has been pressed all the way through. Press through the center of the cutter to remove the shape. This will be your stamp!!
- Place a large dollop of paint on a paper plate. Press the potato stamp into the paint, ensuring the entire bottom of the stamp is fully covered with paint.
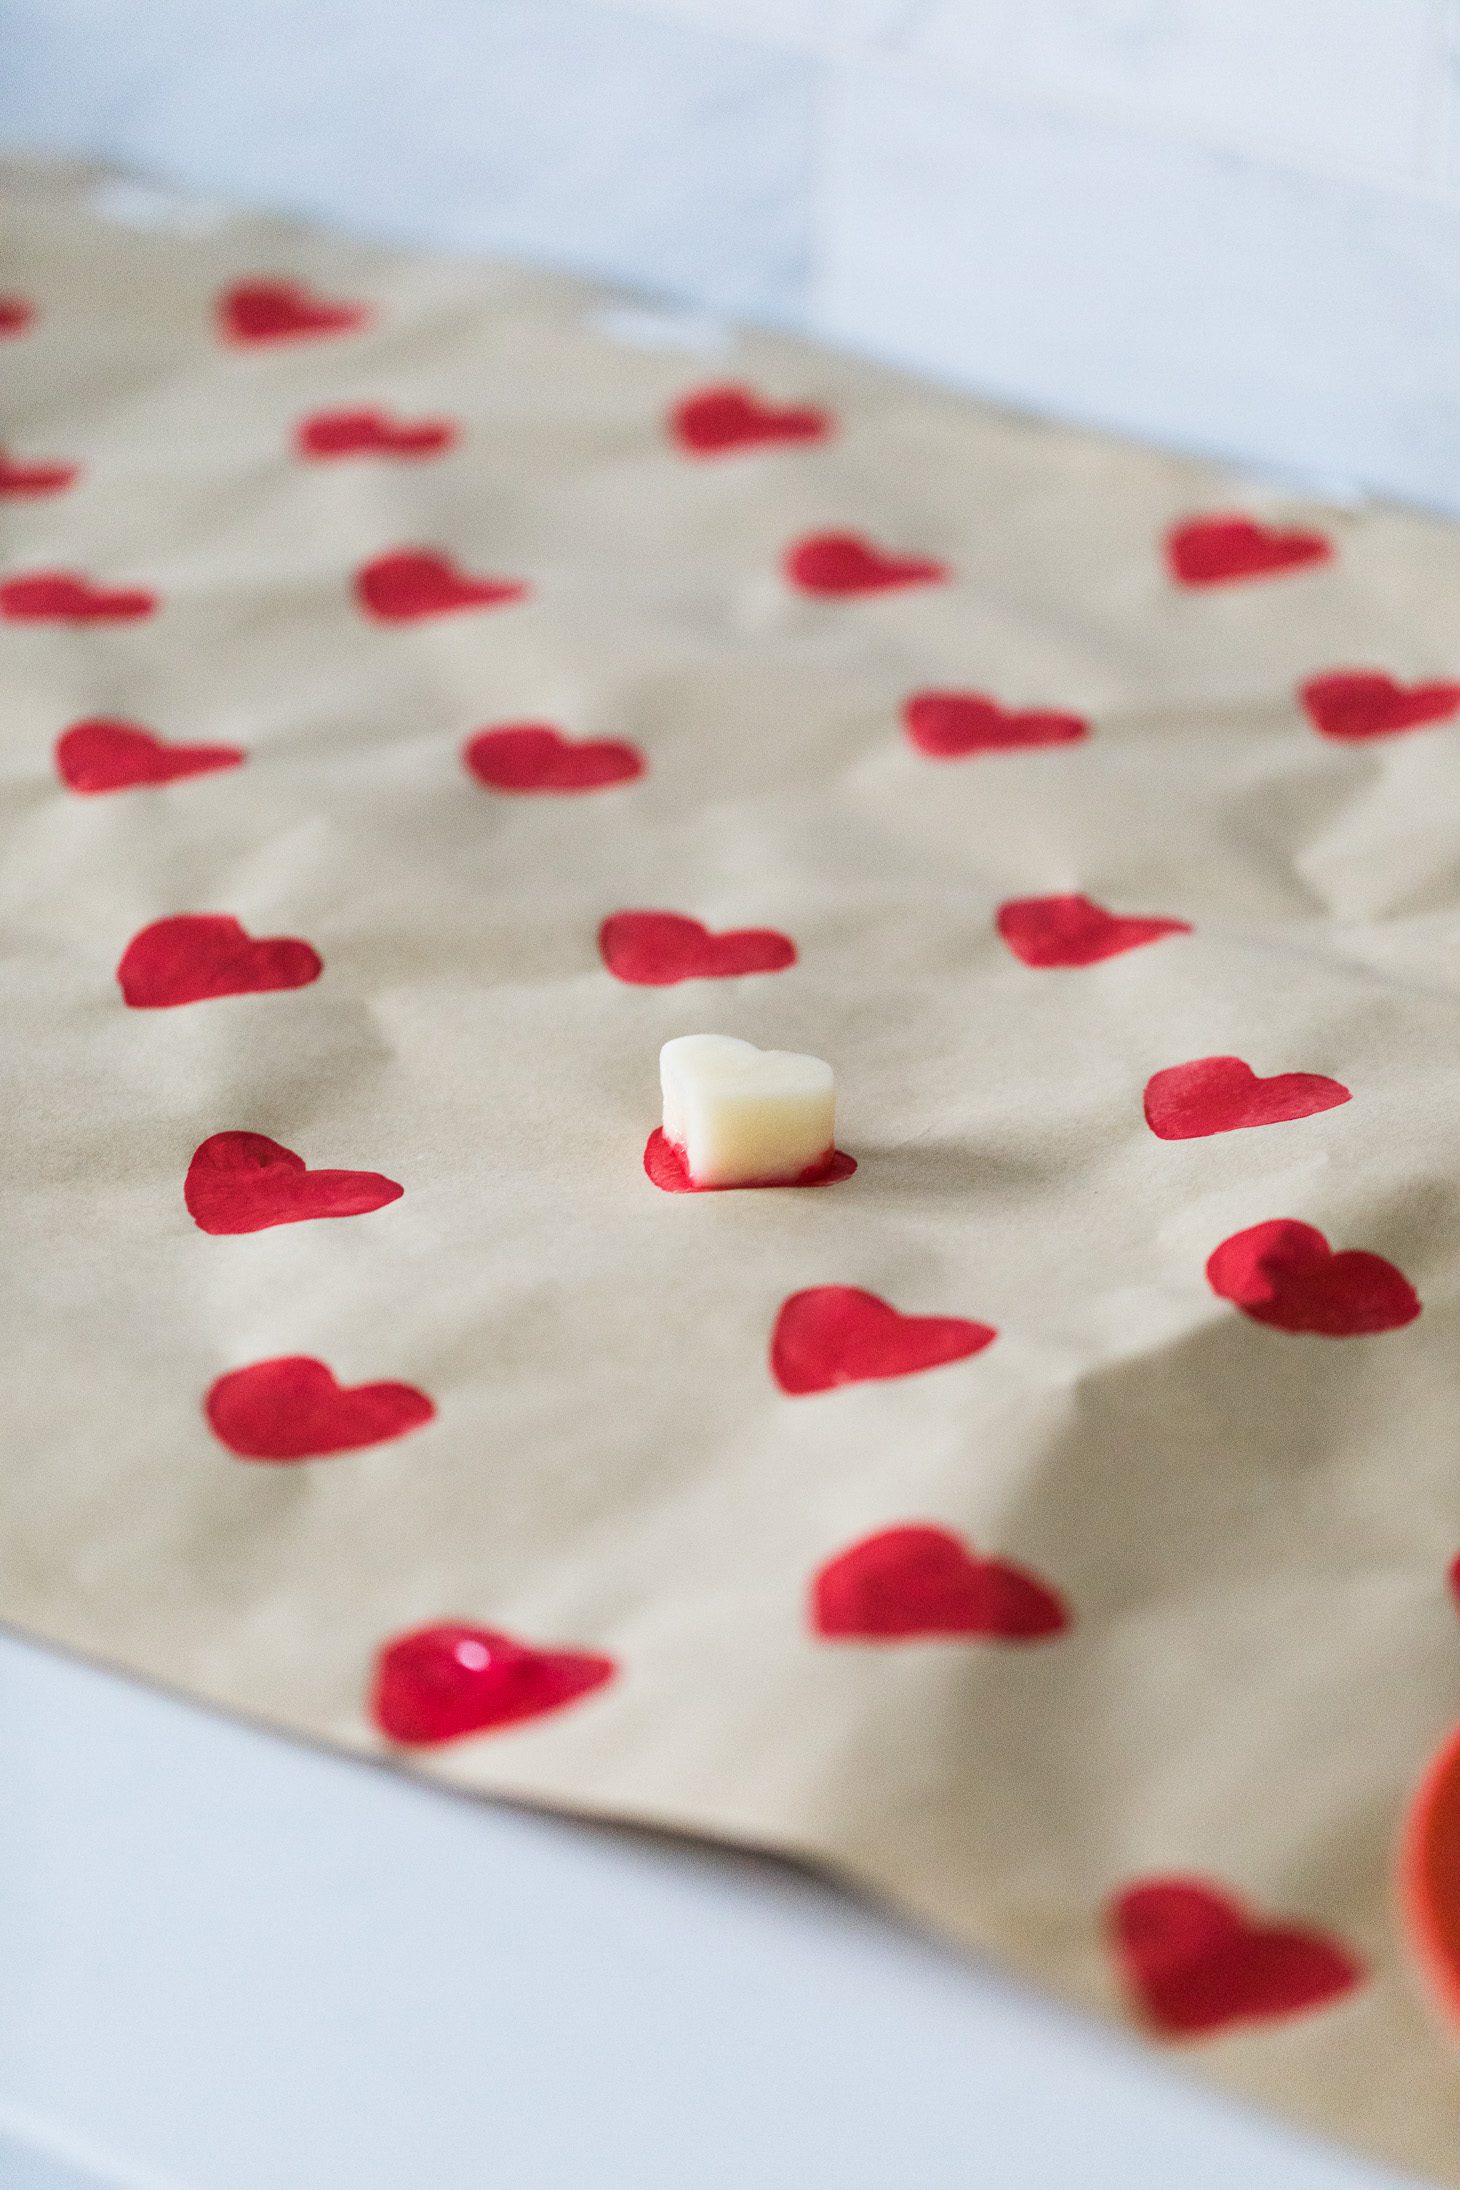
- Stamp the potato onto the wrapping paper with enough force to create the shape onto the paper. Using your paintbrush, dip in the paint, and clean the edges or smooth out the shape on the paper. Moving up the paper, repeat this step until reaching the top.
- For the next column of stamps, place your stamps halfway between your first column, to create a staggered column. Repeat until you stamp the amount of wrapping paper you’ll need.
- Let dry overnight.


Have you tried this DIY before?? If so, what design did you go with??
xo
Jilly