


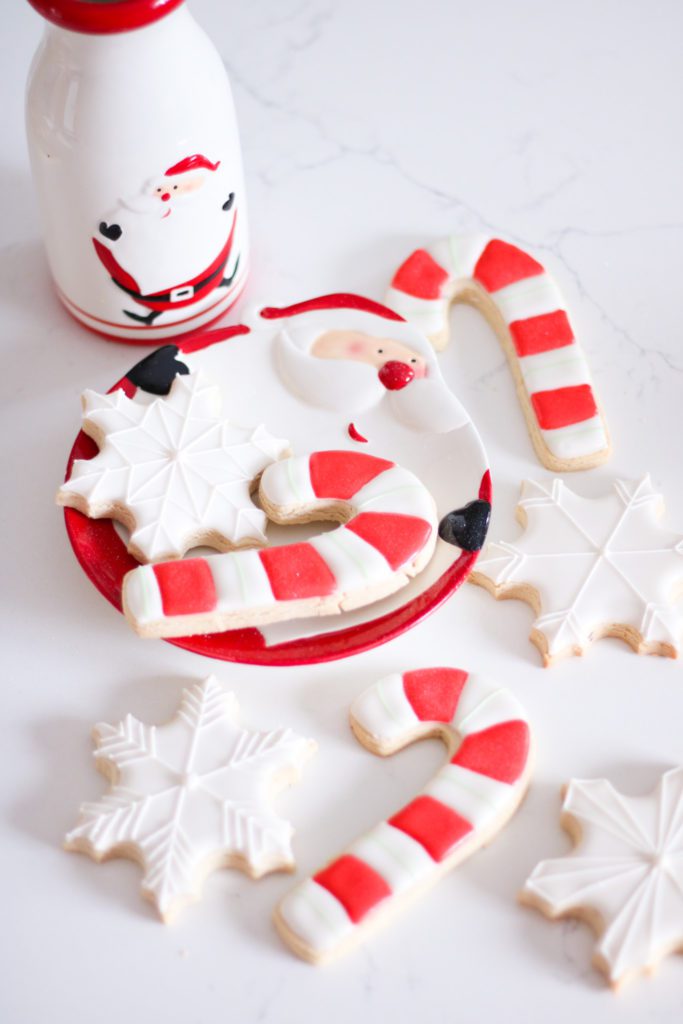
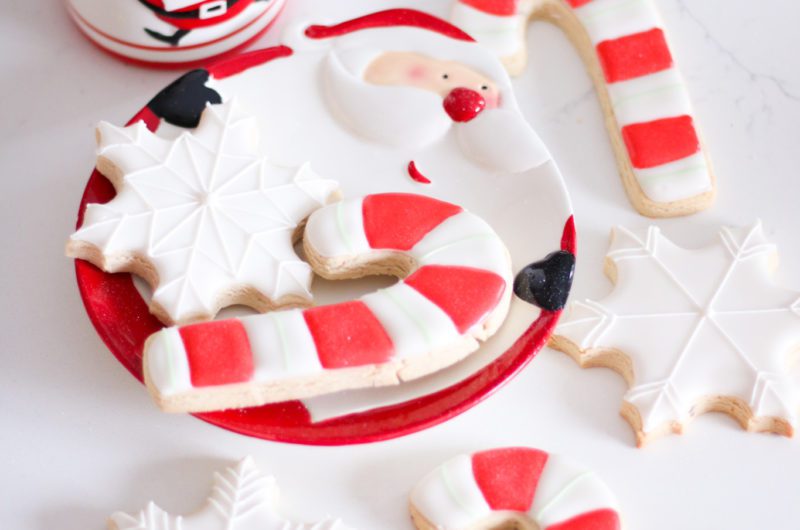
Hello everyone! It’s Izabela from The Cake Mama, and I’m going to share with you my tips and tricks to decorating beautiful sugar cookies! Sugar cookies are always at the top of my baking list for Christmas. They’re delicious, easy to bake, and the possibilities are endless when it comes to choosing cookie cutter designs! My kids always love getting involved in the decorating of sugar cookies, and often they’ll ask to make them as Christmas gifts for friends and family.
In this post, I’m going to share my beloved sugar cookie and royal icing recipes along with some key tips to getting your consistency just right. Royal icing can be a little tricky to figure out if you’ve never worked with it before, but I have no doubts that after reading this, you’ll be decorating like a pro in no time!
All of the recipes I share are vegan, which makes it much easier to be considerate of common allergies, especially if you plan to bake and gift cookies this Christmas! You can even substitute the all-purpose flour for gluten-free flour for all of your celiac or gluten intolerant friends too.

Some tips for working with this dough:
1. Chilling the dough for 10-15 mins will make it much easier to roll and cut cookies with no breakage
2. Roll the dough between 2 pieces of parchment paper; this ensures your dough doesn’t dry out from adding extra flour to make it less sticky
After you’ve baked and cooled your cookies, it’s time to make them look pretty! As mentioned above, working with royal icing can be frustrating, especially if you don’t know what you’re looking for in terms of consistencies. My two favourite types are an outline consistency and a medium flood consistency. These are my go-to for all the cookies I decorate. I’m also going to share my tips on colouring your icing, so you are all set!
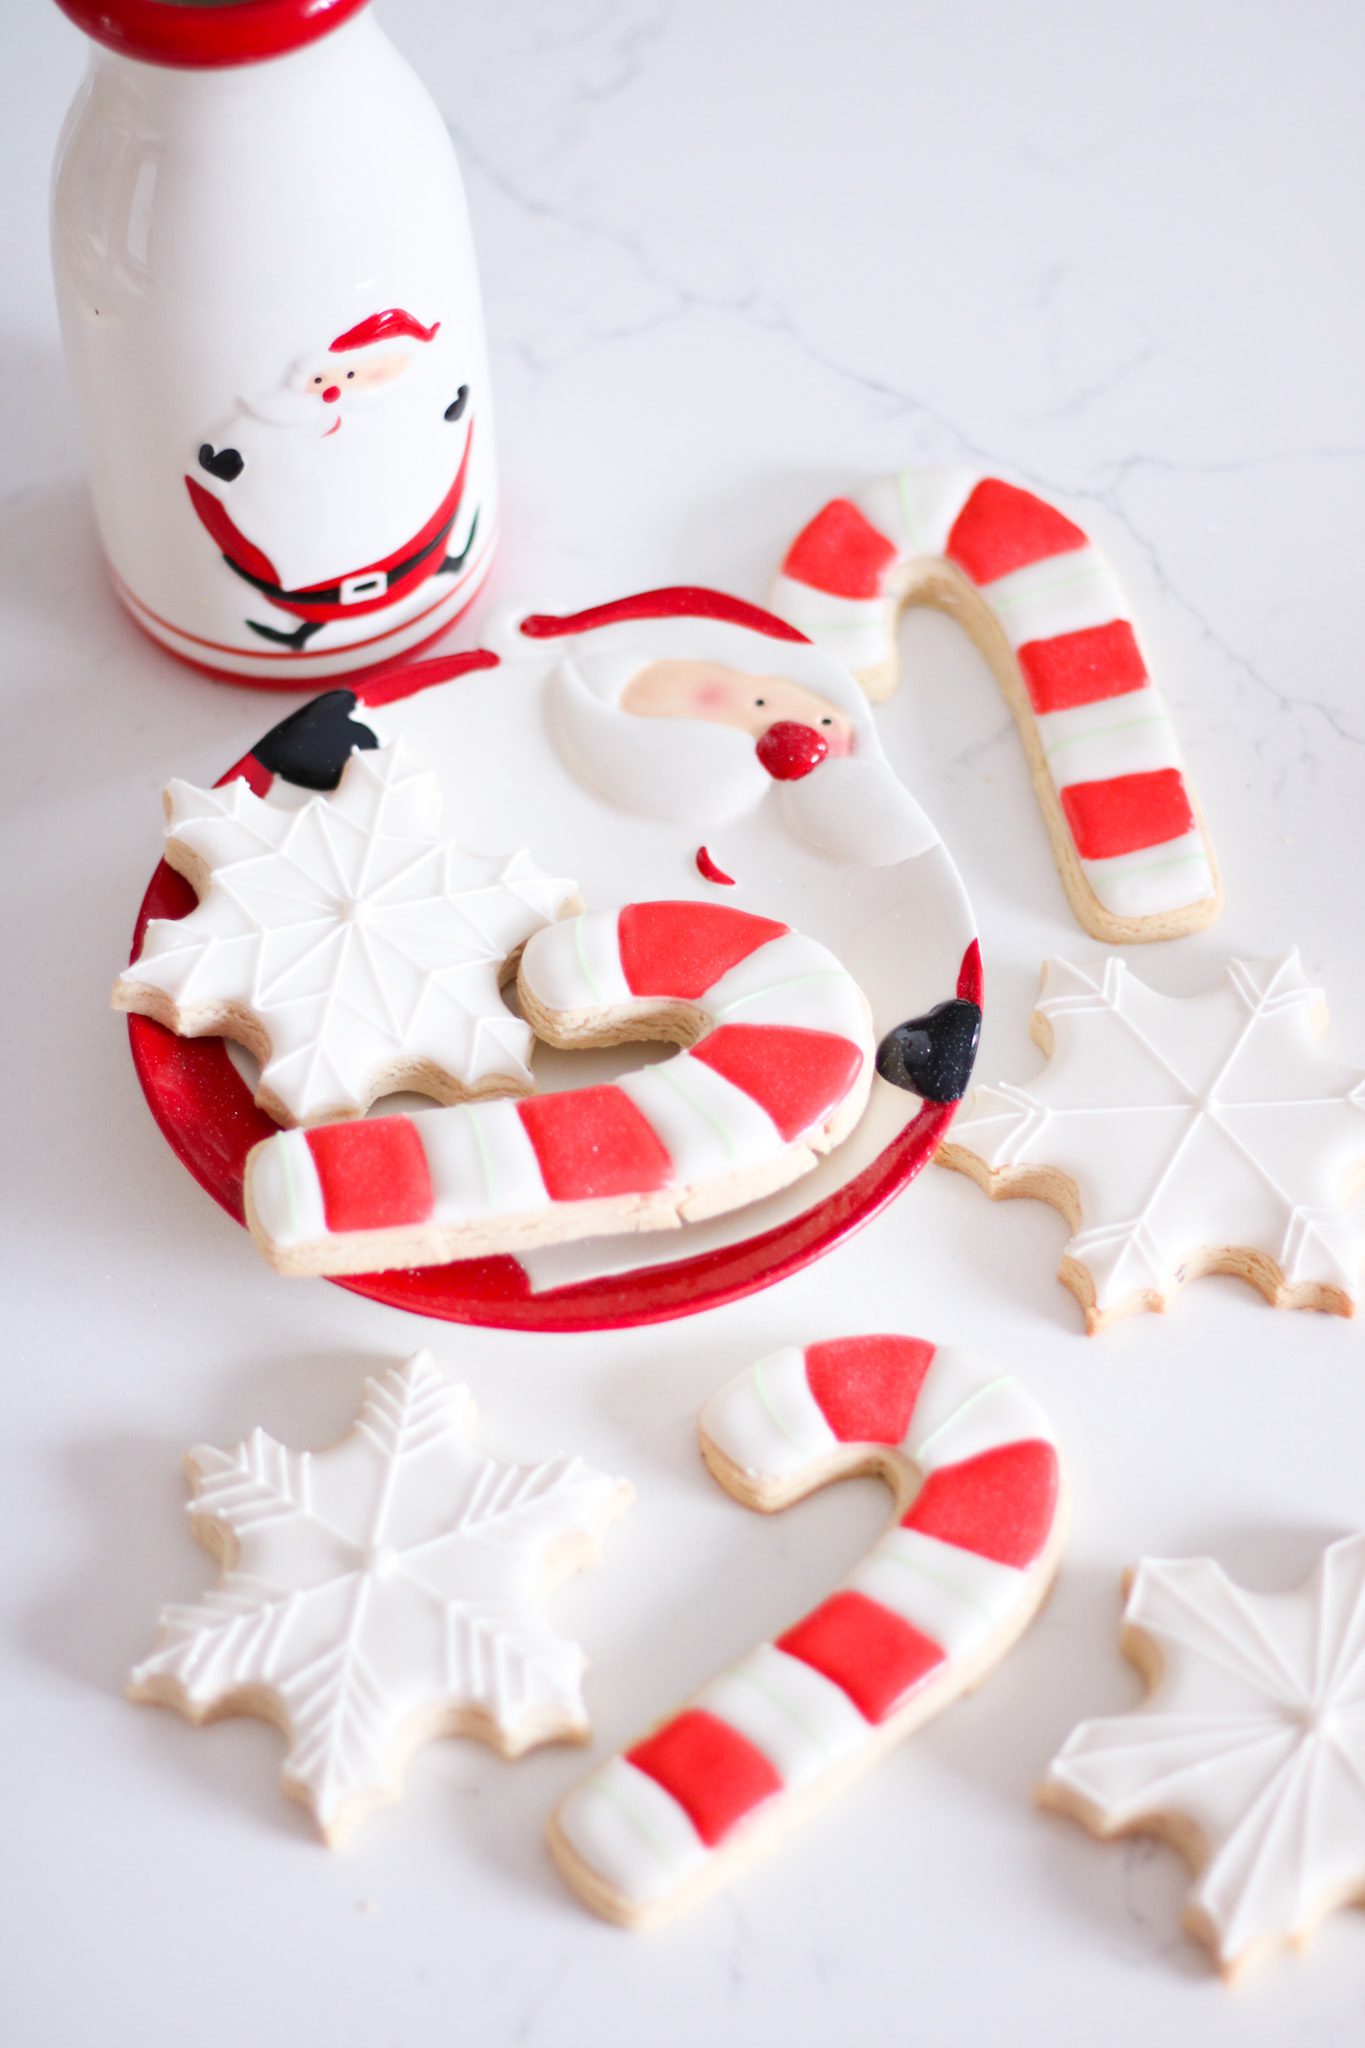
Tip #1: Colouring Your Icing
I like to colour my icings when they are at their stiffest. Why? Because most food colours are in liquid or gel form and can start to change the texture of it before you’ve even started adjusting it. For bold colours such as red and black, consider only attempting to get to about 75% of the final colour. Food colours deepen as they sit and dry, so adding too much will result in darker icing than expected and lots of teeth staining. LOL!
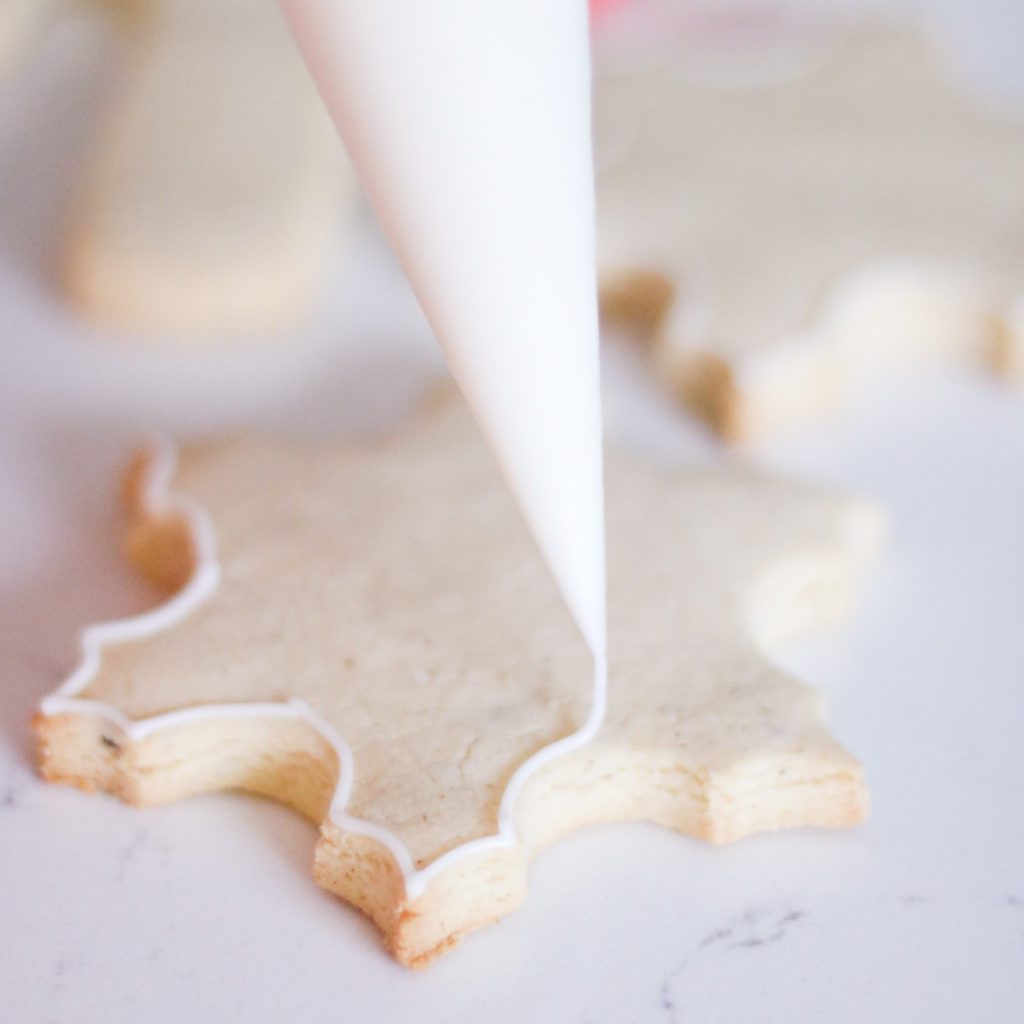
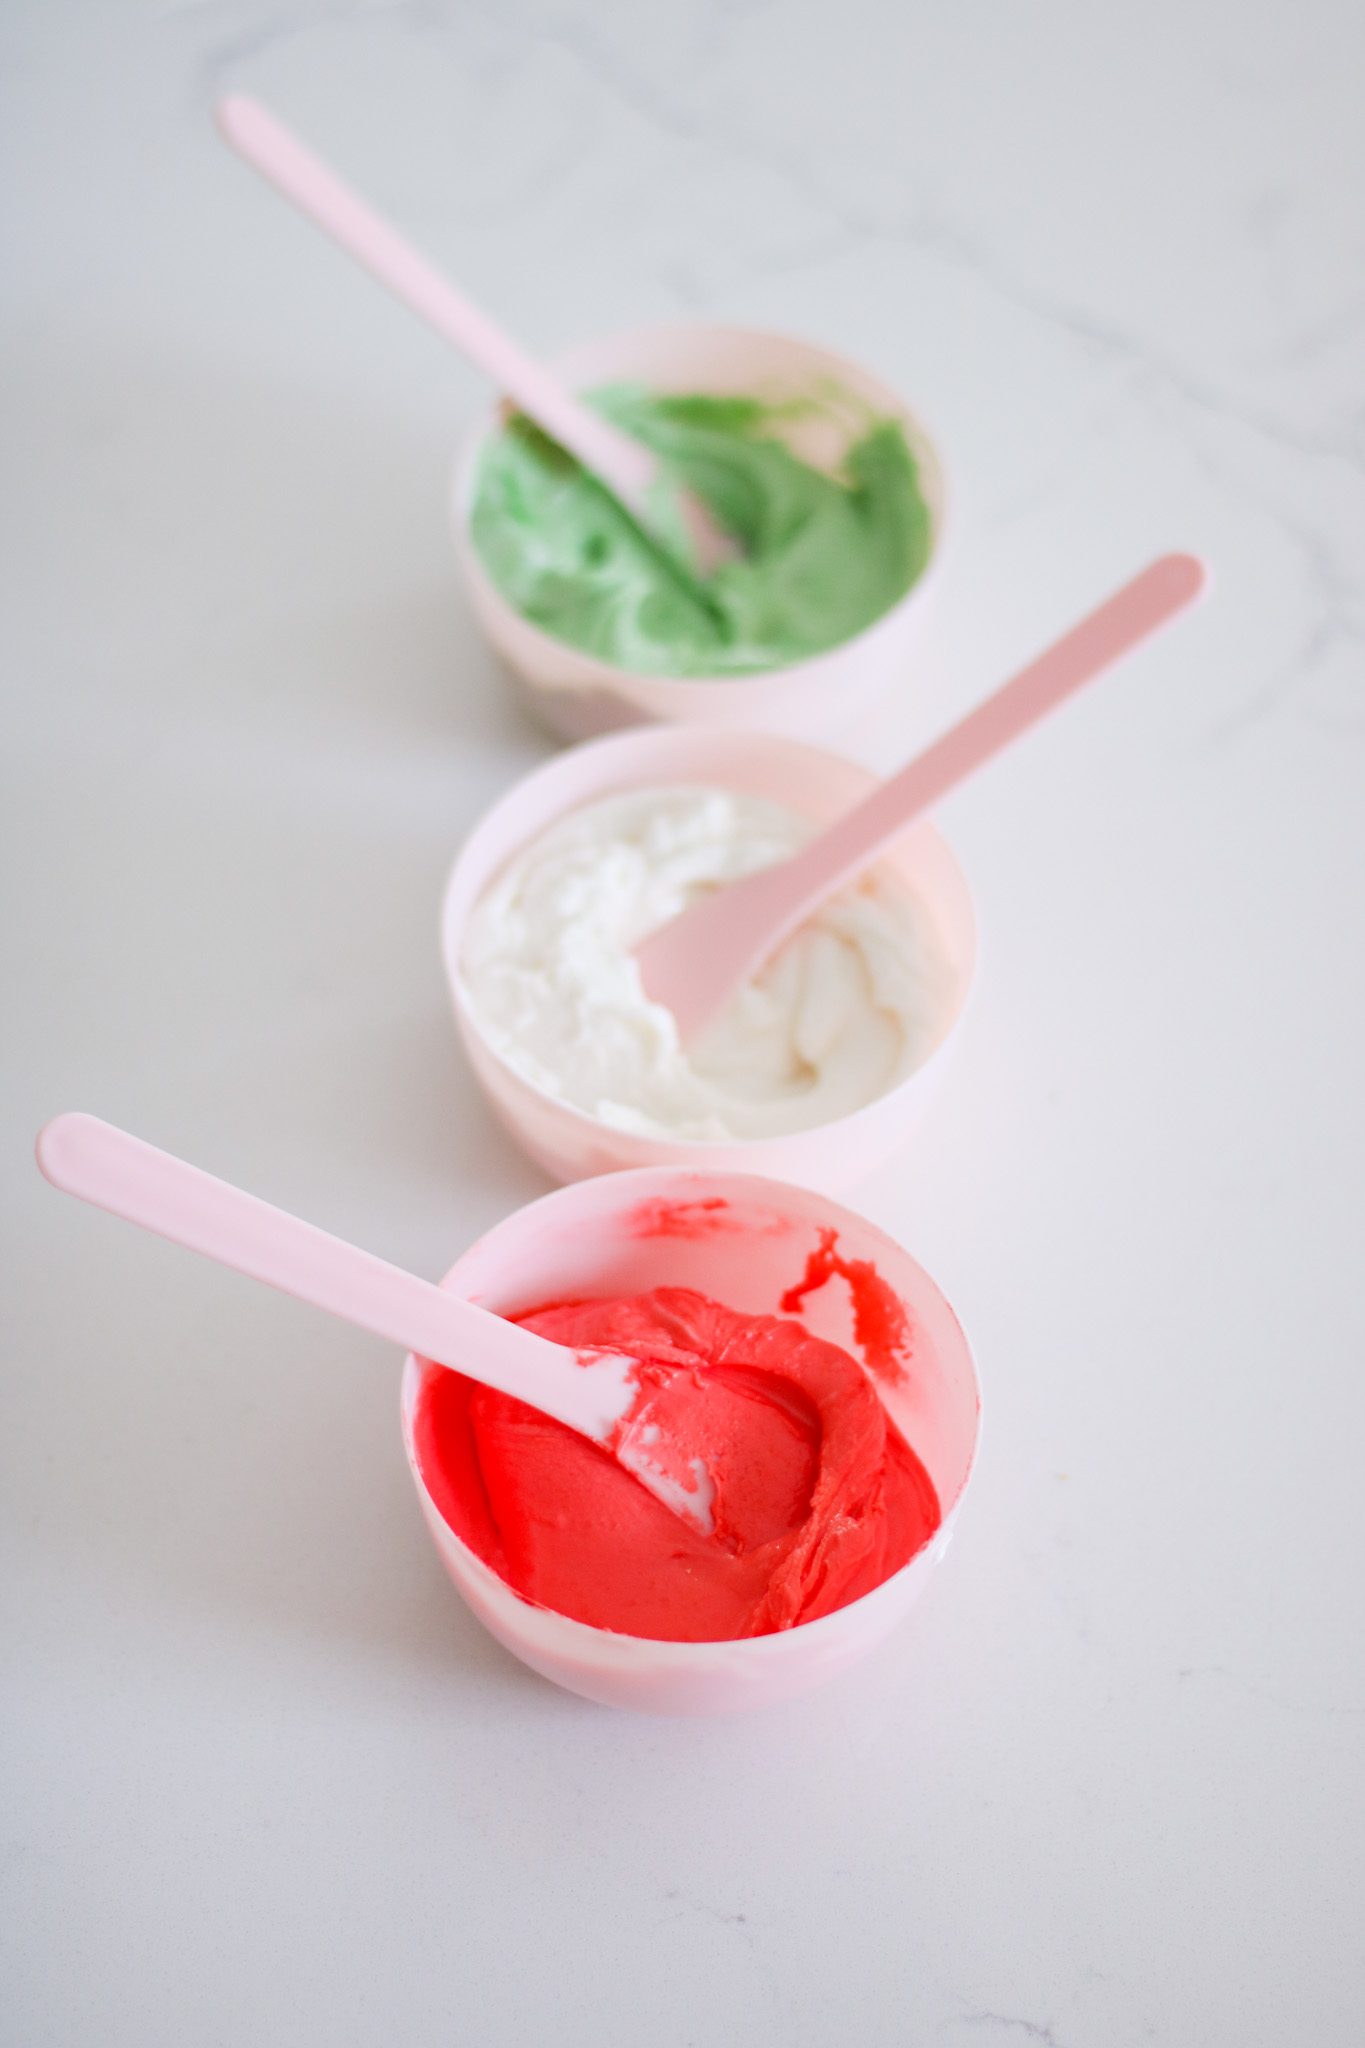
Tip #2: Outline Consistency
I like to outline my cookies and separate sections by using a thick enough icing that will dry faster and create a border but still soft enough to squeeze through a piping bag. When creating an outline consistency, it should look like a really soft cream cheese that is easily spreadable but still holds its shape when you smear it. When piping the borders of your cookies, squeeze a small amount of icing out of the tip (use a #2 metal tip) and make contact with the cookie. Then you’ll want to lift the piping bag about 1/4” away from the surface and slowly pipe the outline of the cookie. It sounds crazy, but this ensures that your lines are not shaky!
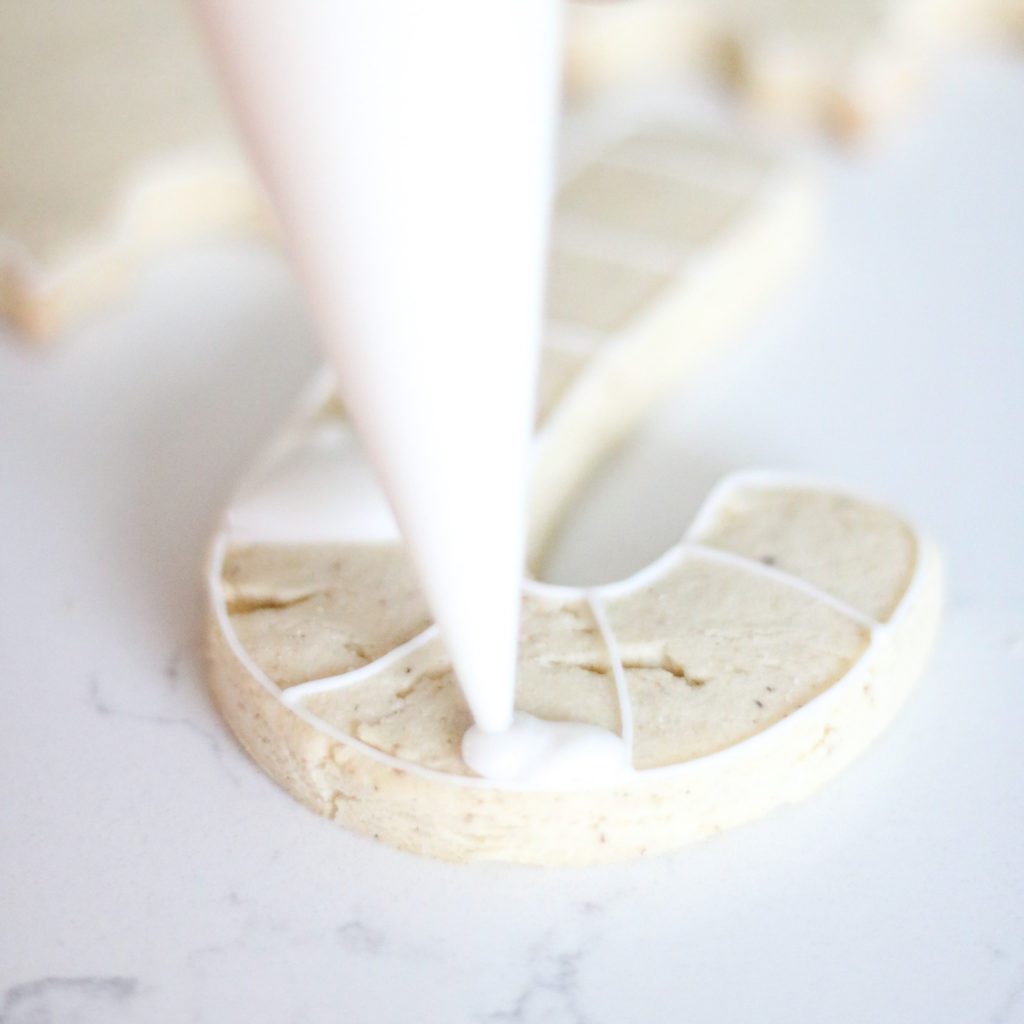
Tip #3: Medium Flood Consistency
I love this one most of all mainly because it’s not super runny and I always feel like I have a lot of control when it comes to flooding the surface of my cookies. When creating a medium flood consistency, it should look like really thick honey. It should be able to ribbon off of a spoon very slowly and the swirls that land in a bowl should take about 10 seconds or so to disappear. When flooding the middles of your cookies, you’re doing to do the exact opposite of outlining. You’re going to put the tip of the bag as close to the cookie as possible and squeeze the piping bag so that it spreads out while you’re flooding the cookie. This will ensure that your surface area will be covered quickly!
Tip #4: Drying and Storage
When you’re finished decorating your cookies, it’s time to let them dry. It’s important to allow a minimum of 10-12 hours of drying time before you intend on stacking or packaging your cookies. Humidity can play a big part in the drying time, so using a small tabletop fan to lightly blow on the tops of the cookies can be very helpful. After they have fully dried, you can stack them in an airtight container or wrap them in cellophane with a ribbon. Your cookies will stay fresh for up to 10 days in these conditions, and they also freeze very well, allowing you to make them ahead of time.
I hope you enjoyed this tutorial and if you do end up making sugar cookies this holiday season, don’t forget to tag me on Instagram!
How To Decorate Sugar Cookies
Ingredients
- Vanilla Sugar Cookies
1 cup 1 vegan butter
1 cup 1 granulated sugar
1 tbsp 1 vanilla extract
2 flax eggs 1 tbsp ground flax to 3 tbsp water per “egg”
4-5 cups flour (or 5-7 cups of gluten-free flour, keep adding gf flour until dough pulls away from the sides of the mixing bowl)
1 tsp 1 baking powder
- Royal Icing
1 can 1 chickpeas (using the aquafaba- the liquid in the can) 540ml can, preferably unsalted and strained through a sieve
1 tbsp 1 vanilla extract
1 bag 1 bag plus 3-4 cups icing sugar
Directions
- Dough
- Preheat oven to 400*F
- Prepare flax egg by mixing ground flax seeds and water and allow to stand for 2-3 mins until thickened.
- In a mixer with paddle attachment, beat butter and sugar until creamy. 4. Add flax mixture and vanilla and continue to mix until well combined.
- In another bowl, mix flour and baking powder, then gradually add to wet ingredients. Mix until completely combined.
- Portion the dough into 2 discs, wrap in plastic wrap and chill for about 10-15 minutes.
- Between two layers of parchment, roll out portions of dough to be cut out; approximately 1/4” in thickness.
- Transfer cut dough onto cookie sheets lined with parchment.
- Bake for 10-12 mins. Allow to cool before decorating!
- Royal Icing
- Drain the liquid of one can of chickpeas into a mixer with the whisk attachment.
- Add 1 tbsp vanilla extract.
- Whisk for 10-15 mins. Mixture should quadruple in volume and be white and frothy. 4. Turn mixer to low and gradually add all the icing sugar.
- Once combined turn mixer back up on high until a stiff consistency is reached. Mixture should resemble cold cream cheese.
- For outline consistency: Thin 1C of Royal icing with 1 tsp of water. Mixture should resemble a very soft and spreadable cream cheese! (Be sure to colour your icing first before thinning out!)
- For flood consistency: Thin 1C of Royal icing with 2 tsp of water. Mixture should resemble honey! (Be sure to colour your icing before thinning out!)
Notes
- For the Royal icing: I know it sounds like a lot, but you have to use the entire volume of the chickpea in order to yield the proper proportions for icing that will harden. Leftover icing can be refrigerated for up to 1 month or frozen for up to 3 months.
Happy Baking!
Izabela – The Cake Mama

Thanks for sharing! Do you use salted or unsalted butter?