


Now that you have mastered how to build your sourdough starter, and you’ve (hopefully) made some delicious discard recipes let’s move onto making the actual loaf of SOURDOUGH!!! If your starter has passed the float test, then my friend, that’s your sign that you are READY TO MAKE SOME DAMN BREADDDD!!!
Let’s quickly recap what the float test is before we move onto the good stuff! The float test will be the final test to determine if your sourdough starter is ready to use. All you need to do is take a tablespoon of your starter and add it to a cup of water, if it floats it’s ready to use, if it doesn’t, continue feeding it for a few more days and then repeat the test!
To tell you the truth, when I jumped on the sourdough train I really had no clue what I was doing or what I was getting myself into. But with some help from my Aunty Mary and Shannon at Sourdough Schoolhouse they walked me through how to make my very first loaf. Shannon teaches people through her online courses (via Sourdough Schoolhouse!) how to build the perfect sourdough starter and how to make sourdough bread! In her Sourdough 101 course, she walks you through how to make your own sourdough loaf and her secret sourdough recipe and SO much more!! She has also graciously allowed me to share the EXACT recipe for the PAIN AU BELLE with you today!
Just before we dive into the good stuff, I thought it would be beneficial to run through some sourdough terminology. I mention these terms throughout the blog, if you ever forget what they mean (not to worry I still have to refer back to this sometimes too…LOL) refer back to this section!
Sourdough Terminology:
Autolyse: An autolyse (pronounced “auto-lease”) is a gentle mixing of flour and water, followed by a 30 minute and up to 2 hour rest period. After the rest, the remaining ingredients are added and kneading begins. This simple pause allows for the gluten to bond without the salt.
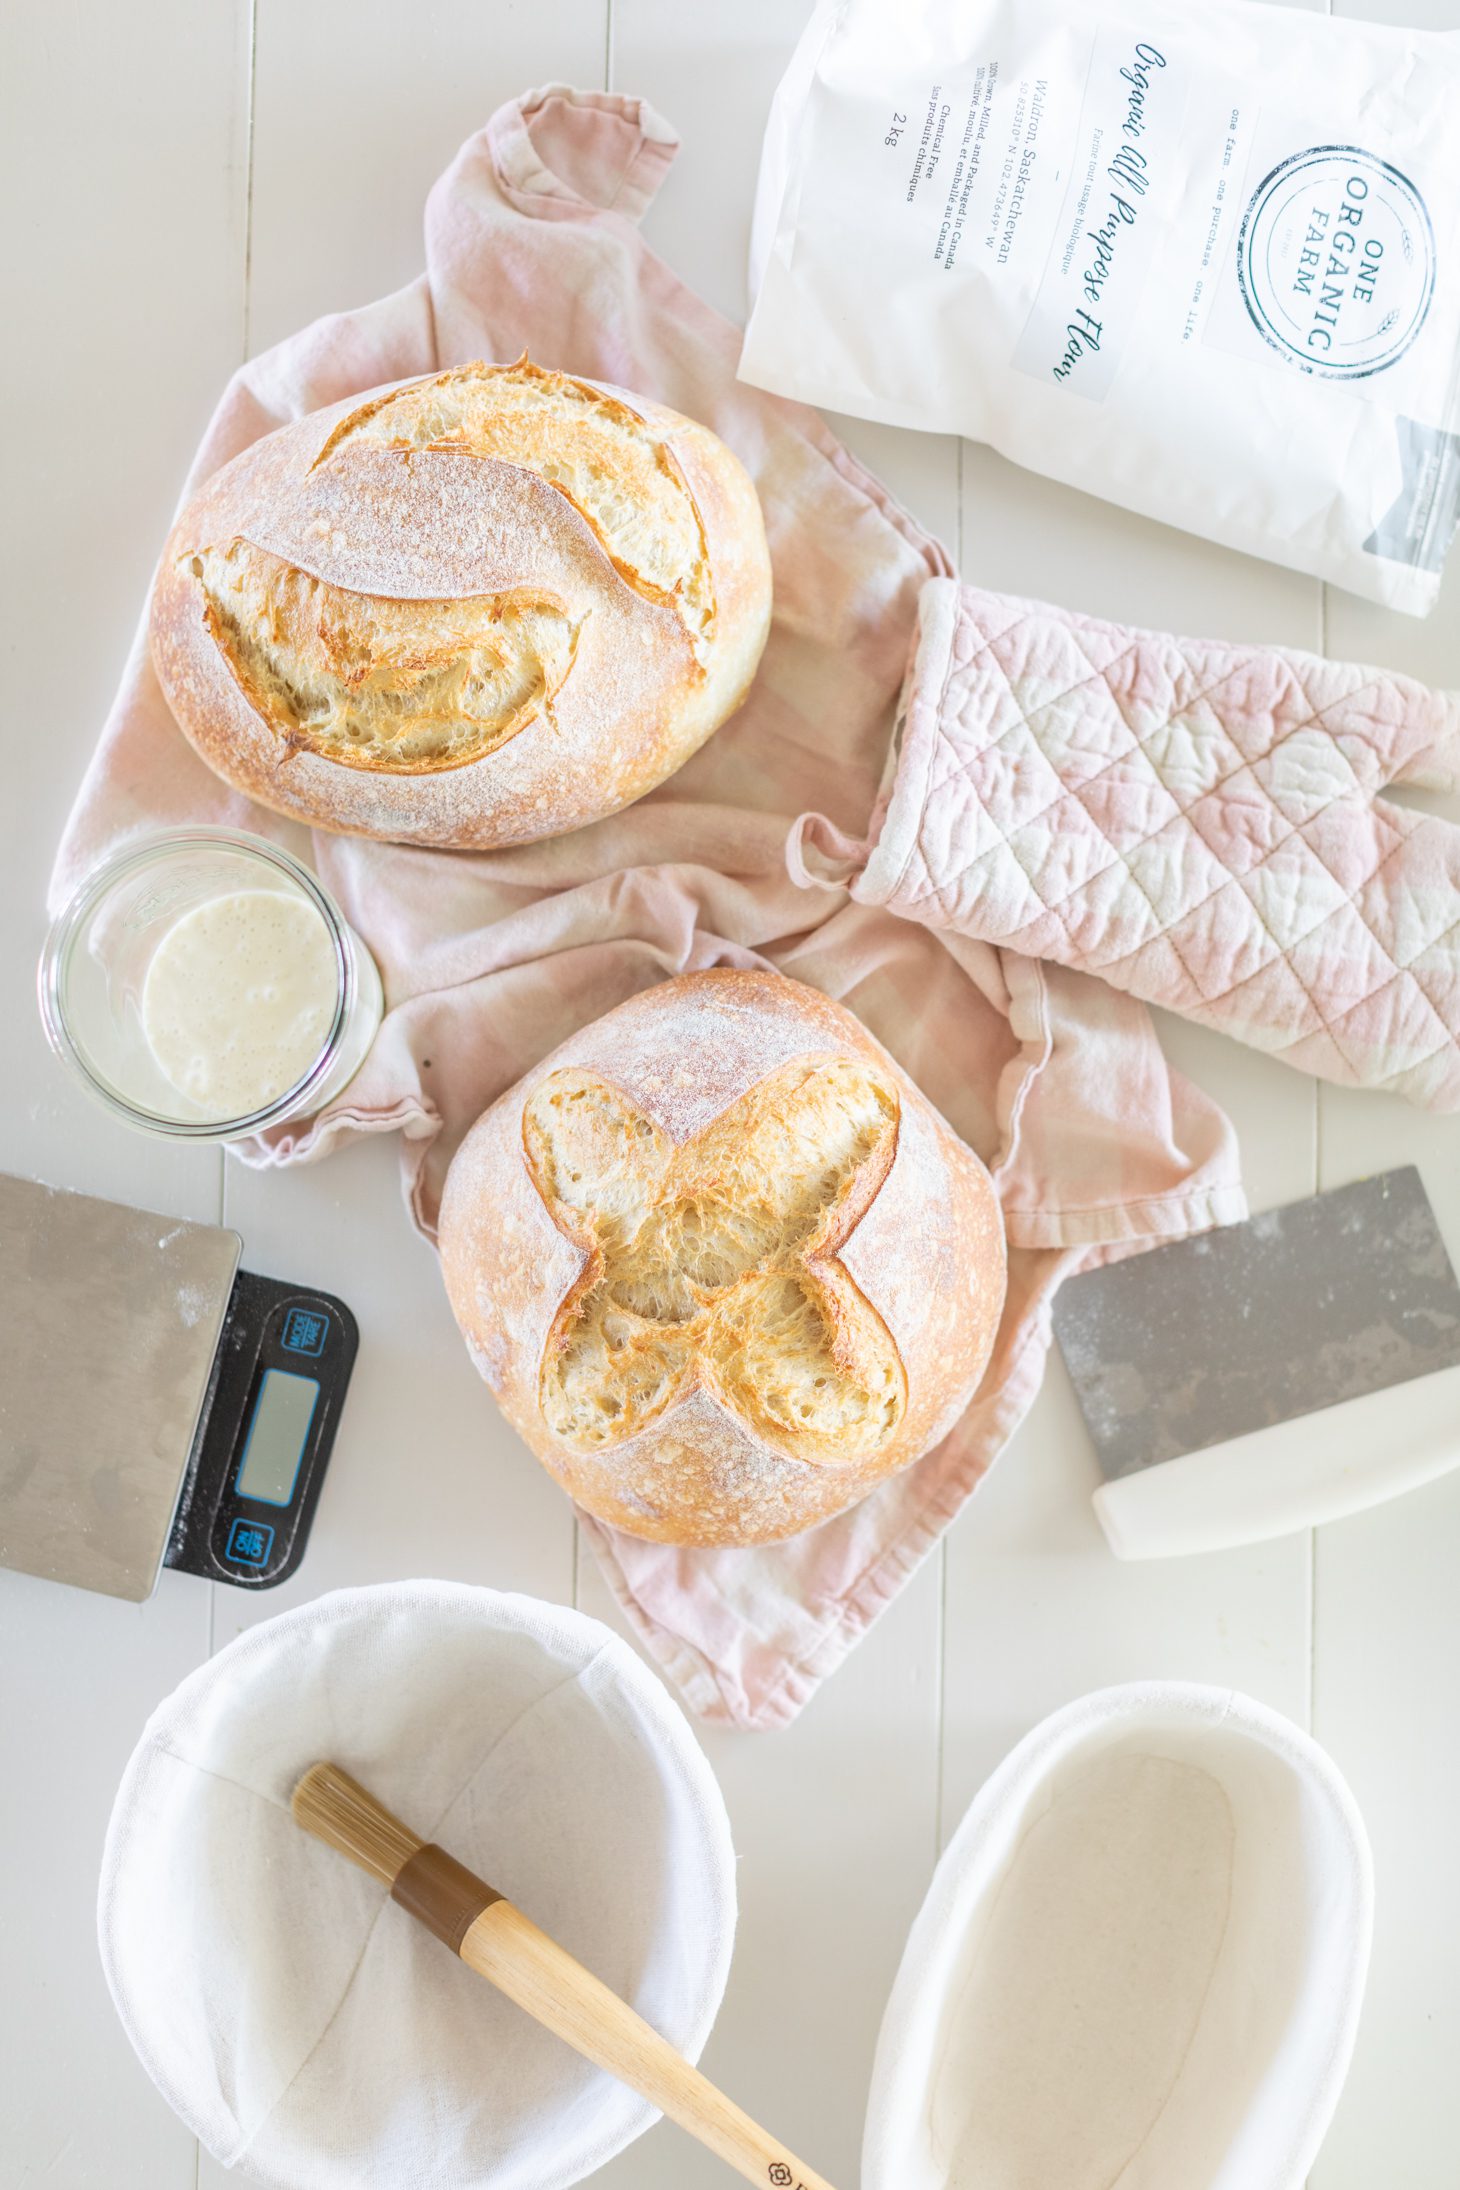
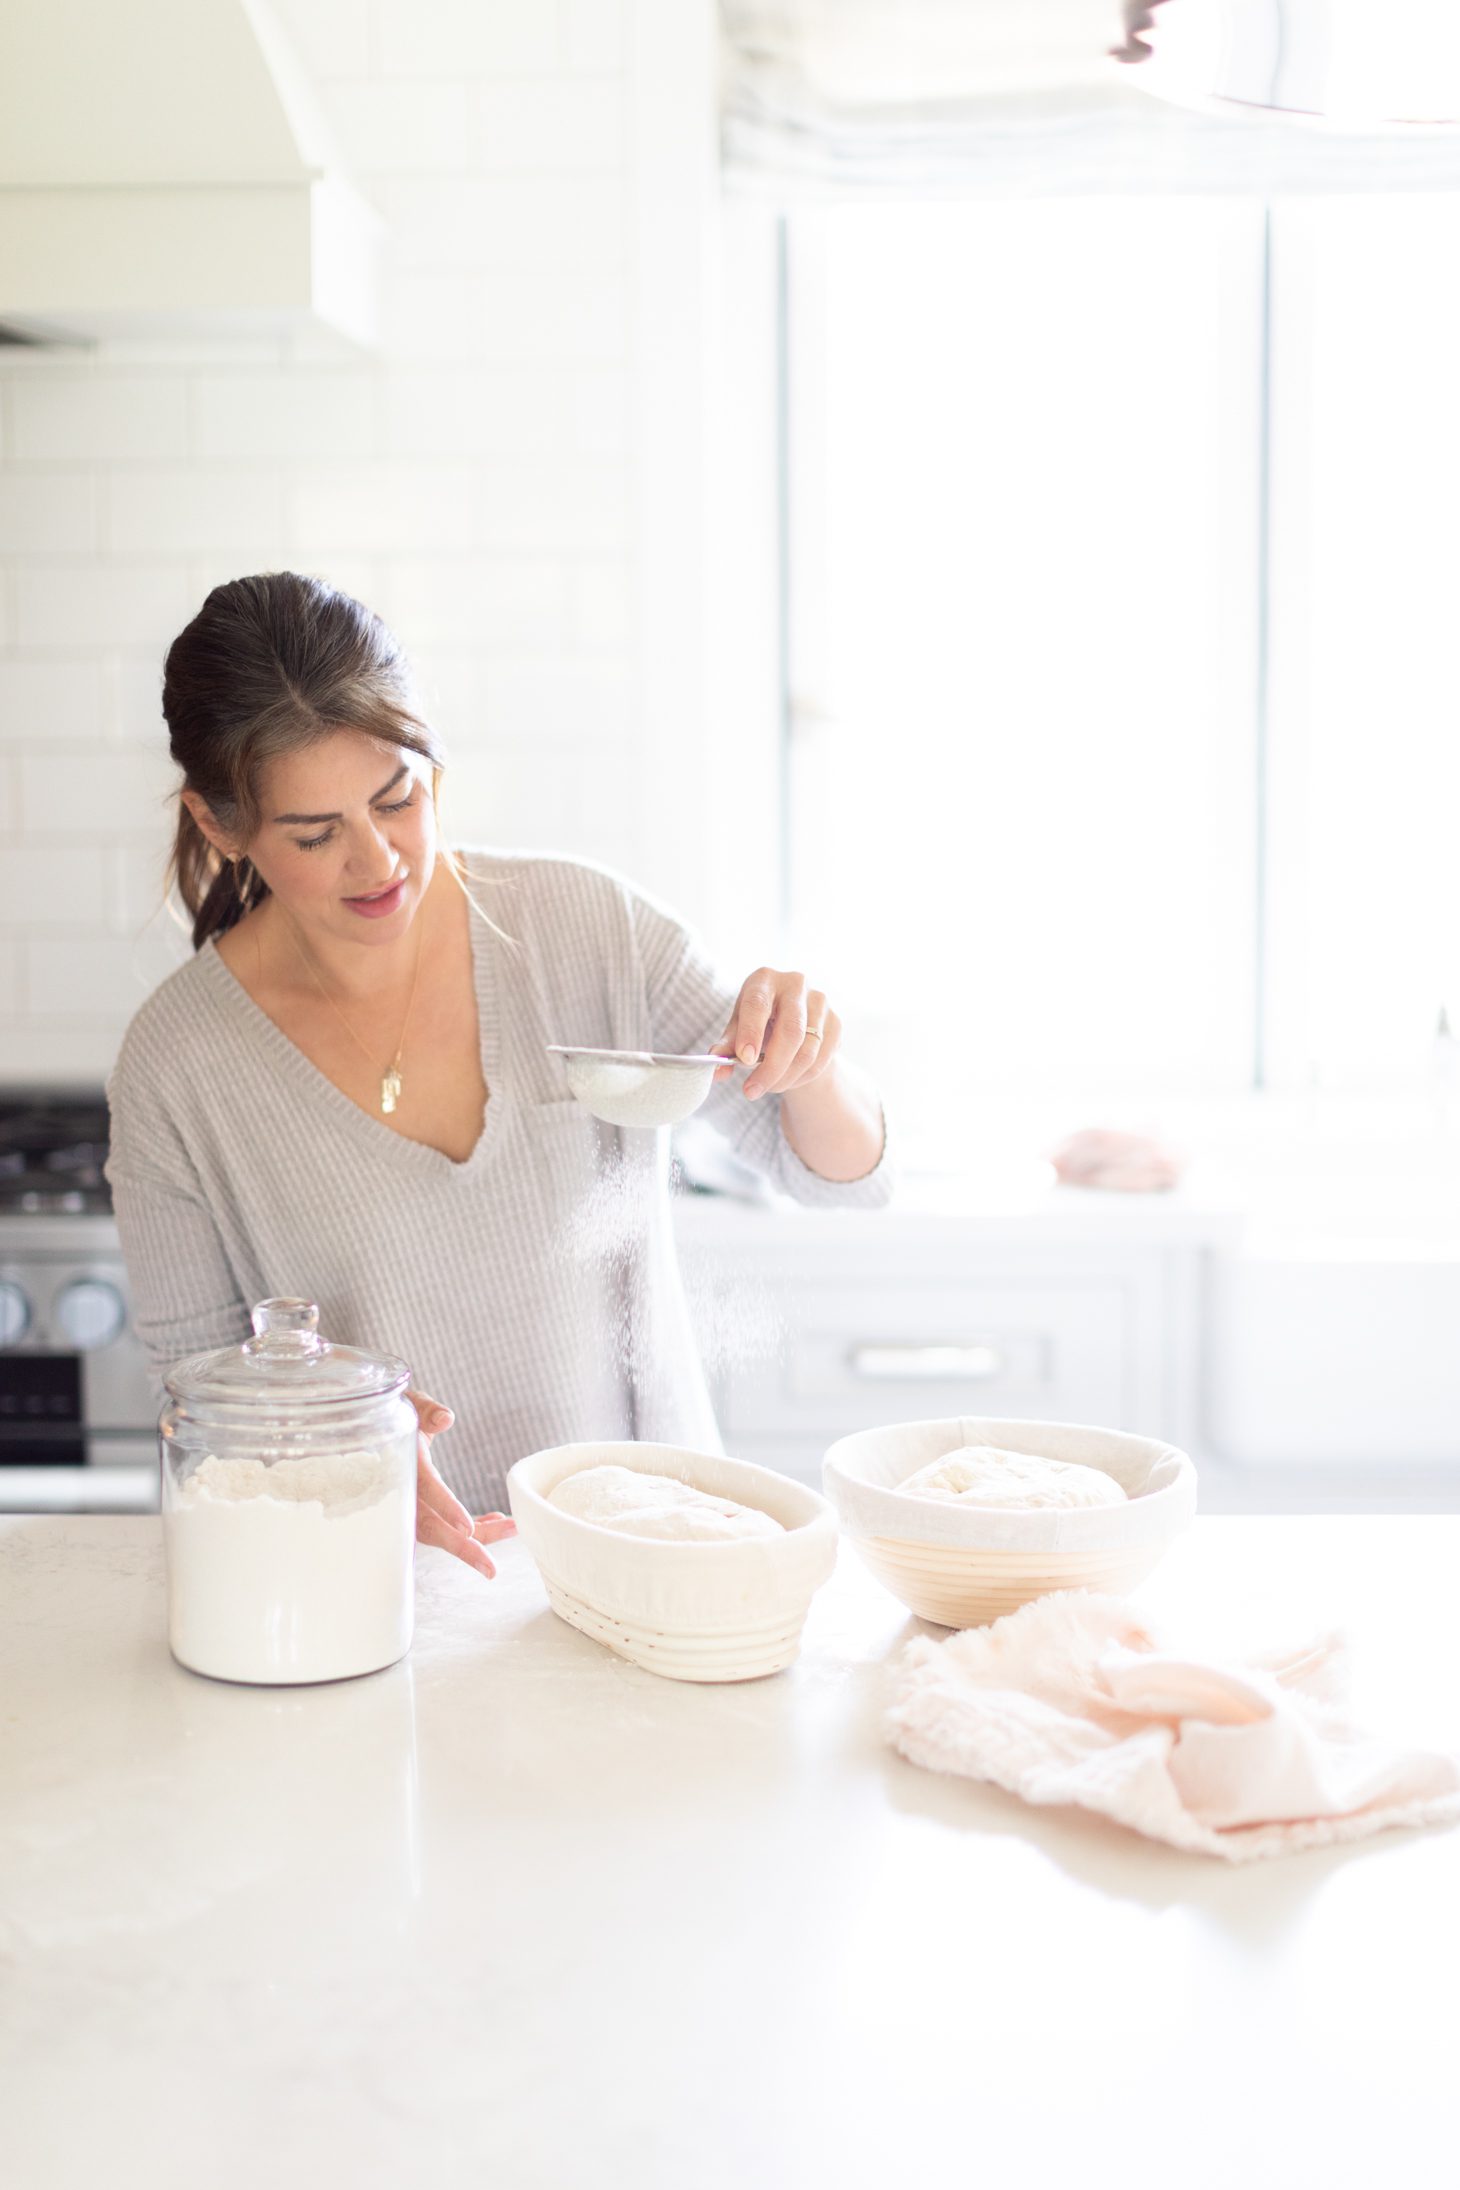
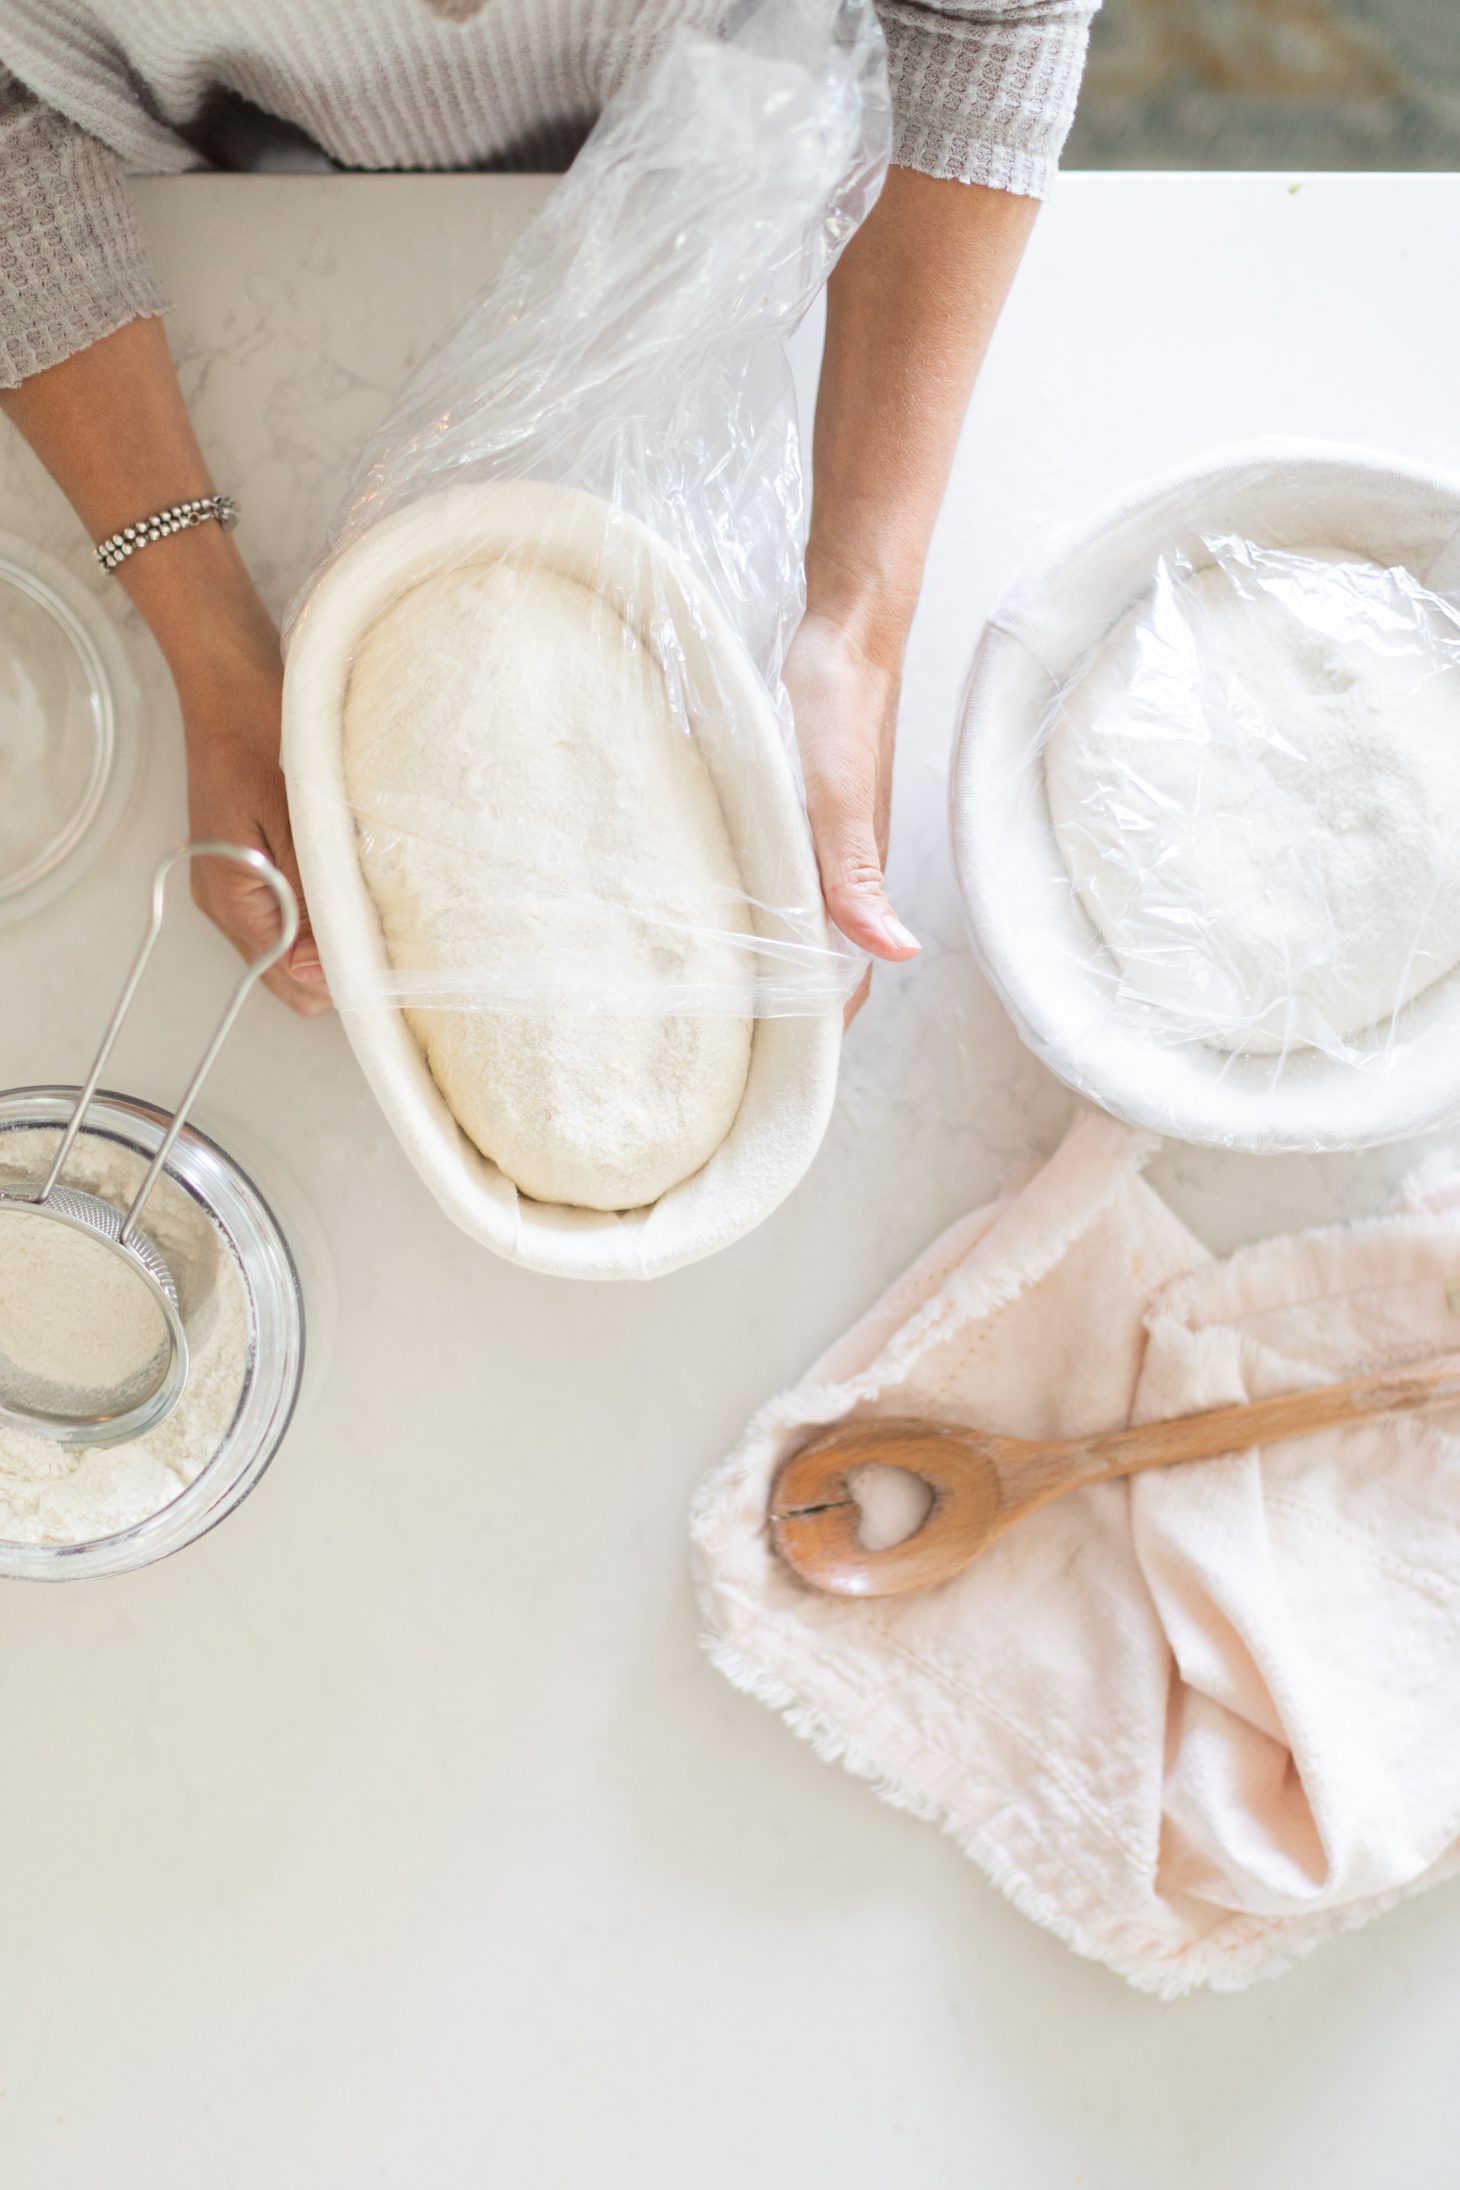
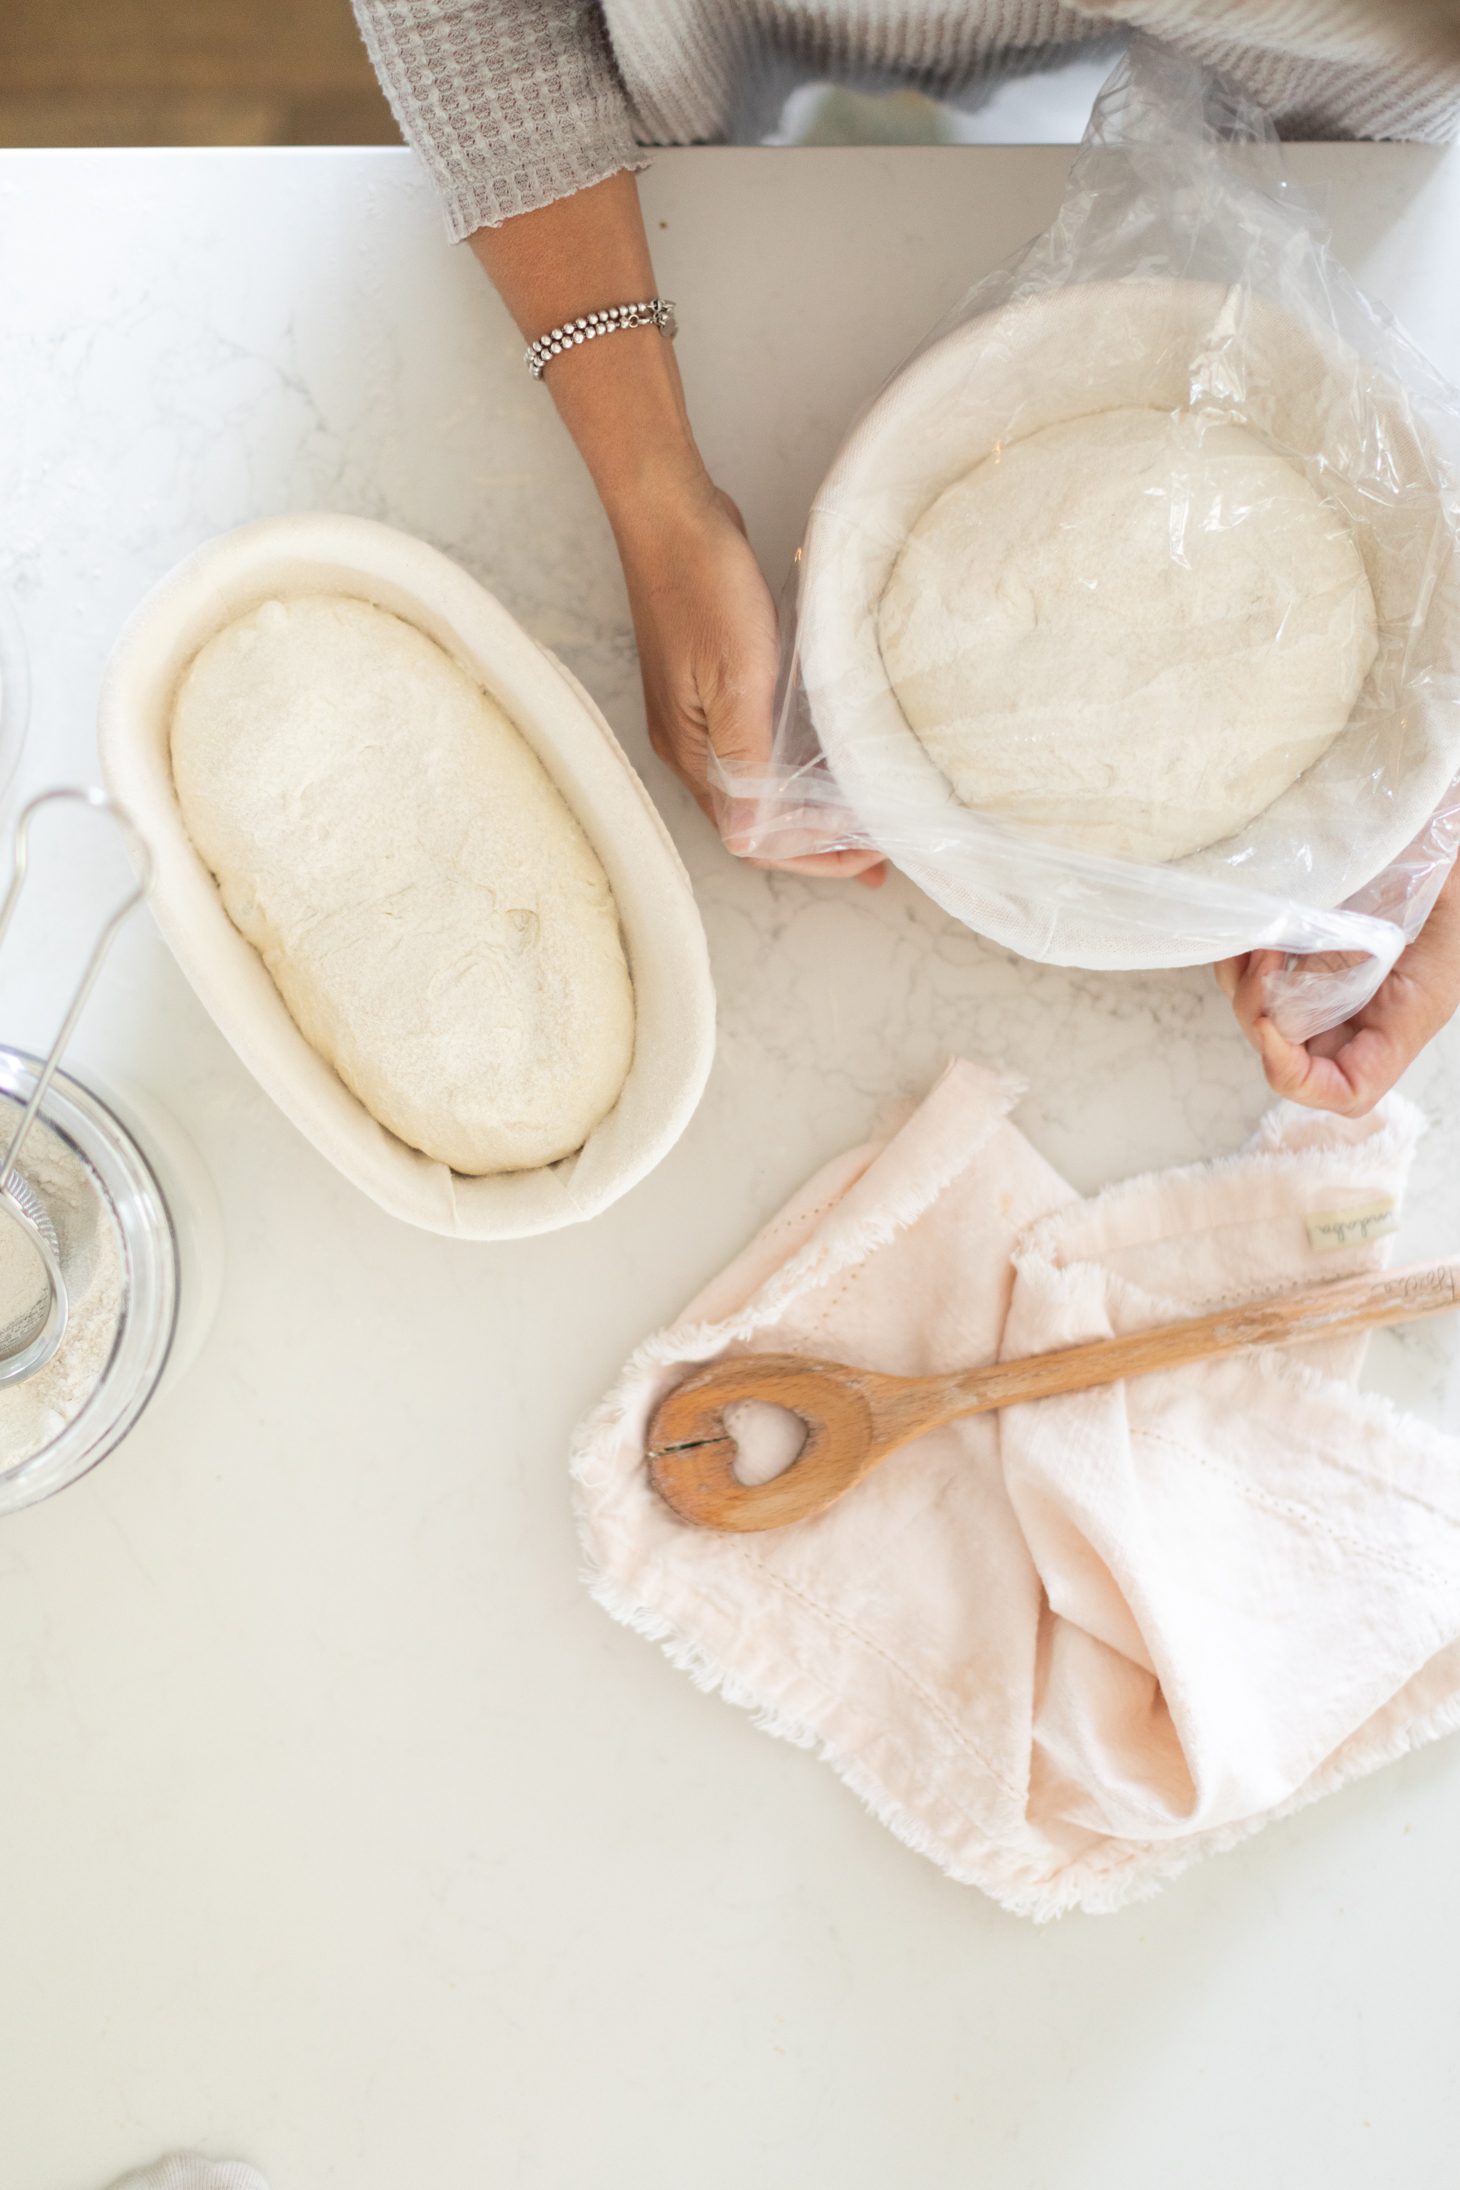
Banneton: A banneton is a type of basket used to provide structure for loaves of bread during proofing. If you don’t have a banneton you can use a glass bowl lined with a tea towel.
Delayed Fermentation: This is a method of baking bread in which you mix all of the ingredients and then let them sit in the fridge. Delayed fermentation is the point in the sourdough process that adds all of the health benefits and tangy flavour.
Proofing Bucket: A proofing bucket is just a big container that you make your dough in. If you don’t have a “proofing bucket” you can use a big Tupperware container with a lid or a big glass bowl instead, just refrain from using metal.
Proofing Bag: A proofing bag traps moisture and heat, which is ideal for creating light and airy bread. If you don’t have a proofing bag you can use any clear bag, just make sure you seal it with either a rubber band or a knot!
Levain: A levain is essentially a starter but a higher volume of starter.
Boule: This is a round loaf of bread!
Battard: This is a football-shaped loaf of bread!
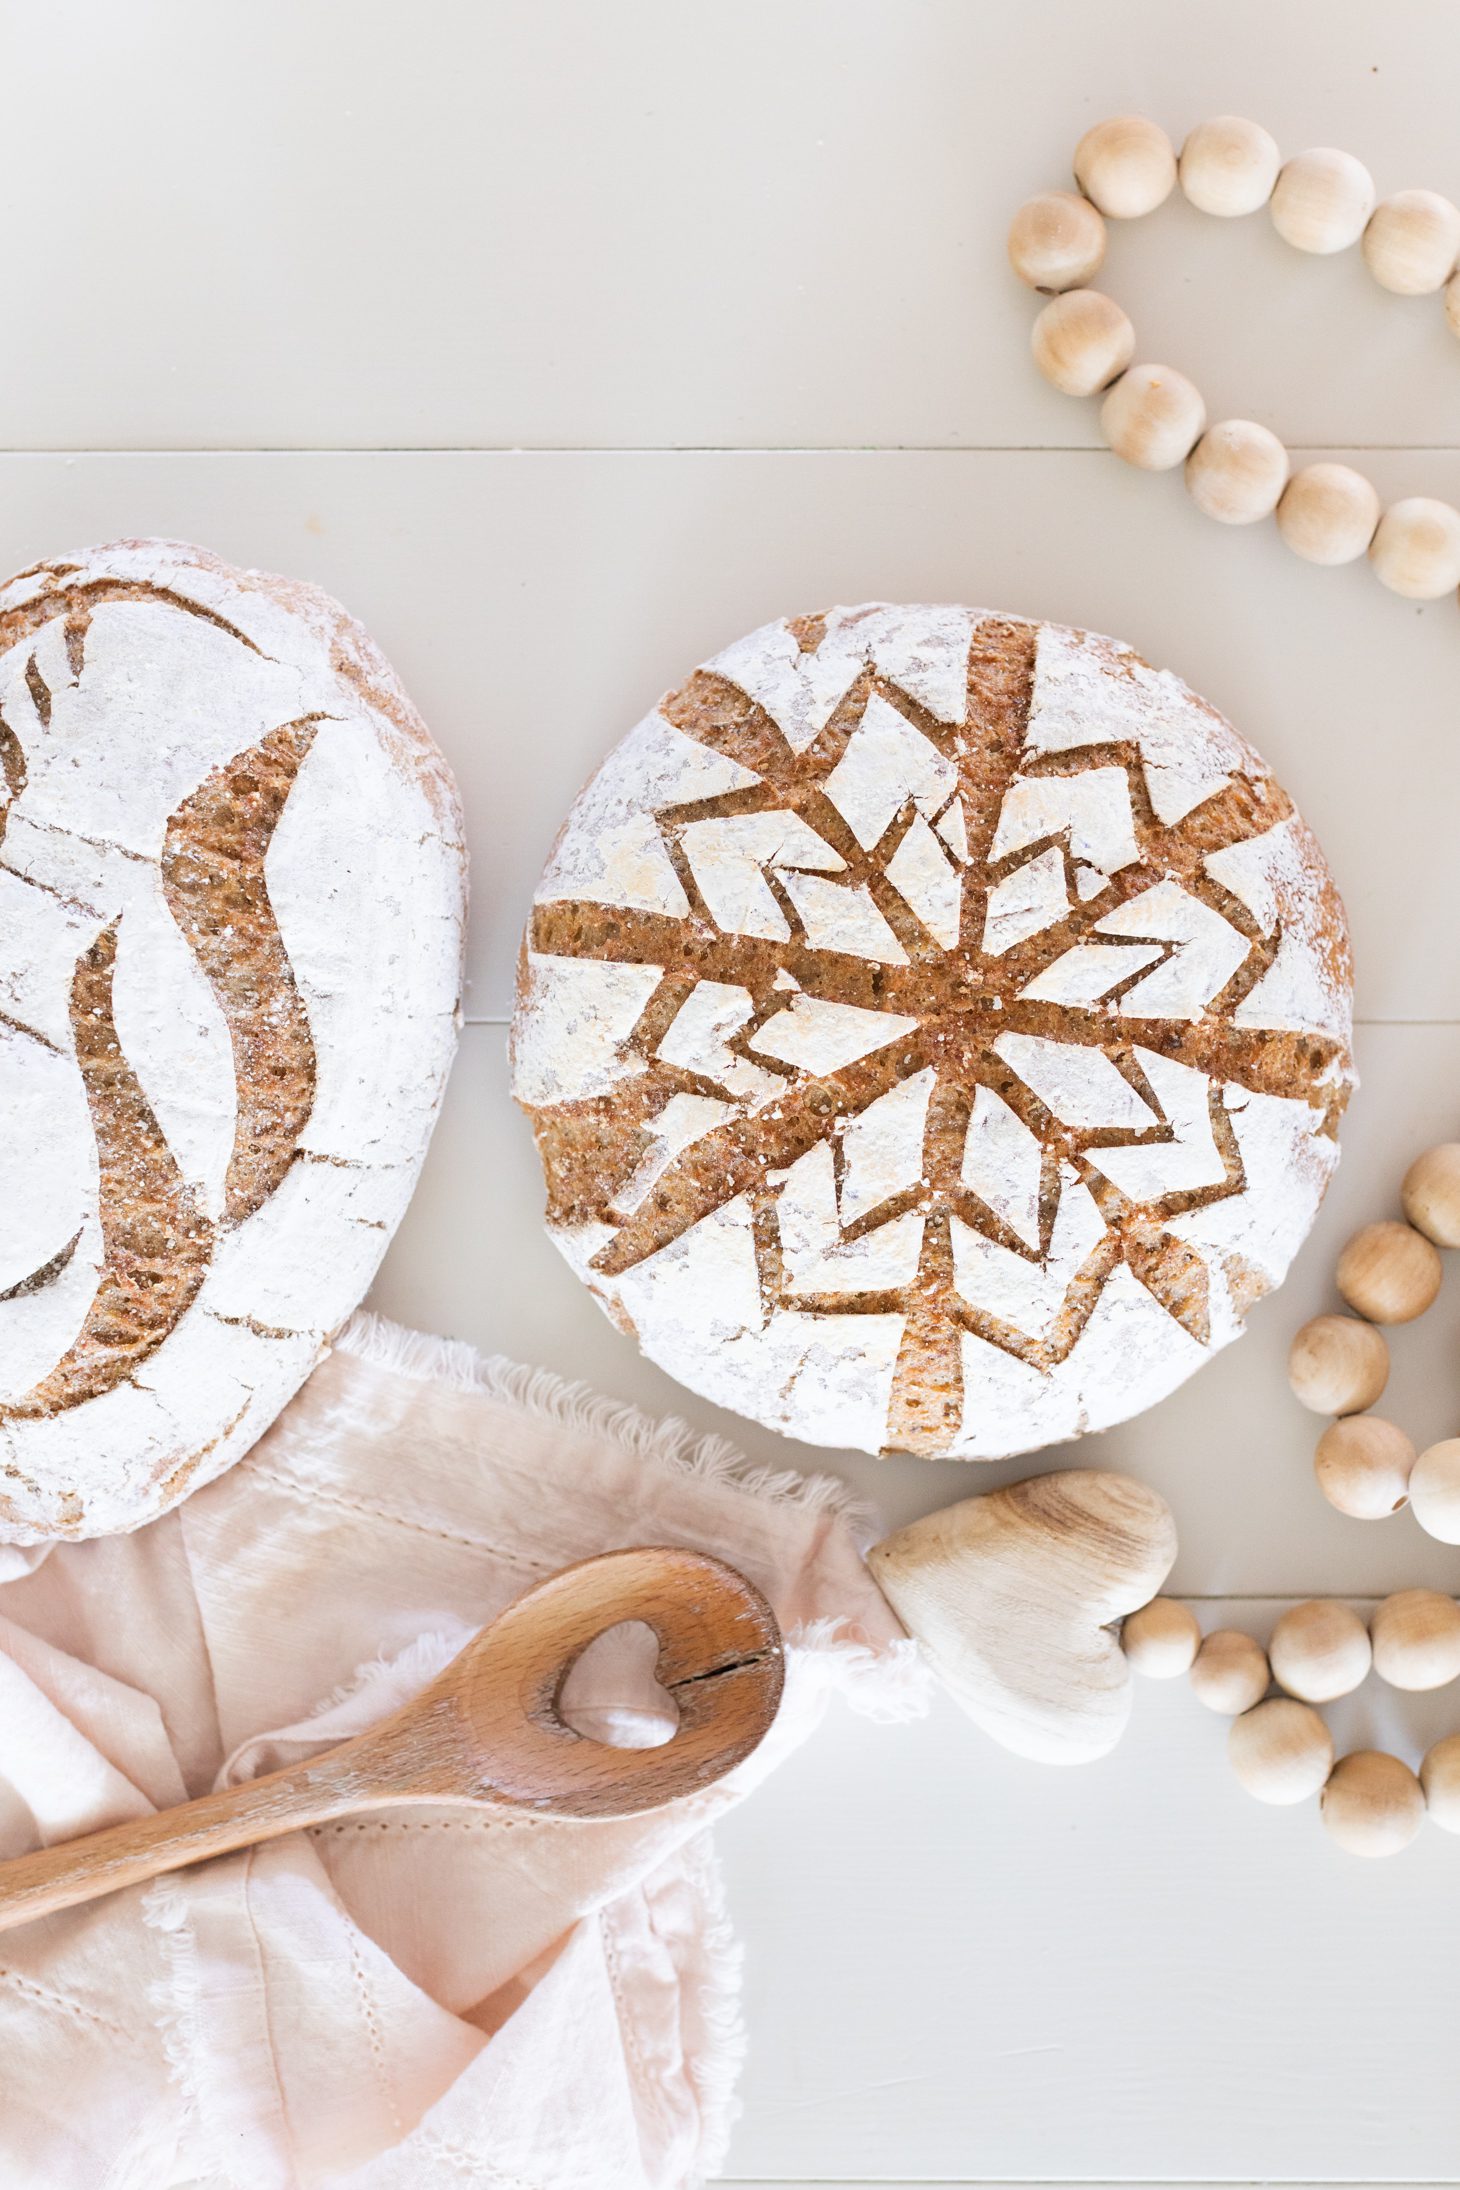
Lame: A lame is used to score (also called slashing or docking) bread just before the bread is placed in the oven.

The recipe that I am sharing with you today is meant to go along with Shannon’s Sourdough Schoolhouse course! I was a little impatient and just wanted to make a sourdough loaf, so instead of taking the course I decided to wing it, but it didn’t make any sense LOL! I caved and decided to follow along with the course and everything just “clicked”!
I’ll be the first to admit that making a sourdough loaf is no easy feat! So, below I will explain to you step-by-step how to make your own sourdough loaf, in case you are impatient like me and just want to try it or if you can’t afford to take the course. If my step-by-step guide doesn’t make sense I would highly recommend taking the course as it will provide you with an “ah-ha” moment! Shannon offers a couple of free courses as well that are super resourceful as well!
If you are wanting to take Shannon’s sourdough course you can find that here. She is also offering a 30% discount on the Sourdough 101 Course and an option to bundle the Course with a Mise en Place Kit, for an additional 10% off using code JILLYBAKES at checkout until August, 5th at 11:59 pm! OR if you are looking for more information on how to make GLUTEN-FREE sourdough make sure to check out my Aunty Mary’s blog post here!
You can either choose to follow her exact recipe attached but since it’s laid out a bit different than most recipes I re-wrote it (with Shannons approval below) so that it reads like a standard recipe.
And without further ado let’s make some sourdough!
Jillian’s Version
Step 1: Prepare the “levain”
The levain is essentially a starter but a higher volume of starter. I can’t stress this enough, this step HAS to be done the night before (around 12 hours before) or at the very least 6 hours before making your dough.
Ingredients:
27g of starter
135g of room temperature water (you don’t want it to be too hot or too cold)
135g of bread flour (we recommend organic bread flour but it won’t make or break this recipe)
Directions:
1. In plastic or glass container (preferably one that has a lid) mix, all of the above ingredients just like you would with your starter. I like to start with the water, then add the starter, and then the flour.
2. Cover and place in the same location your starter lives (a nice warm spot with no draft). If you don’t have a proofing bucket or a lid, cover it with a damp tea towel, saran wrap or a bag.
3. Leave it for 6-12 hours until it is ready. It should have at least doubled in size, is bubbly, passes the float test and has that fresh ripe yeasty smell.
Step 2: Make the dough
Now that you have your big ass starter (the levain), you are ready to make the dough!
Ingredients:
495 g of warm water
90g of milk (you can sub this for 80g dairy-free milk or water, I use oat milk)
270g of Levain (this should be all the levain you made the night before)
900g of bread flour
20 g of sea salt
Approx 1 cup of either oat flour, rice flour or almond flour (this is for dusting your banneton or tea towel-lined bowl)
Directions:
1. Remove and put aside 25 grams of the water (so 470g should go into this step) you will use this in about 30minutes. Add the 470g water and 90g milk to your proofing bucket.
2. Add the levain, then the flour to this proofing bucket. Mix until all the flour is hydrated – NO dry bits.
3. Leave the dough mixture for at least 30 minutes. This allows the flour to hydrate, which starts the development of gluten. Salt not only adds flavour, but it also helps to control fermentation by slowing down the process.
4. After 30 minutes to 2 hours, sprinkle the salt and the 25g reserved liquid onto the dough.
5. With your hands, work the salt slurry into the dough by squeezing, folding, stretching for approximately 1 minute.
6. From here, we go to what is called the Bulk Fermentation. So essentially this is a series of turns and stretches and folds to your dough over the course of 4-5 hours. Every hour to an hour and a half, go check on your dough, pull up, fold, turn, pull up, fold turn… do this a few rounds and then cover your dough and let it sit again for 1- 1.5 hours.
To give you a rough schedule: 8:00AM mix ingredients – 8:30AM Autolyse – 9:30AM 1st turn – 11:00AM 2nd turn – 12:30PM 3rd turn – 2:30PM delay fermentation OR divide and shape.
8. After 3-4 turns – not exceeding 5 hours, you move to what is called the DELAYED FERMENTATION.
So from what I am told you can basically proof (final rise) and bake the bread at this point but then its just bread. To get the health benefits of sourdough you must delay ferment it in the fridge at SOME POINT depending on how busy your schedule is. I like to do Delay Fermentation Option #3 (see below) because you get better bread art, but if you get busy halfway through your day you can choose another method.
Step 3: Delayed Fermentation
Option 1:
Bucket in the fridge (at this point, in the recipe, you can take that whole bucket or bowl and throw your dough in the fridge for 12-48 hours).
Option 2:
Banneton in the fridge. This option, you divide and shape your dough and place it in the banneton and then in the fridge for 12-48 hours. Dusted with your gluten-free flour (if you use regular flour it will bond with the dough and you will have a big mess of your tea-towel/banneton sticking to your dough).
Option 3:
Divide, shape, place in banneton, final proof and then place in the fridge for 12-24 hours (all of these steps are coming!)
Ok so let’s say you want to choose option 3 (I usually always chose option 3), then let’s get started on dividing and shaping!
When shaping Pain au Belle, we do a par shape to establish the shape and a final shape to reinforce it. Building tension in the dough is important, but try not to degas it. Be swift, yet gentle. (This is where Shannons videos are very helpful but I will try to explain it to you)
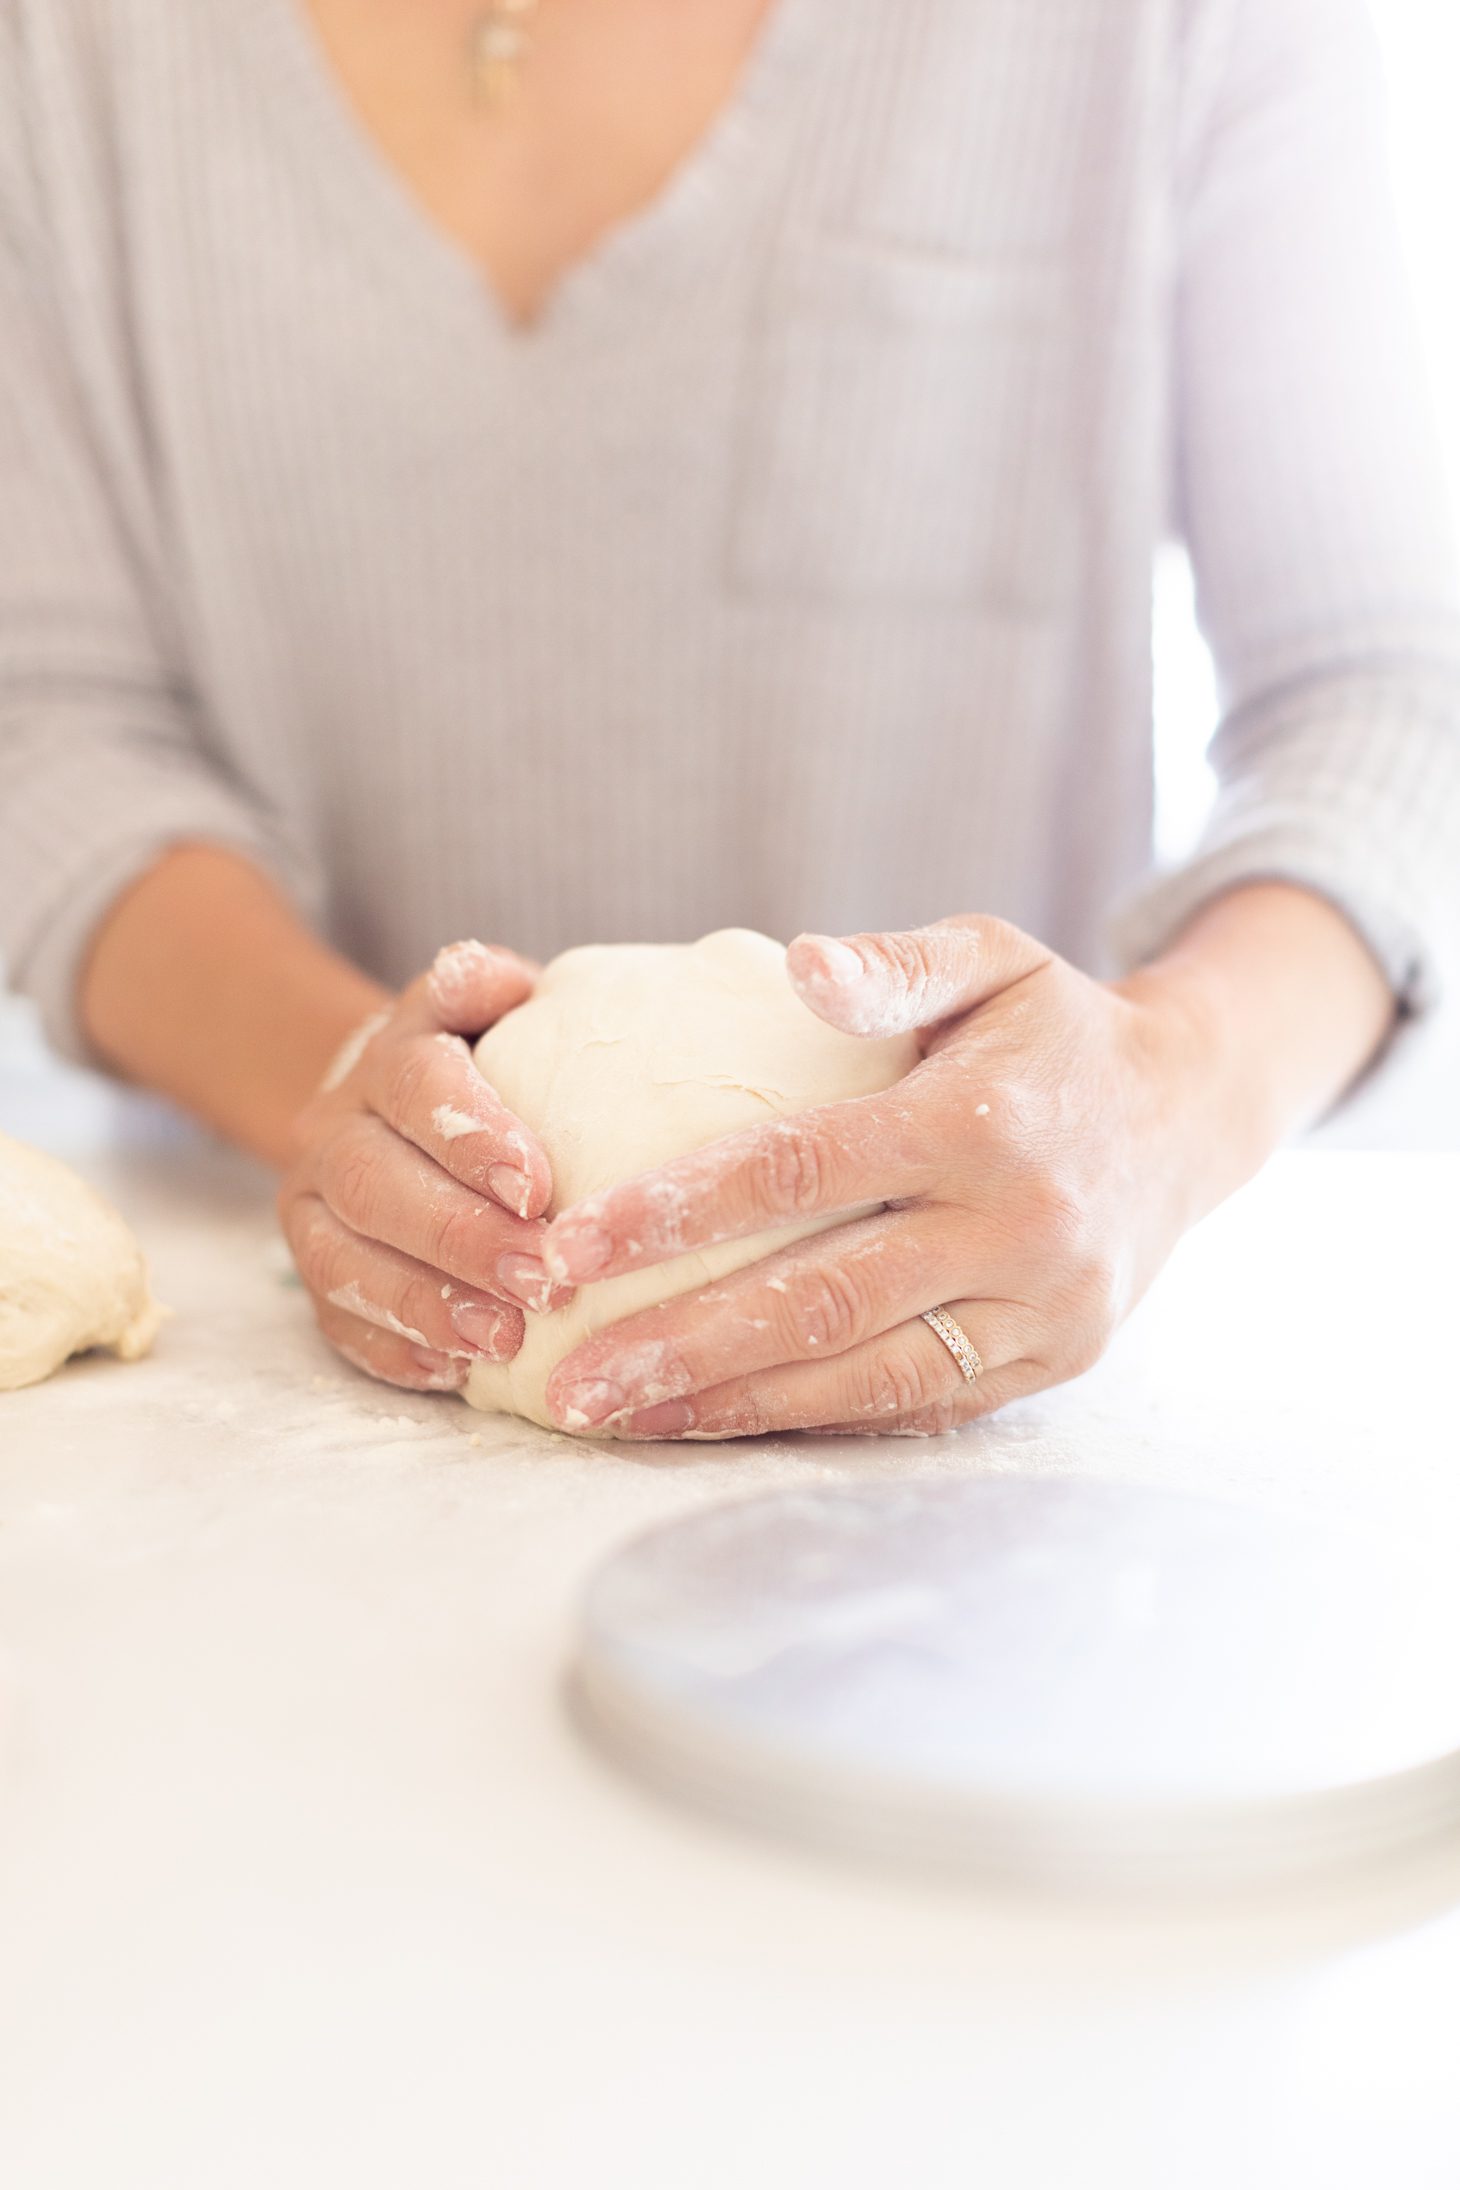
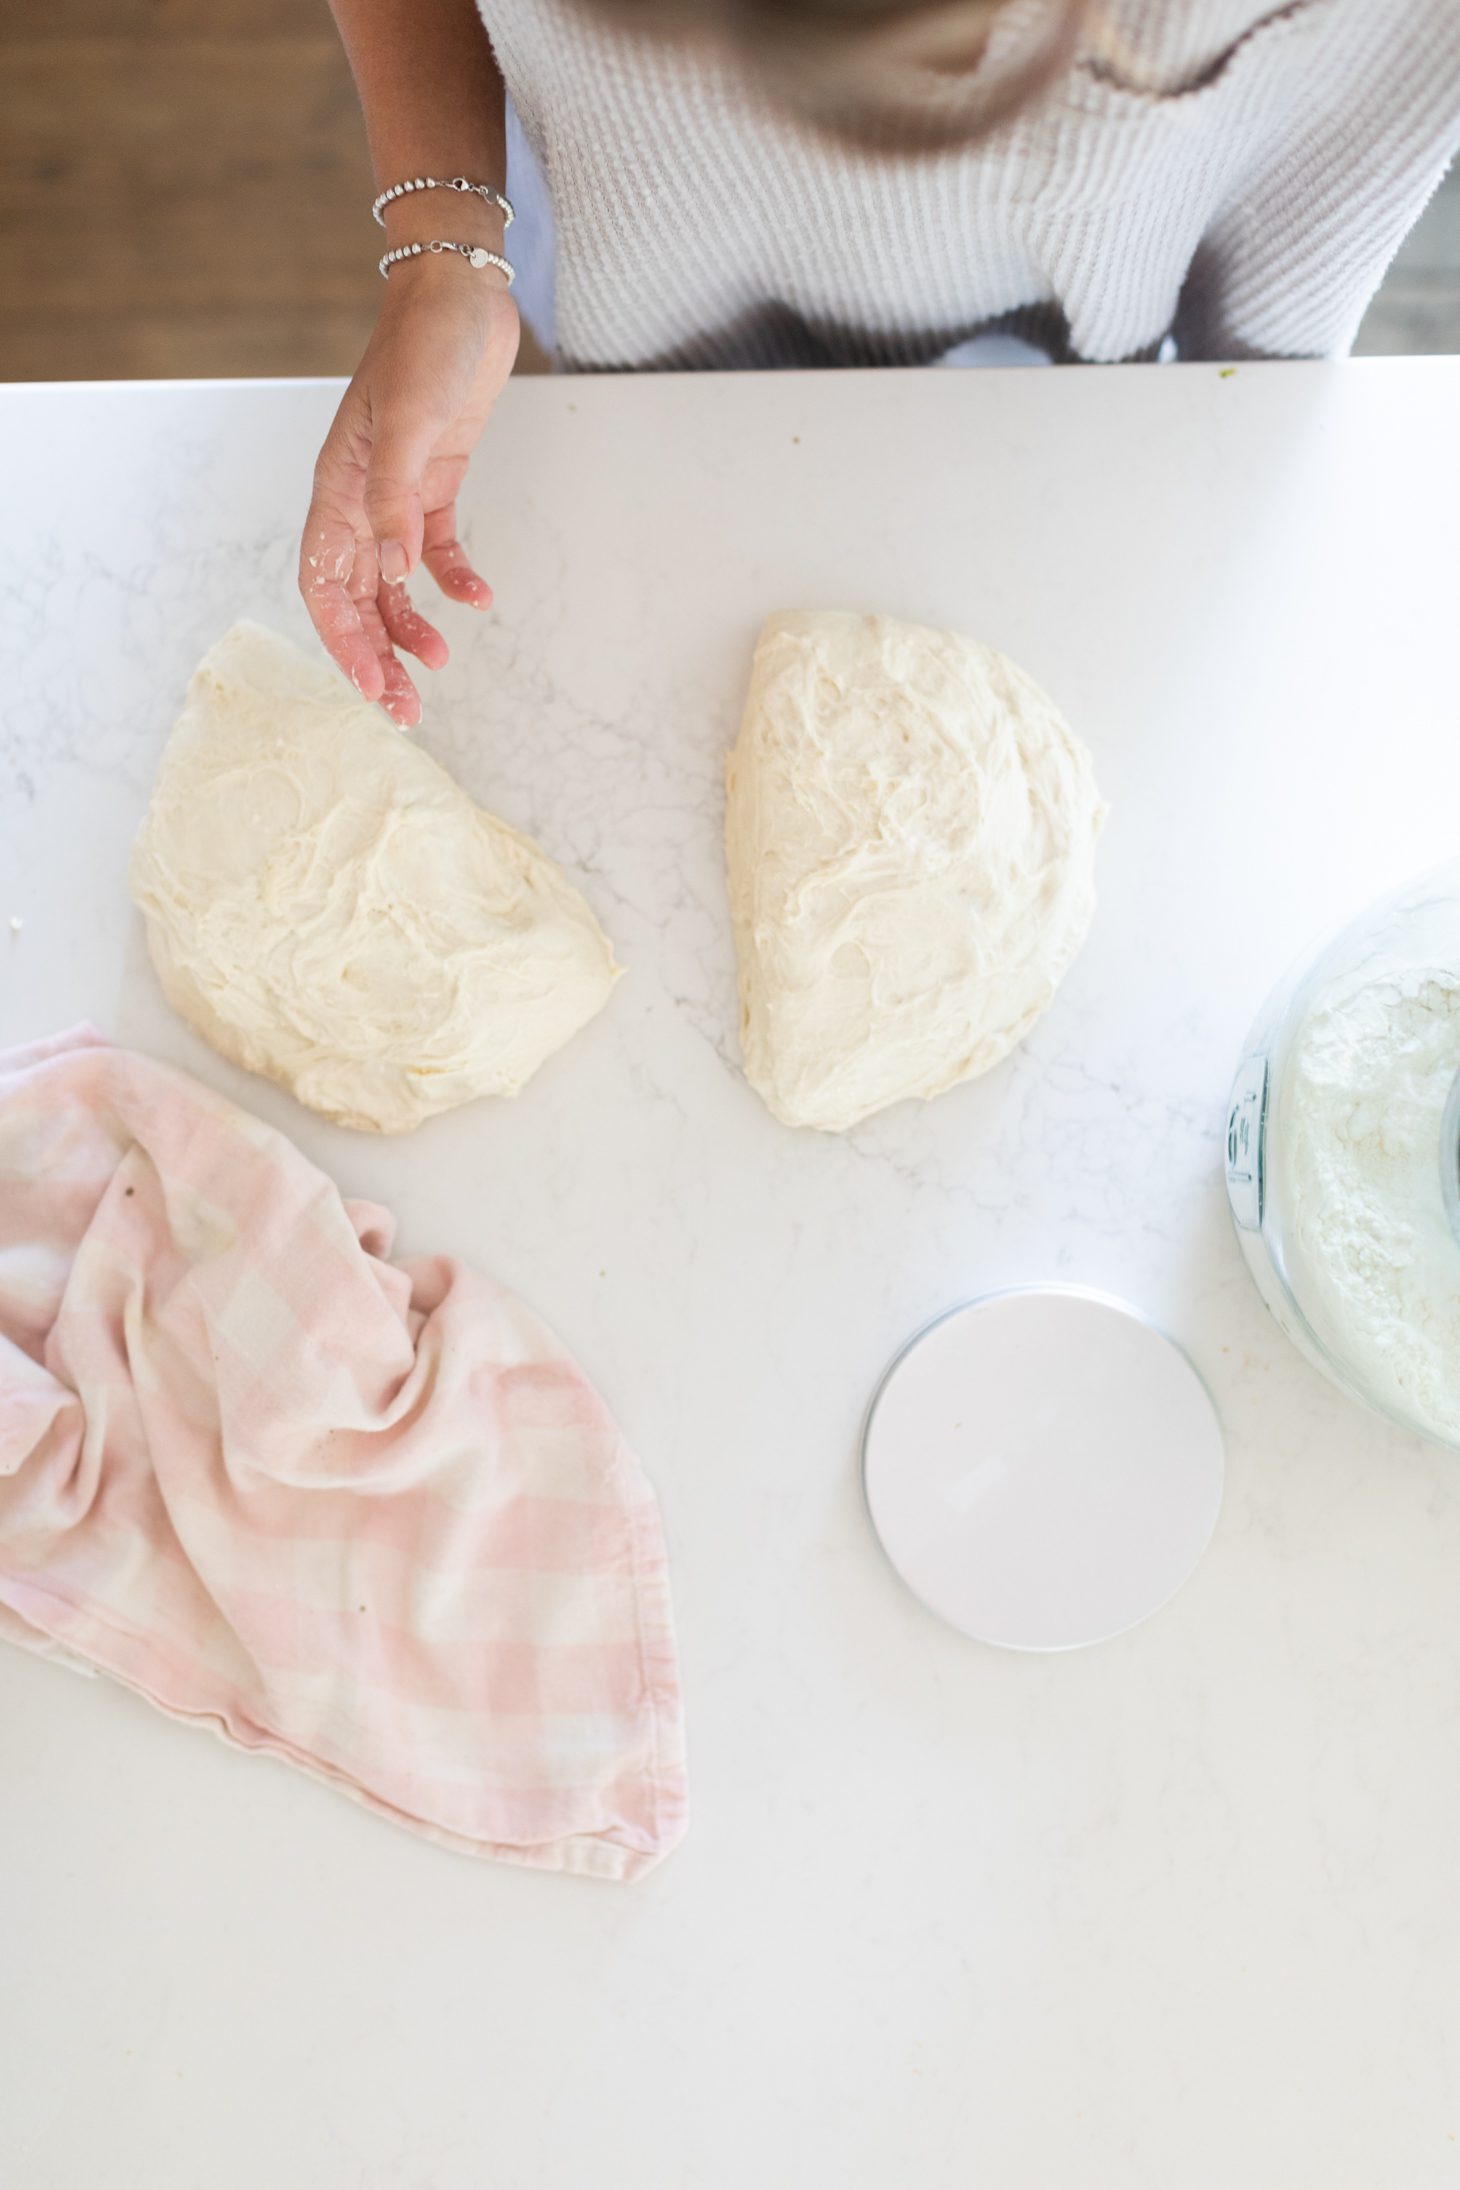
Essentially at this point, you take out your dough from the container and gently cut into two equal parts. This is where you will need to decide if you are going to do a BOULE shape (the round sourdough) or a BATTARD shape (more of a loaf shape).
Gently and swiftly with your hands start to shape your bread … you may need to add a little flour to your hand so it doesn’t stick to your dough. Sticky dough is ok. But you sort of want it to stick to the counter so you can build tension in the dough/crust as you shape it. Make sense? Haha, it also didn’t make sense until I watched Shannon’s course and watched a few videos on “shaping sourdough”!
After you have established your shape, cover your dough with a damp cloth and let rest for about 30 minutes.
After 30 minutes establish your final shape (so just shape it again, gently, but those same actions you took to shape your dough 30 minutes ago, you do this again, to build tension, reinforce the ‘crust’.
Now, gently (possibly using a bread cutter) lay your dough UPSIDE DOWN in your banneton or lined bowl (be sure that this is dusted with your GF flour to prevent sticking) … the BOTTOM of your loaf should now be facing up.
If you picked OPTION 2 for DELAYED FERMENTATION – at this point, you would put your dough in the fridge for 12-48 hours or continue with option 3 and proceed to the next step.
Step 4: Final Proof
Now it’s time for your dough to do it’s FINAL step before baking … this is where I messed up over and over because I thought a big RISE was a good thing but it can actually deflate your loaf so it’s important to be aware of the temperature of your home. If your home is on the warm side like ours, let your dough rise (covered with either a plastic bag or a damp tea towel for max 2 hours. If your home is on the cooler side, let it rise for up to 4 hours. You want about a 25% rise.
Once this time has passed and if you have not done the delayed fermentation yet … this is now your final chance to choose delayed fermentation. If you want you can bake your bread at this point BUT you won’t get all of the amazing health benefits from your sourdough.
NOW, Place your proofed dough, covered in the fridge for 12-48 hours. 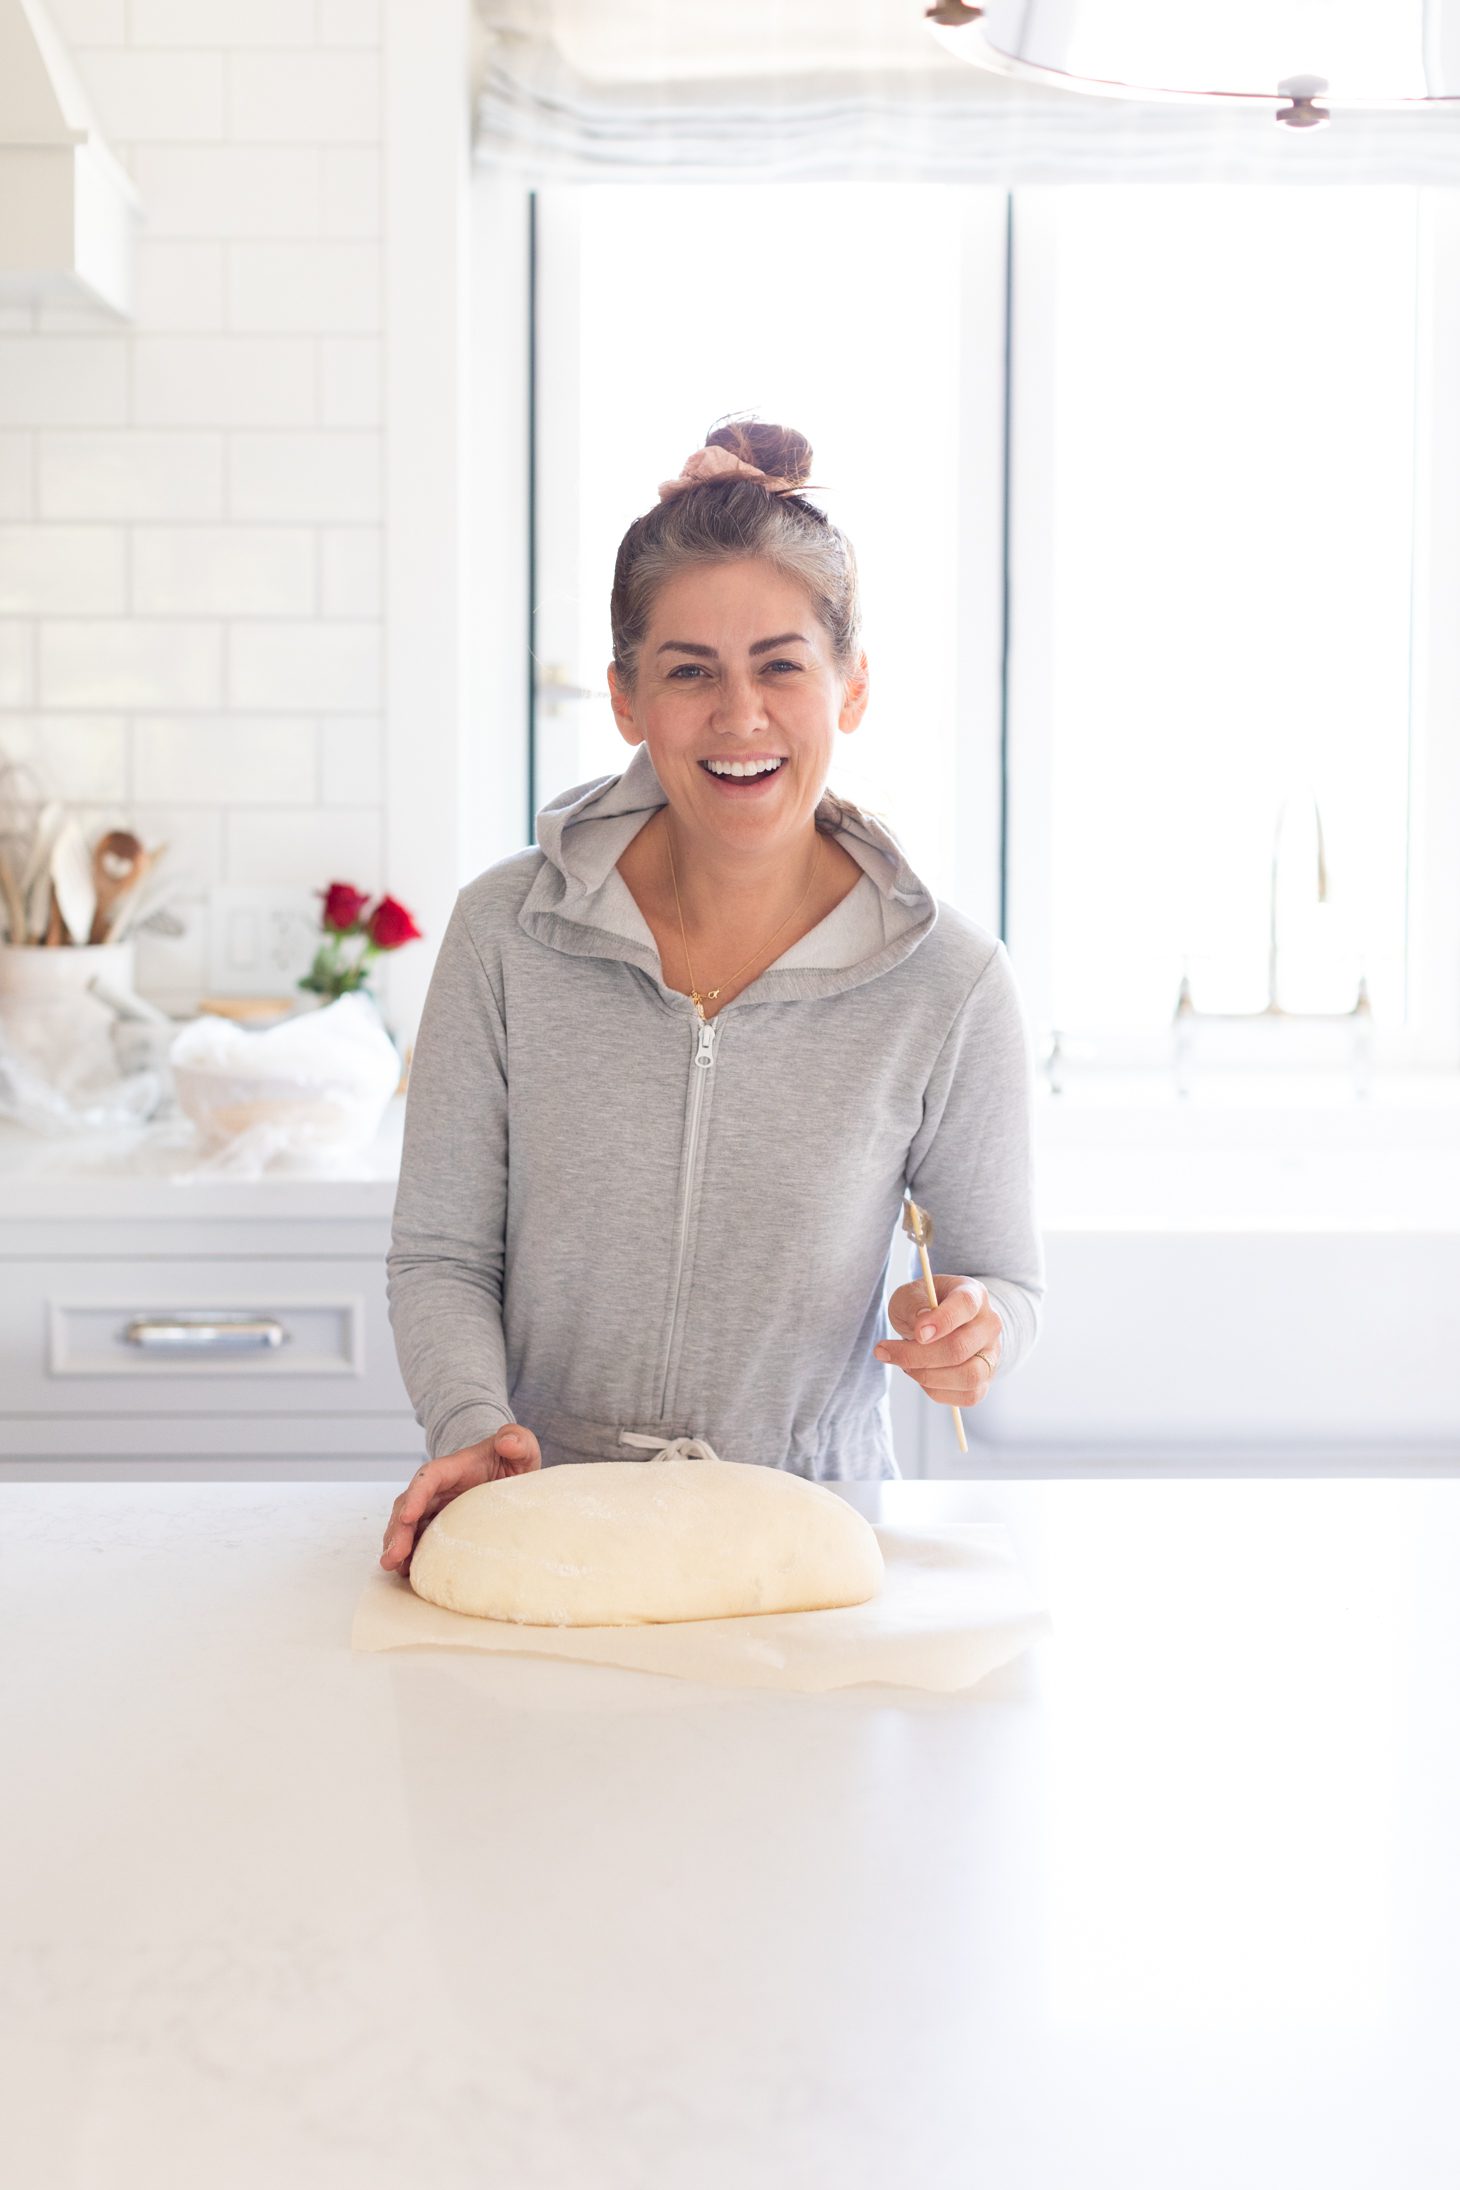

Step 5: Baking the dough
If you have a bread cloche or a dutch oven you will want to use it to bake your sourdough. Otherwise, you can use a high-quality pan that can handle high heat. Place whatever baking dish you choose in the oven. There are three methods to baking that Shannon goes over but I will just touch on two.
The Steam Method: This is if you have a pan that is not covered! When you put your bread in the oven, also put a little oven-safe container of water in the oven so it can create steam for your bread.
The Bread Cloche or Dutch Oven Method: If you have either a bread cloche or a dutch oven you can use this method which is meant for high temps and has a lid.
The Sketchy Method: Is the third option but it’s too sketchy (LOL) so I’ll let Shannon go over that in her course!
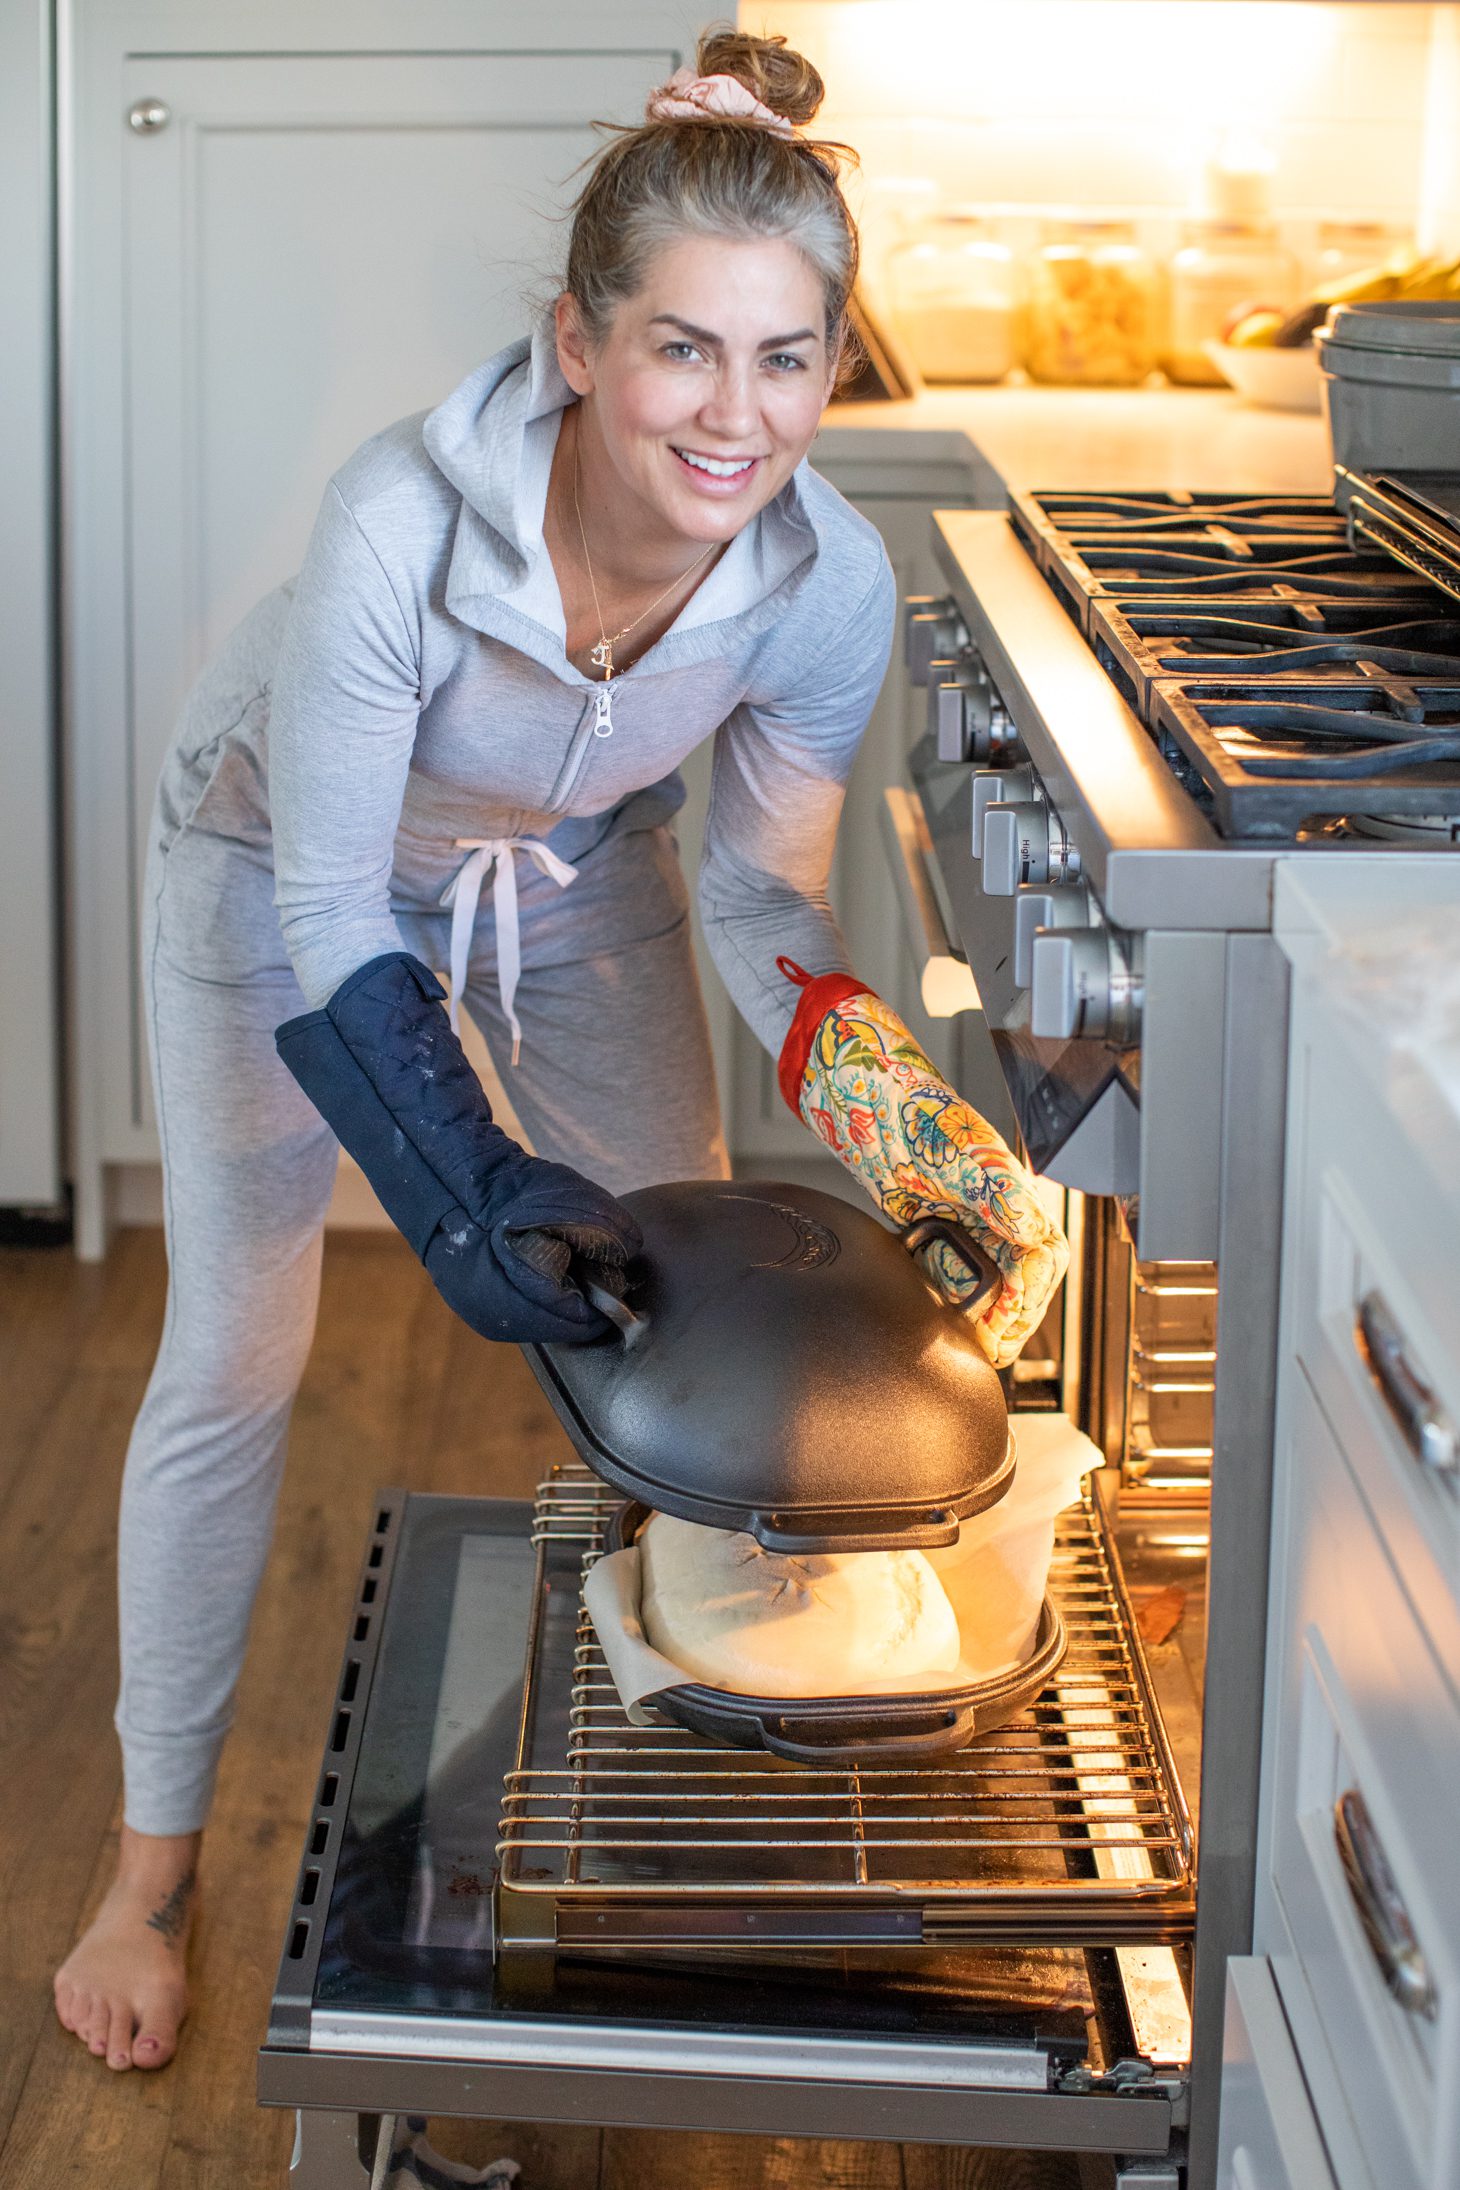
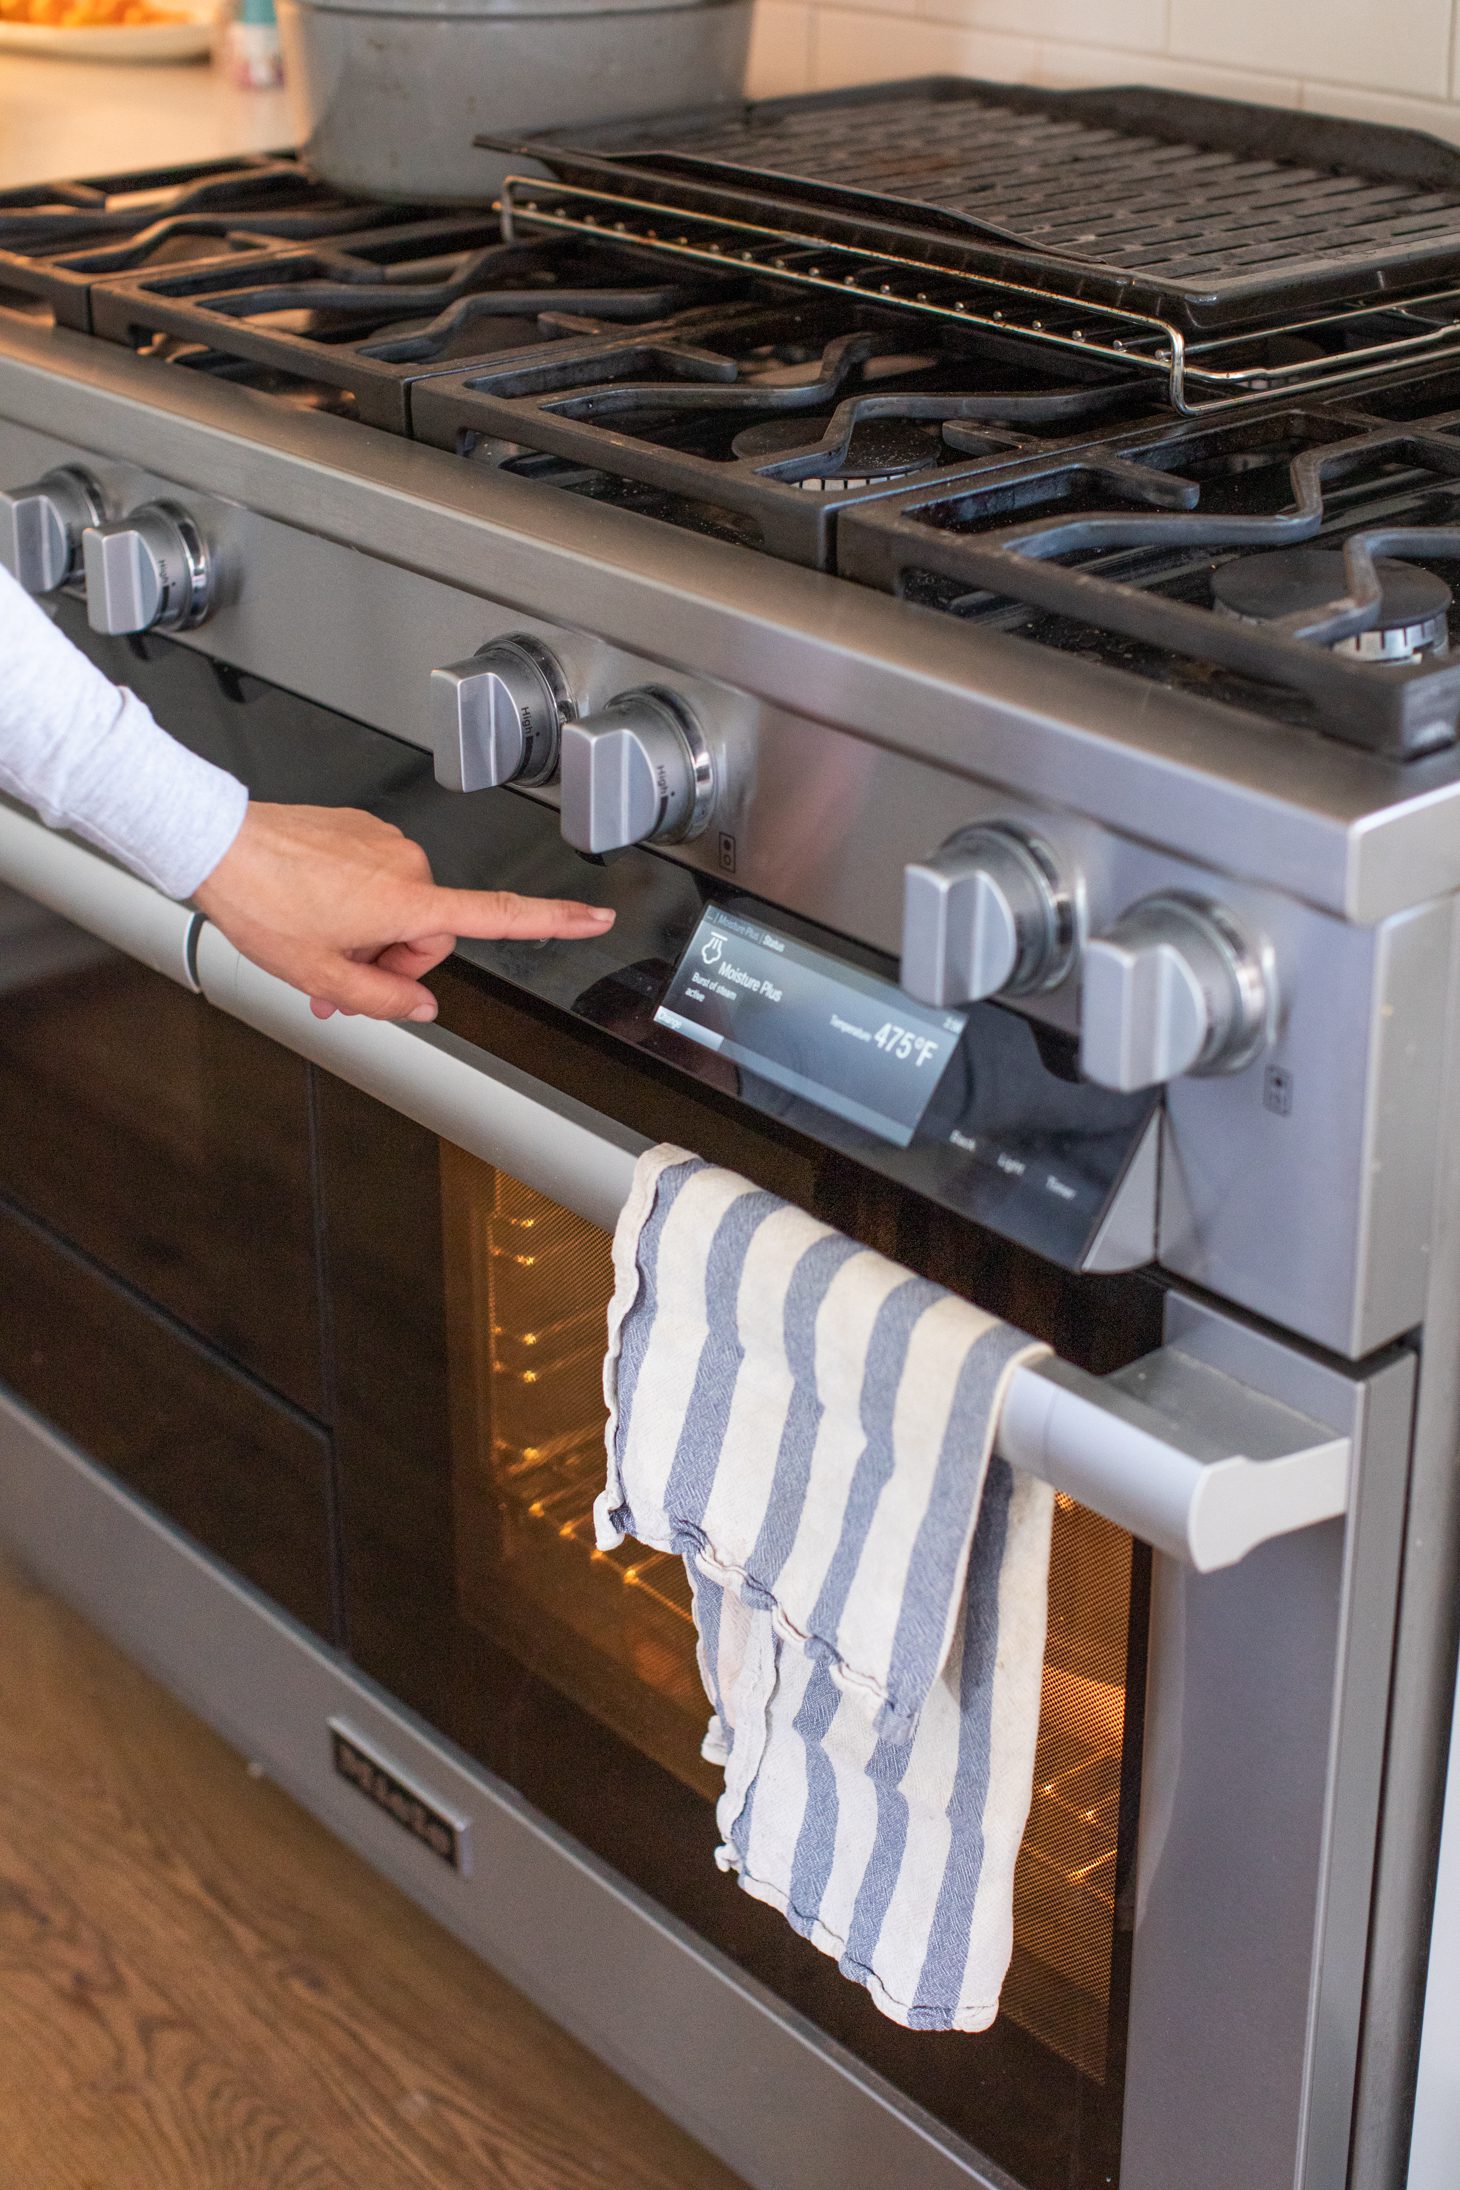
1. Preheat oven and your baking dish to the 500°F+ for 45 minutes.
2. Carefully turn over your dough onto a piece of parchment. Lightly dust it with flour and then score it with a Lame. This is where you create your bread art. If you don’t sign up for the Shannons course you can google and watch youtube videos on scoring and bread art. It’s very captivating….
3. Now, carefully, load loaves on the parchment paper into their HOT baking dishes. BE CAREFUL!
4. Reduce temperature to 450°F and bake for 15-18 minutes.
5. Remove lid (if using cloche), check for colour. Reduce the temperature if dark in colour or leave at 450°F if pale in colour
6. Bake an additional 8 minutes; check for colour again. Reduce the temperature if dark in colour or leave at 450°F if light in colour.
7. Bake the remaining 7-10 minutes or until internal temperature is over 205°F.
Pay attention to hot spots in your oven and rotate loaves if necessary. For a lighter crust, drop the temperature to 375°F after the first 15 minutes and bake longer – 25-35 minutes more. Error on over-baked rather than under-baked.
IMPORTANT NOTE: Cooling is part of the baking process; allow loaves to cool completely (at least 2 hours before cutting into it and eating it) or the crumb will be gummy.

If you are looking for more information on how to make your first sourdough loaf check out Shannon’s Livestream workshop, it’s FREE as long as you promise to bake it forward and give your loaf to someone else, whether it is good, bad or ugly! You can also download her secret Pain au Belle recipe below!
AND THERE YOU HAVE IT!!!!!!! Whew, now I know that was a lot of information, but I promise that as you start to make your first loaf everything will just start to “click”!
xo
Jilly


Beautiful, beautiful girl. I watch you and Todd. Wonderful projects. Congratulations from Rio, Brasil. Love you,
After the cold fermentation in the fridge, do you ever bake right from the fridge or you let the dough sit at room temp for a final proof?
How do you store your loaves once you’ve made them? A couple days out and they start to get stale, but in a bag, you lose the crispy crust.
Thanks for sharing! I started making sourdough over quarantine because of your stories.
When you choose option #1, for delayed fermentation, do you let the dough sit at room temperature before shaping or shape and bake straight out of the fridge?
Thank you so much for sharing! I’ve followed your sourdough bread journey and you inspired me to learn! 🙂
Thank you so much for the recipe and tips. This is the first time I’ve been able to successfully make sourdough bread that turned out like a loaf instead of a brick! Maybe because my starter is still young it didn’t rise as quickly so I added some time to most of the rising steps but it turned out beautifully in the end.
Is the dough supposed to be wet and sticky in step 2?
Only 27g of starter?!
Any suggestions on a very sticky, wet dough? I follow all the steps and the taste of the bread comes out nicely but it is very wet that it doesn’t hold its shape when shaping it. The first time I thought it was because I used All purpose flour, but it happened again with bread flour this time. Thanks for sharing this recipe!!
I made this again and it actually works so great! I made the mistake of not having a scale and was not doing the measurements correct between grams and cups which made it sticky! It has been perfect since getting a food scale. Thanks again for sharing!!!
My sourdough finally turned out after trying this recipe! Thank you for sharing. 🙂
Hi! Does t he lid stay on for the entire baking process?
Beautiful! Can you please share the dimensions of your paper bread bags? Thank you!