Last year I had the girls over for a massive Cinco De Mayo photoshoot at my home … we spent the day making delicious Mexican inspired cocktails and dishes and we also had Easton work on a couple of DIYs for our Cinco De Mayo party decor! Easton spearheaded these DIYs (you can find the pom pom garland one here!) and totally rocked them so we were pretty excited to share them with you so you too could whip them up for your (stay at home and virtual!) Cinco De Mayo party!!
First things first … this watermelon piñata is INSANELY CUTE … almost TOO cute to beat with a stick. Right?!? LOL! To be honest, this watermelon Piñata took us WAY longer than we had anticipated (and left us with sore fingers from hot glue gun burns) … but it was well worth it.

We would suggest doing this DIY over the course of a couple of days with your household during quarantine (Watermelon Jalapeño margaritas are also good to have on hand! LOL! You can find the recipe here!). Giving yourself six hours will minimize your need to rush through it and will help to avoid those hot glue gun burns! Now, this COULD be quicker depending on how many people you have working on it!
Well, let’s get right to it! For this adorable DIY, you’ll need the following …
Materials Needed
- Cardboard (size depends on how big you want the piñata to be!)
- Tissue paper (3 different colours! We used light pink, hot pink, and green!)
- 1 piece of black felt (for the seeds!)
- Card-stock
- Masking tape
- Pencil
- Scissors
- Large ruler
- Hot glue gun
- Hot glue sticks
- Candy to fill the piñata


Instructions
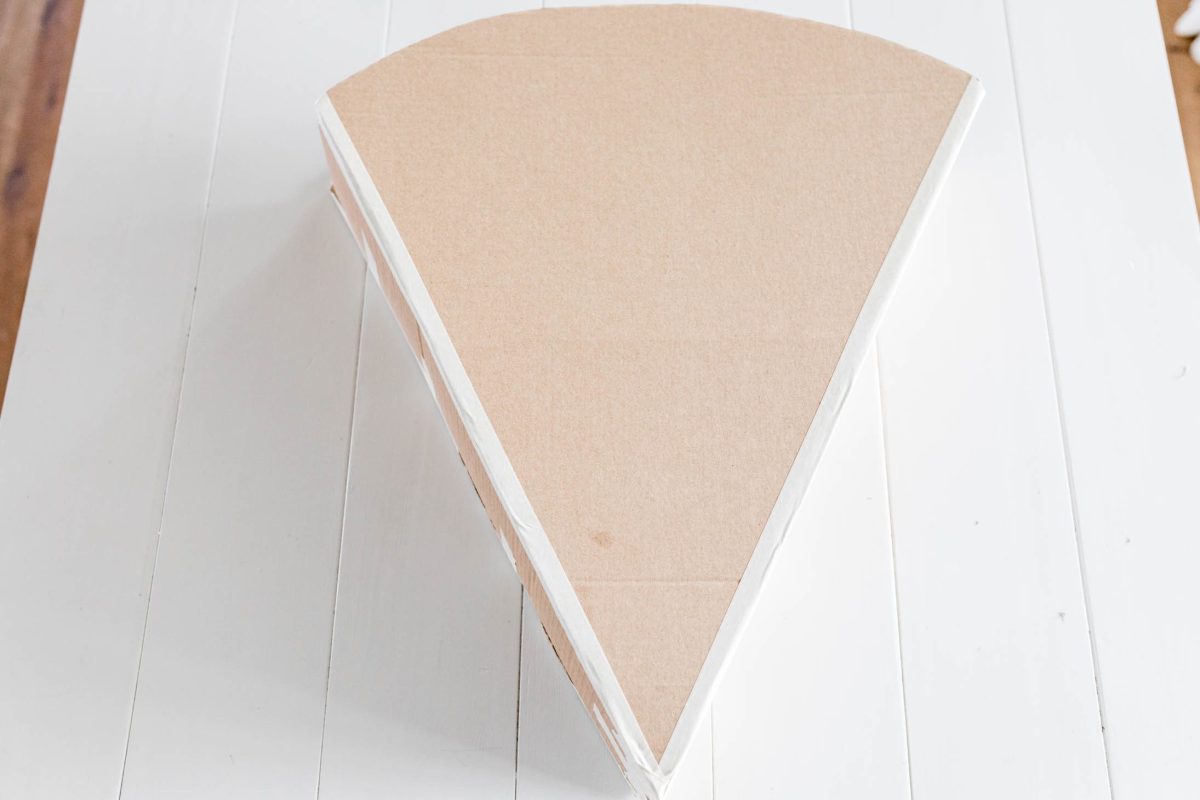
1. Trace the shape of the watermelon onto the pieces of cardboard. You will need to make 2 large pie-shaped cutouts the exact same size and 2 rectangular pieces for the sides of the watermelon. These also need to be the exact same size and the same length as the pie-shaped cutouts. Pro Tip: The smaller you make the shape the less time it will take you to cover it with tissue paper.
2. Tape the rectangle sides to one of the pie-shaped cutouts to make the walls, then tape the second pie-shaped cutout on top.
3. Measure the card-stock paper along the bottom of the watermelon slice to create the core. Pro Tip: We used card stock paper because it bends easier to form the bottom of the watermelon slice.
4. Tape your measured piece of card stock to the cardboard but before completely closing this shut, put in your candy inside, then tape it completely shut. You now have your watermelon shape!!!!!
5. To create your fringes, take 1 single piece of tissue paper and fold it four times towards the top, leaving a small gap each fold at the top to create a layered effect. Take your scissors and cut small slits horizontally along the side that is not folded to get the fringes. Pro Tip: The closer together the slits are the more “full” your piñata will look.
6. Glue the strips of tissue paper onto your watermelon slice starting at the bottom and work your way up. Pro Tip: Make sure your fringes are going towards the bottom of the watermelon.
7. Continue to do this until you cover your entire piñata. We used three colours, lime green and light pink for the rind, and hot pink for the fruit. Pro Tip: The closer you glue each strip of tissue paper together the more “full” your piñata will be.
8. Once your piñata is completely covered you can now make the seeds. To do this cut several “seed-like” shapes out of the black felt and glue them randomly on each side of the watermelon.
9. Poke two holes in your piñata, a couple of inches apart, where you would like it to hang from. Use ribbon or string to loop through these holes and hang it!
TA-DAH you now have an adorable watermelon piñata that you won’t want to break open because it’s WAY too cute!! LOL! But don’t forget … there’s candy inside so SOMEONE better take a crack at it! LOL!


If you happen to make this DIY please share your photos with me over on my social accounts as I would LOVE to see them!! Stay tuned for another Cinco De Mayo DIY coming your way tomorrow!!
Until then …
xo
Jilly


Hey Jillian. I just found your blog. I have followed you up to the bachelor program. You are a lovely person. And most of all, you, Justin and Leo are charming together. <3 I am currently looking at your joint rempa or relocation program, wonderful to watch you together. Overwhelmed. Give Leo a kiss and Justin a hug: D <3 Apologies bad language, and greetings from Finland;)